The purpose of adding a new customer in TAAX Pro is to maintain an organized database of client information. This will enable efficient appointment scheduling, communication, and document sharing. Registered customers can track booked appointments, successful meetings, and store essential records securely within the platform to streamline the customer management workflow and improve overall service quality.
Let’s walk through the step-by-step guide on how to create a new customer on the TAAX Pro platform.
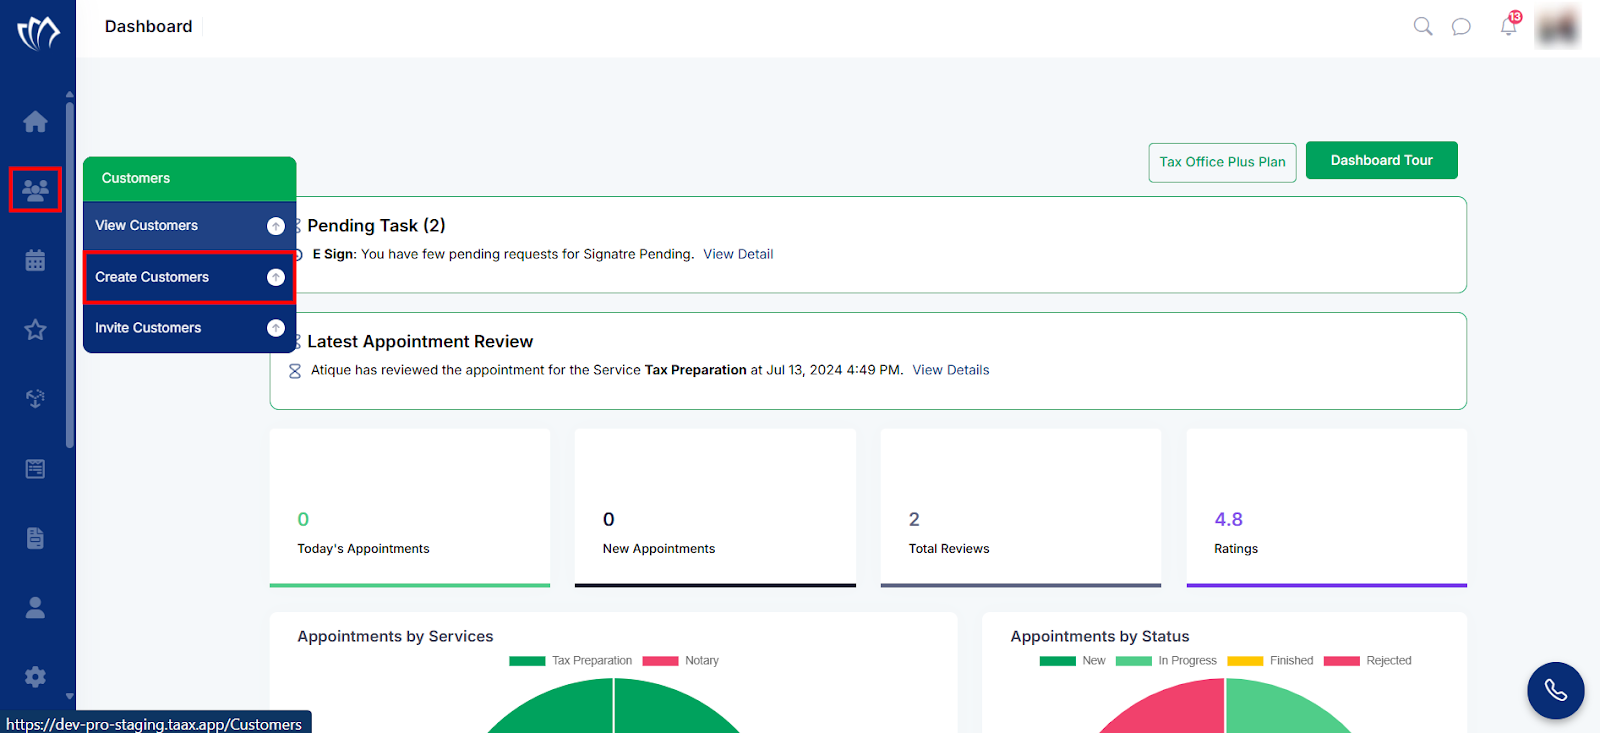
Step 1: Move your cursor over the Customer icon located on the left side panel. When the menu expands, click on the Create Customers option to begin adding a new customer.
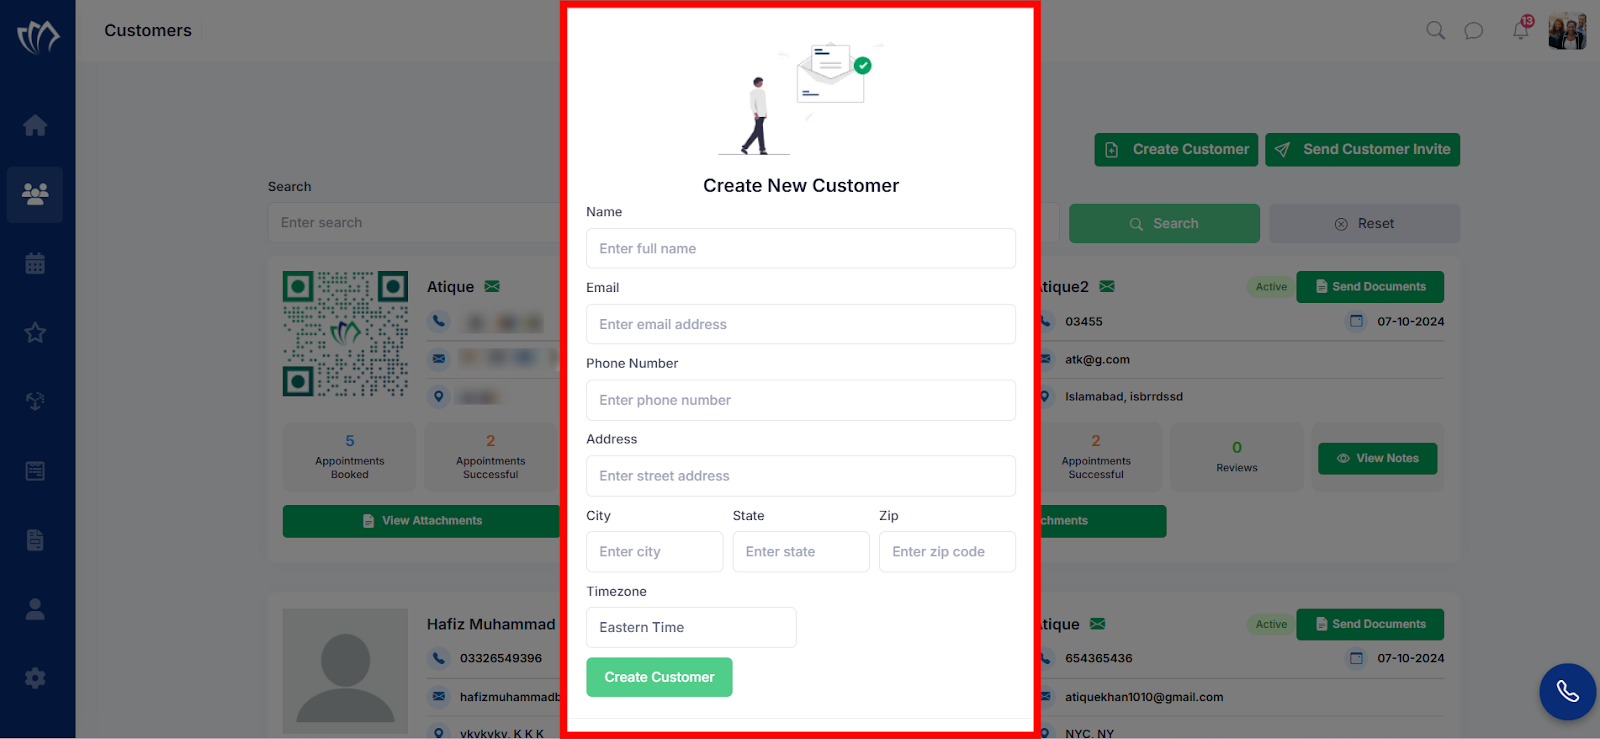
Step 2: A new customer form will open in the center of the screen. Enter all required details in the form fields, then click the “Create Customer” button to save the new customer.
The new customer has now been successfully added to your TAAX Pro account and is available in your customer list for future needs.
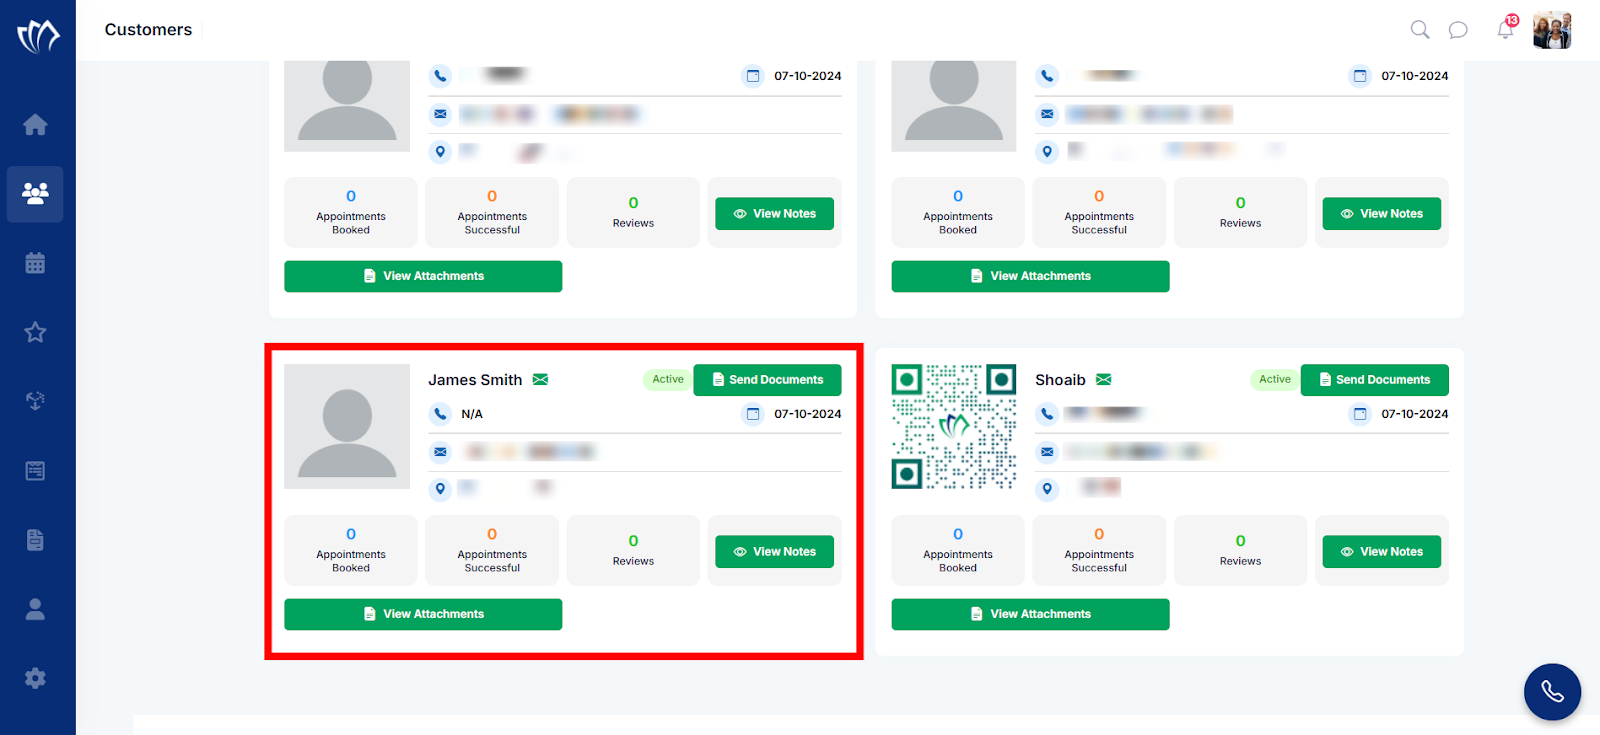
After adding the customer, you can send documents, view notes, access attachments, and check reviews.