Enabling auto appointment approval reduces delays and manual involvement in the booking process. Instead of manually reviewing and approving each incoming request, the system automatically accepts the appointments based on availability. This feature is useful during peak periods when responses need to be fast & consistent.
It ensures clients receive instant confirmation and avoids missed sessions & unnecessary back-and-forth. Once enabled, it keeps your calendar moving without constant supervision. It’s a simple toggle that gives you more time to focus on actual work rather than admin follow-ups.
Follow the step-by-step guide below to enable the Auto Appointment Approval on the TAAX Pro platform.
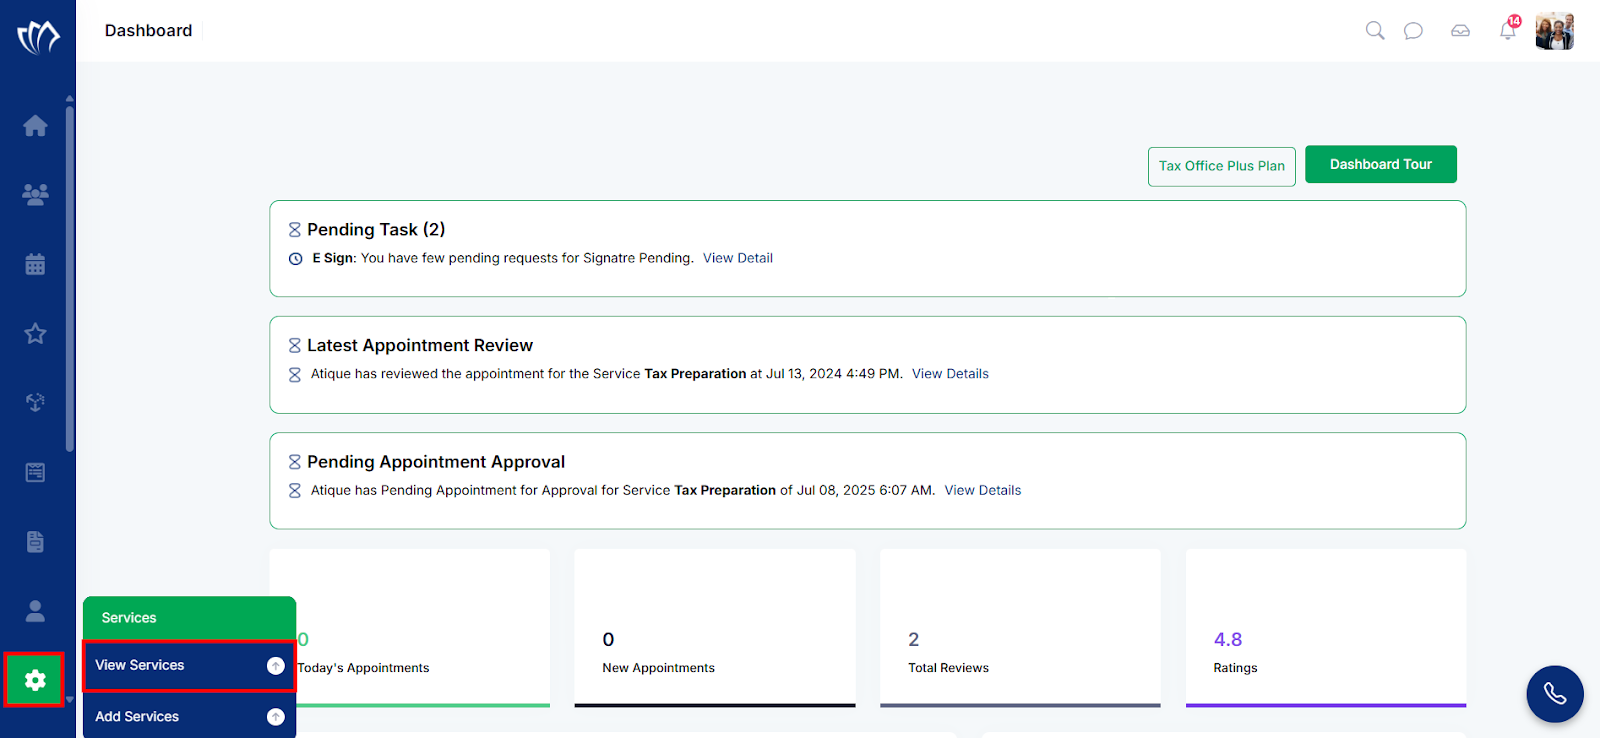
Step 1: Navigate to the left side panel, hover over the “Services” section, then click the “View Services” option.
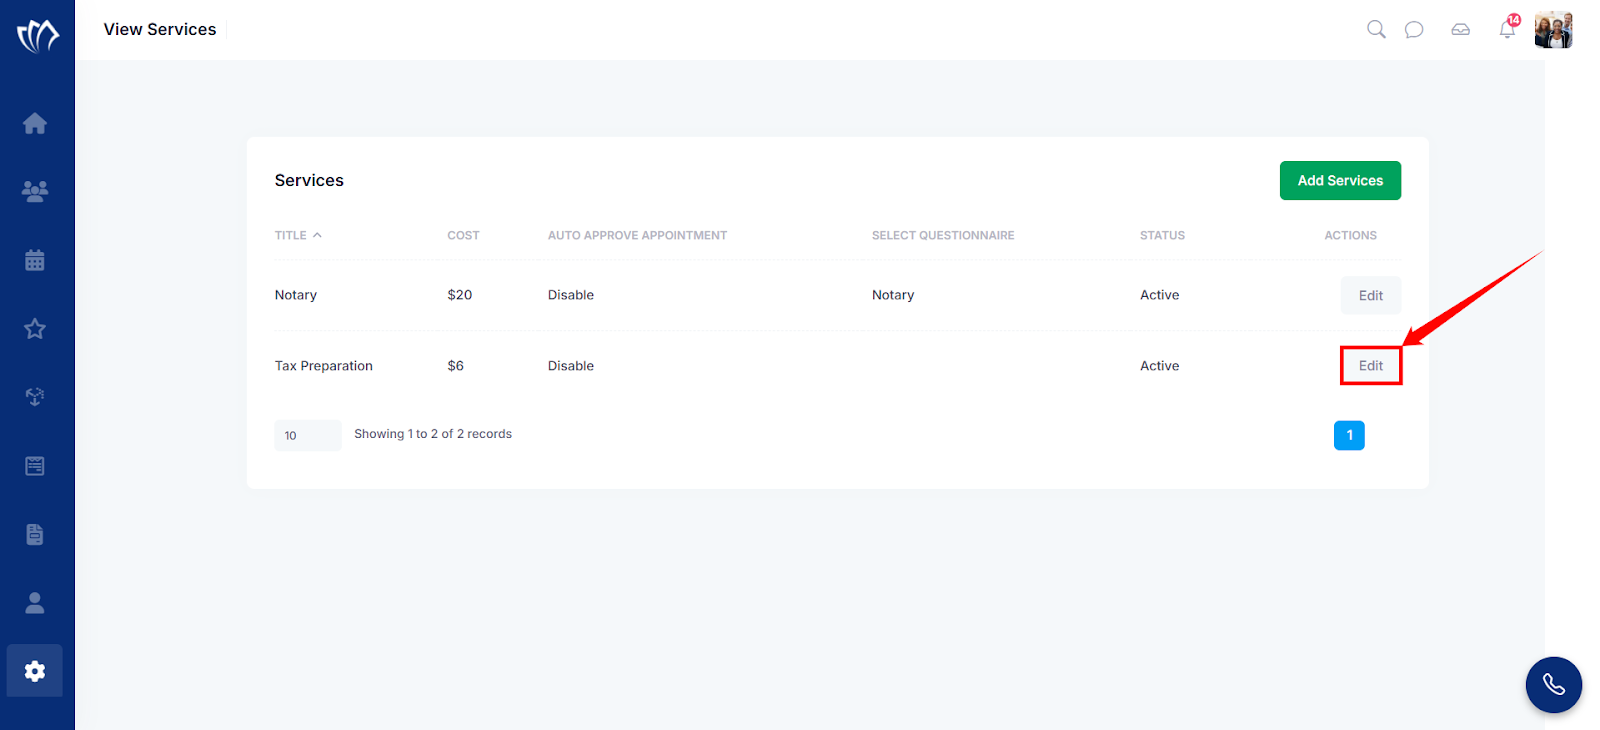
Step 2: A new screen will open with a list of all the services. Click on the “Edit” button at the end of the service whose appointment you want to automate.
Note: In this example, we will automate appointment approval for the “Tax Preparation” service.
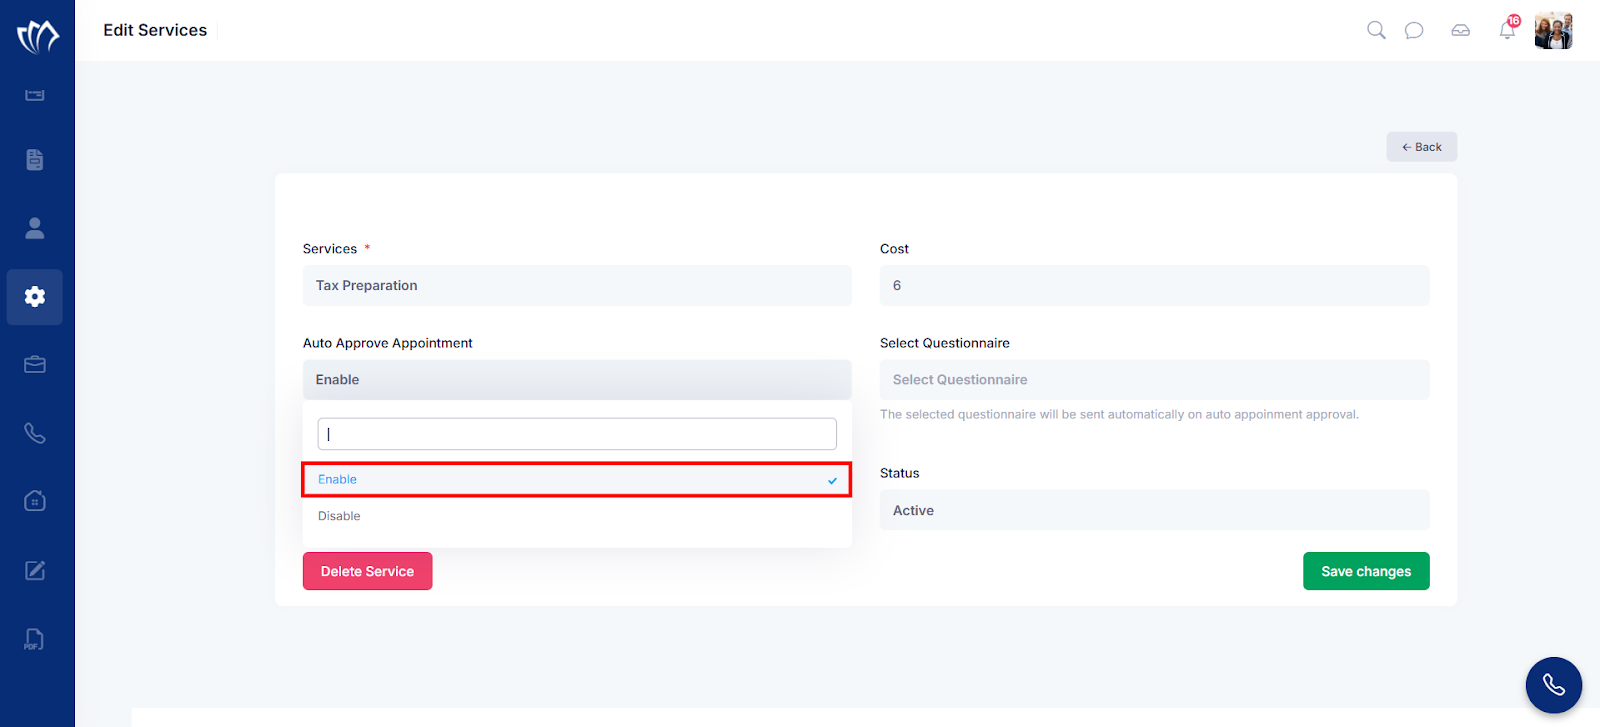
Step 3: Click on the “Auto Approval Appointment” dropdown, then click on the “Enable” button.
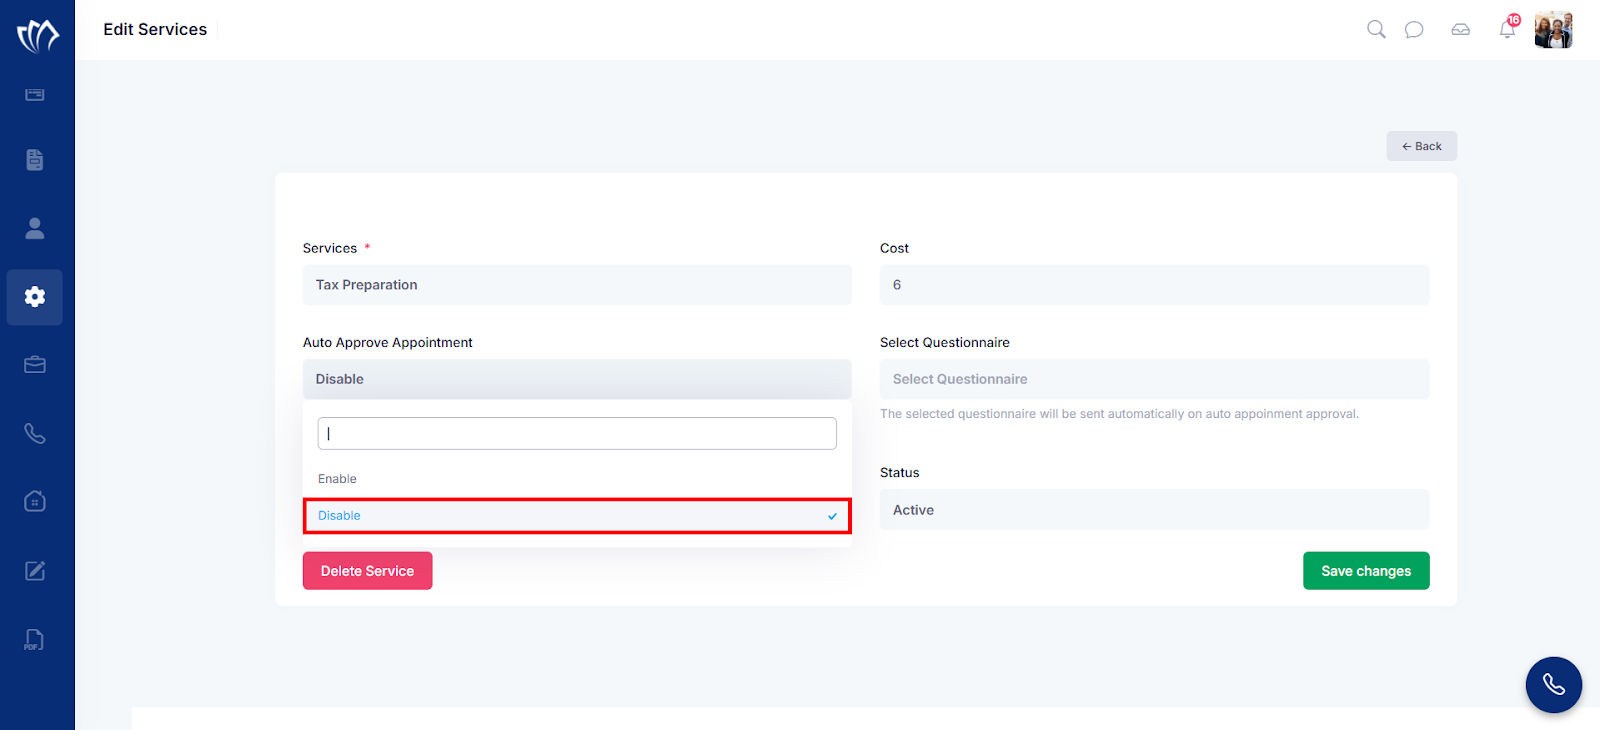
Note: You can also Disable the auto-appointment. Click on the disable option from the dropdown.
Step 4: Click on the “Save Changes” button at the bottom right corner of the screen.
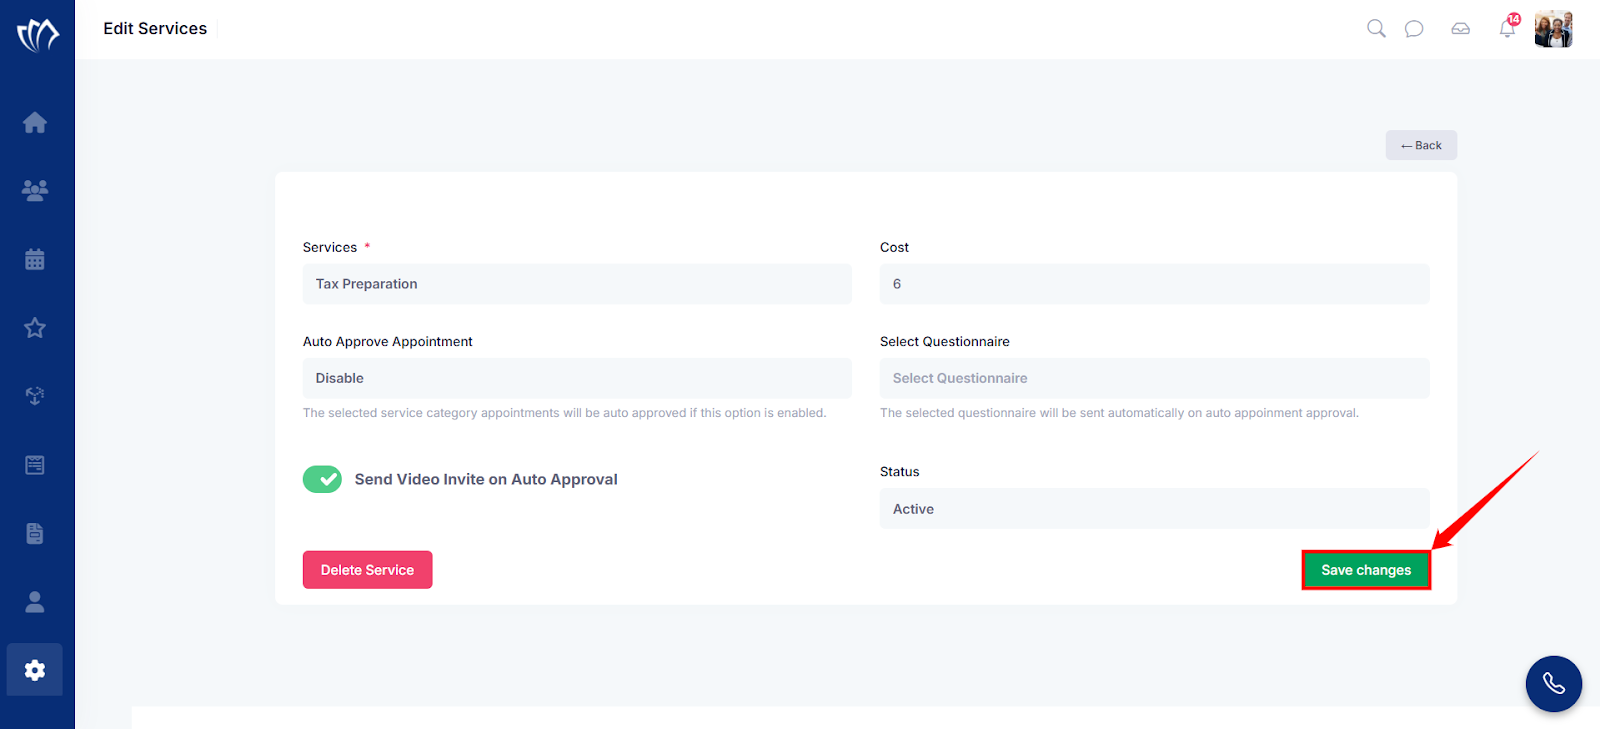
Note: After clicking on the “Save Changes” button, a flash message for success will appear at the top of the screen.
