In our system, services represent the core offerings your business provides to customers, such as Tax Preparation, Accounting, Notary, and more. These services define the type of assistance or expertise a customer can book an appointment for. When you add a service, you also set key details like pricing, required forms, and preferences such as auto-approval or video invites.
Adding and managing services ensures that your business offerings are clearly defined, accurately priced, and ready to be selected during appointment scheduling.
Follow the step-by-step guide below to add and view the services on the TAAX Pro platform.
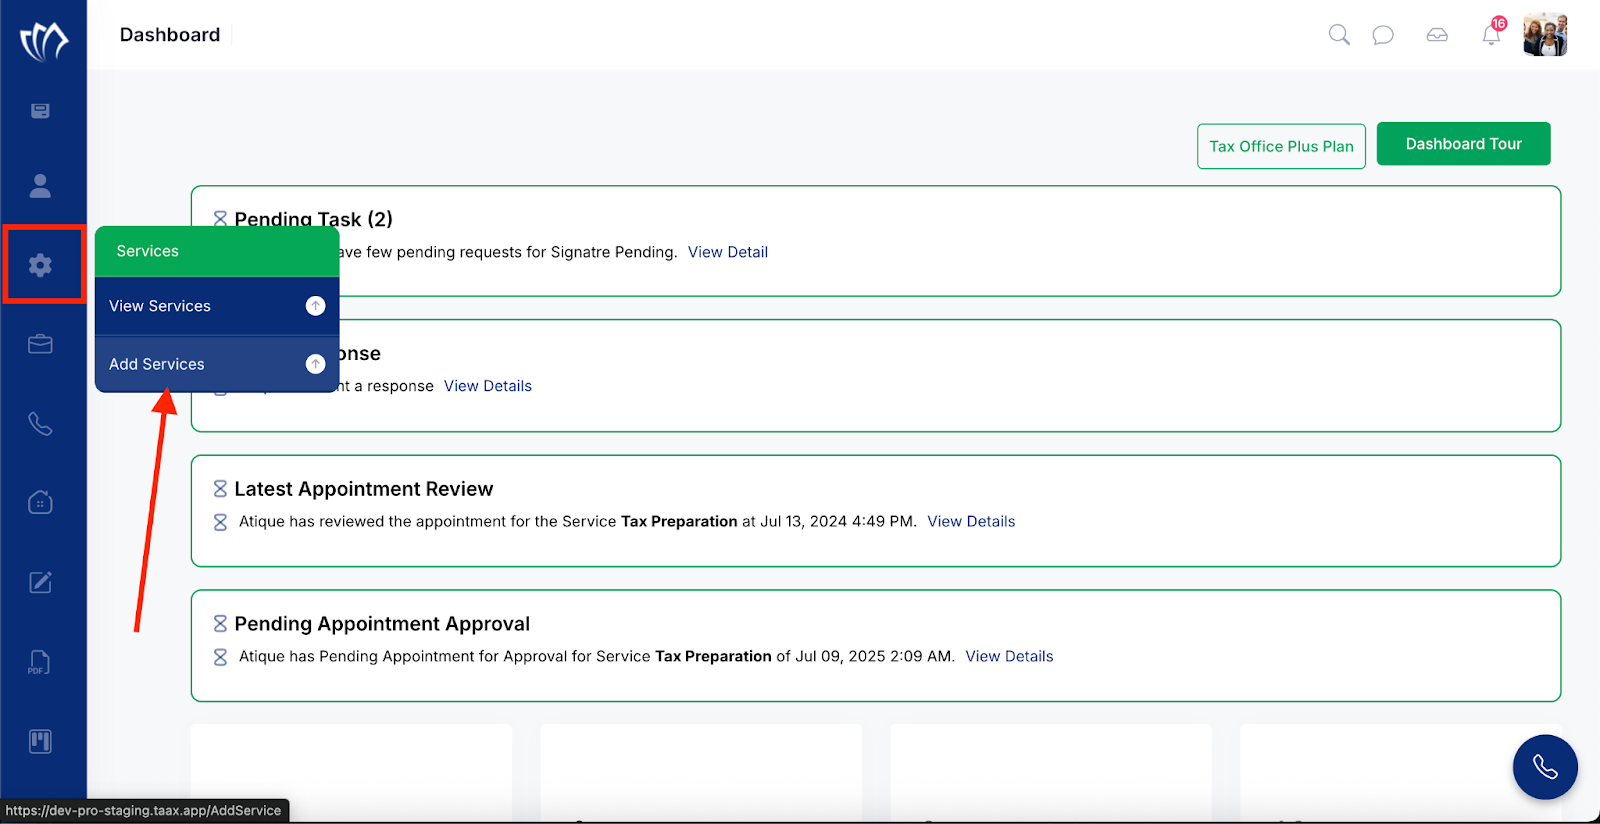
Step 1: Navigate to the left side panel, hover over the “Services” section, then click on the “Add Services” option.
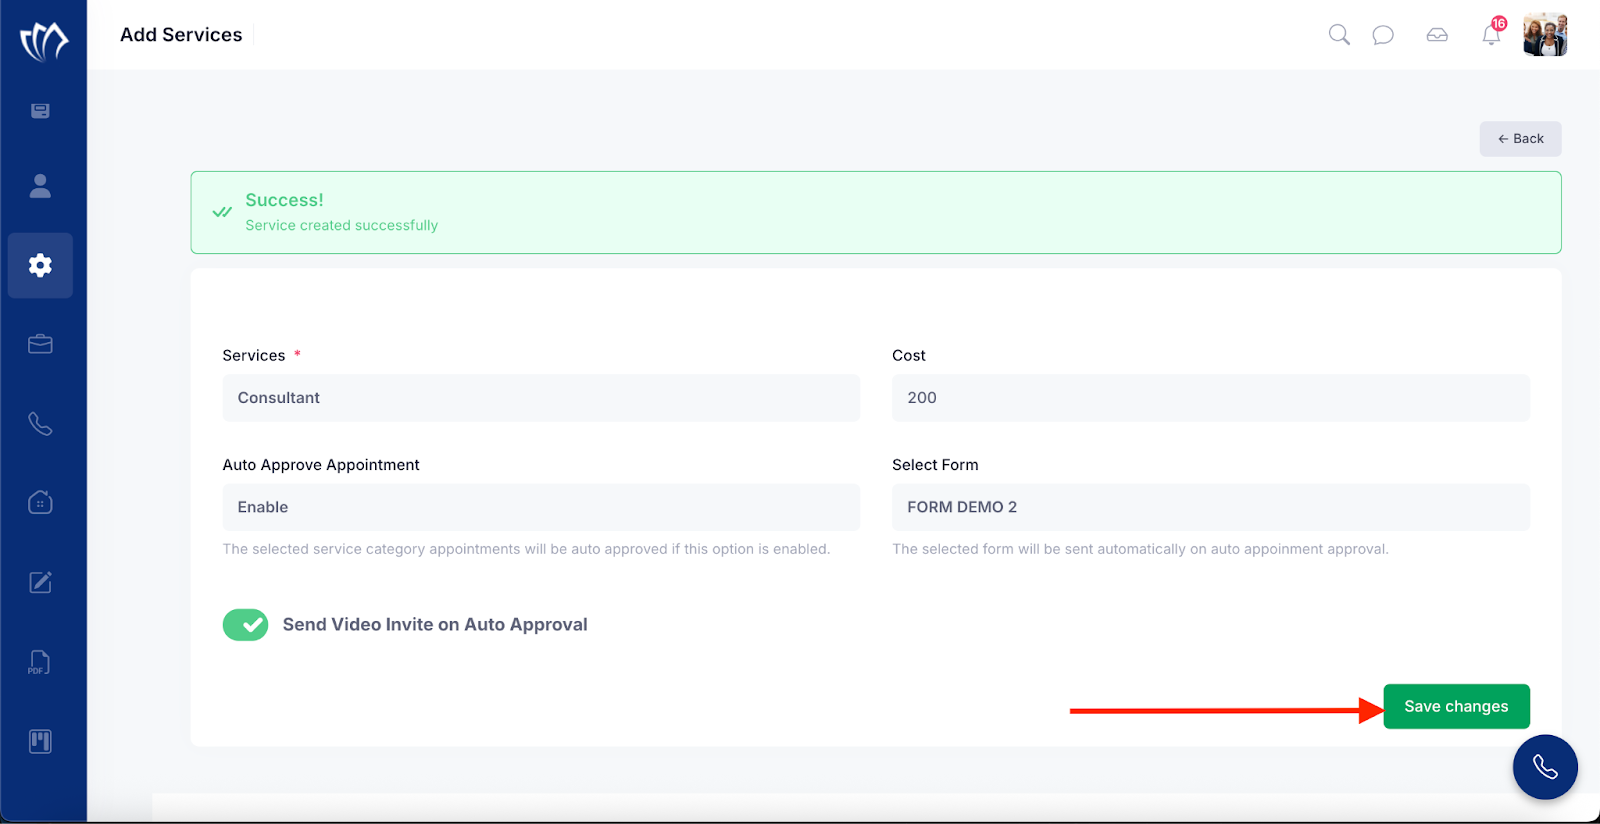
Step 2: The Add Services screen will appear, prompting you to enter the necessary service details. Fill in the following fields to define your service:
| Field | Options | Description |
| Services | Values (Options): Tax Preparation, Accounting, Bookkeeping, Credit Specialist, Financial Advisors, Mortgage, Realtor, Notary, Debt Consolidation, Tax Relief, Business Loan, Attorney, Paralegal, Consultant, Insurance, Investment Banker. | This dropdown lets you select the type of service you want to offer (e.g., Tax Preparation, Accounting). This defines the core purpose of the appointment or engagement. |
| Cost | Value (e.g., $250). | Enter the price charged for the selected service. This is the amount the customer will see and is expected to pay. It must be a numerical value. |
| Auto Approve Appointment | Options: Enable, Disable | When enabled, the appointment will be automatically approved without manual confirmation, speeding up the scheduling process. |
| Select Form | Select the saved forms | Choose a form that should be automatically sent to the customer once their appointment is approved. This could be an intake form, consent form, or any relevant document required before the service. |
| Send Video Invite on Auto Approval Toggle | Options: Enabled (Toggle On): Sends video link automatically Disabled (Toggle Off): No video invite sent |
This toggle allows you to include a video meeting invite (e.g., Zoom or other platform) when the appointment is auto-approved. This is useful if your service involves a virtual meeting. |
Step 3: Once all service details are entered correctly, click the Save changes button to add the new service.
After successfully adding a new service, you can view and manage it within the system. Follow the section below to view the added services.
Viewing Added Services
The Viewing Services section lets you review and manage all existing services in one place, helping you keep offerings updated, relevant, and aligned with customer needs.
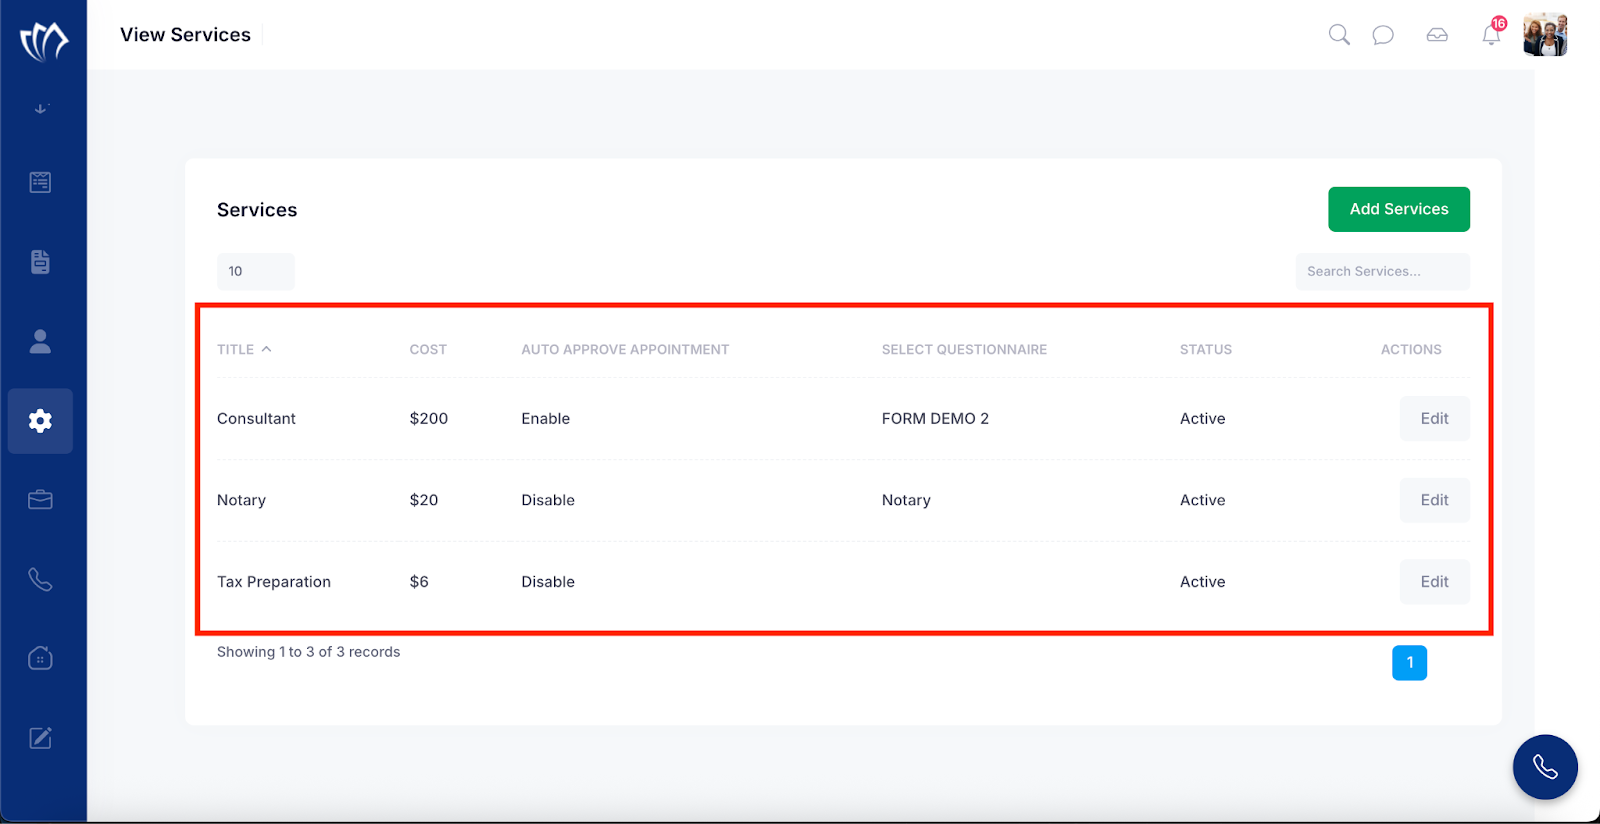
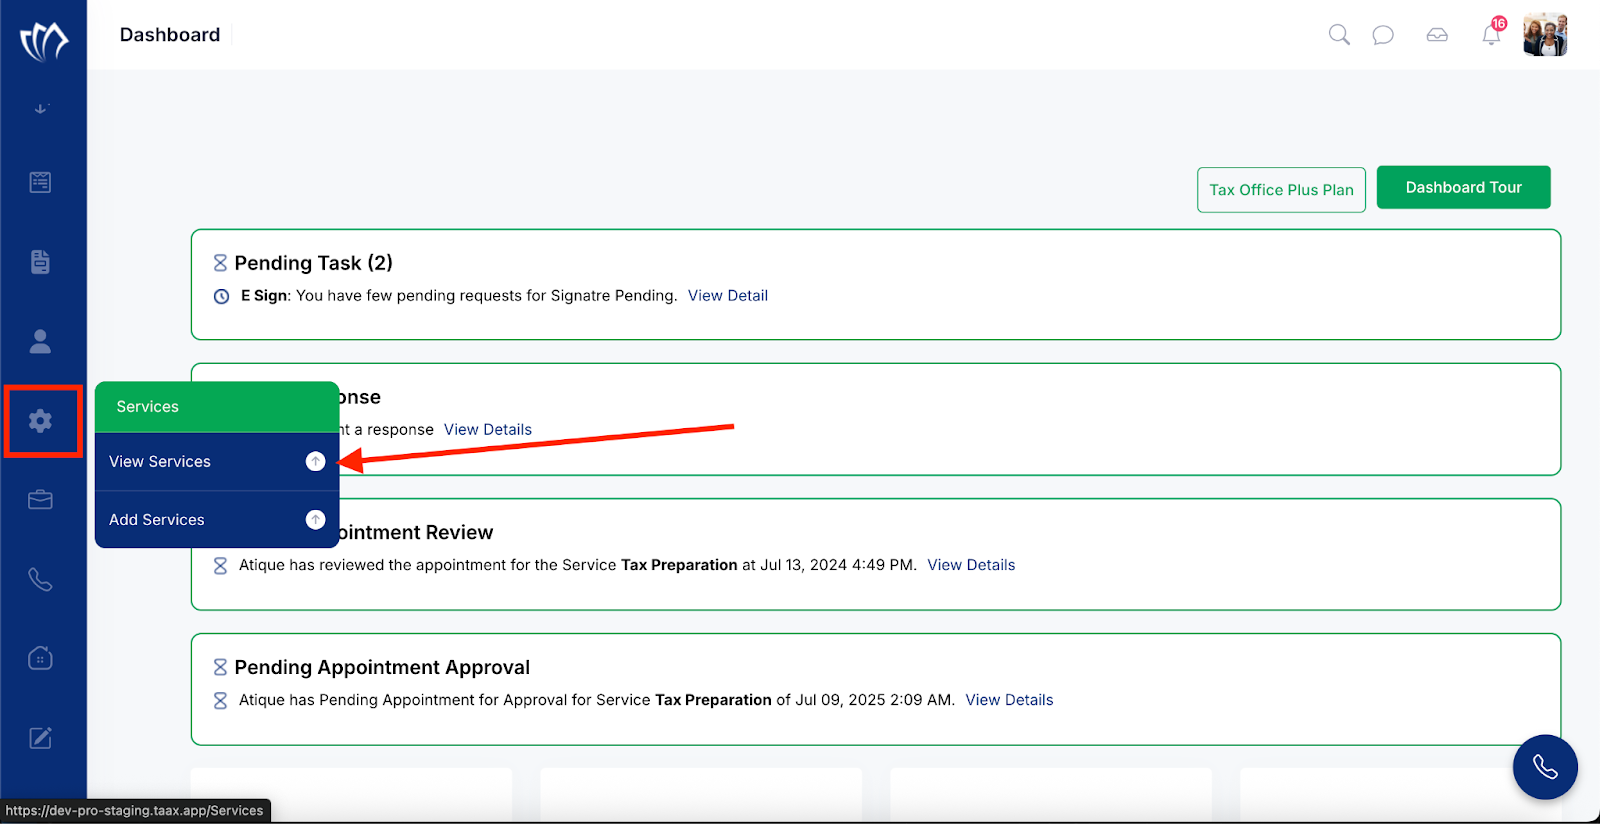
Step 1: Navigate to the left side panel, hover over the “Services” section, then click on the “View Services” option.
Step 2: The View Services screen will appear, displaying a list of all the services you’ve added. Here, you can review each service along with its details such as service name, cost, status, assigned form, and auto-approved appointments.
Note: You can manage the services by clicking the Edit button next to each listed service. This allows you to update details like service name, cost, form, or settings. Follow this guide for step-by-step instructions.