Cancelling an invoice is necessary when a billing error occurs, a transaction is voided, or services are no longer required. This process ensures accurate financial records and prevents further actions on the invoice. Use this feature to formally mark an invoice as cancelled, along with a reason for reference and audit purposes.
Follow the step-by-step guide below to cancel the invoices on the TAAX Pro platform.
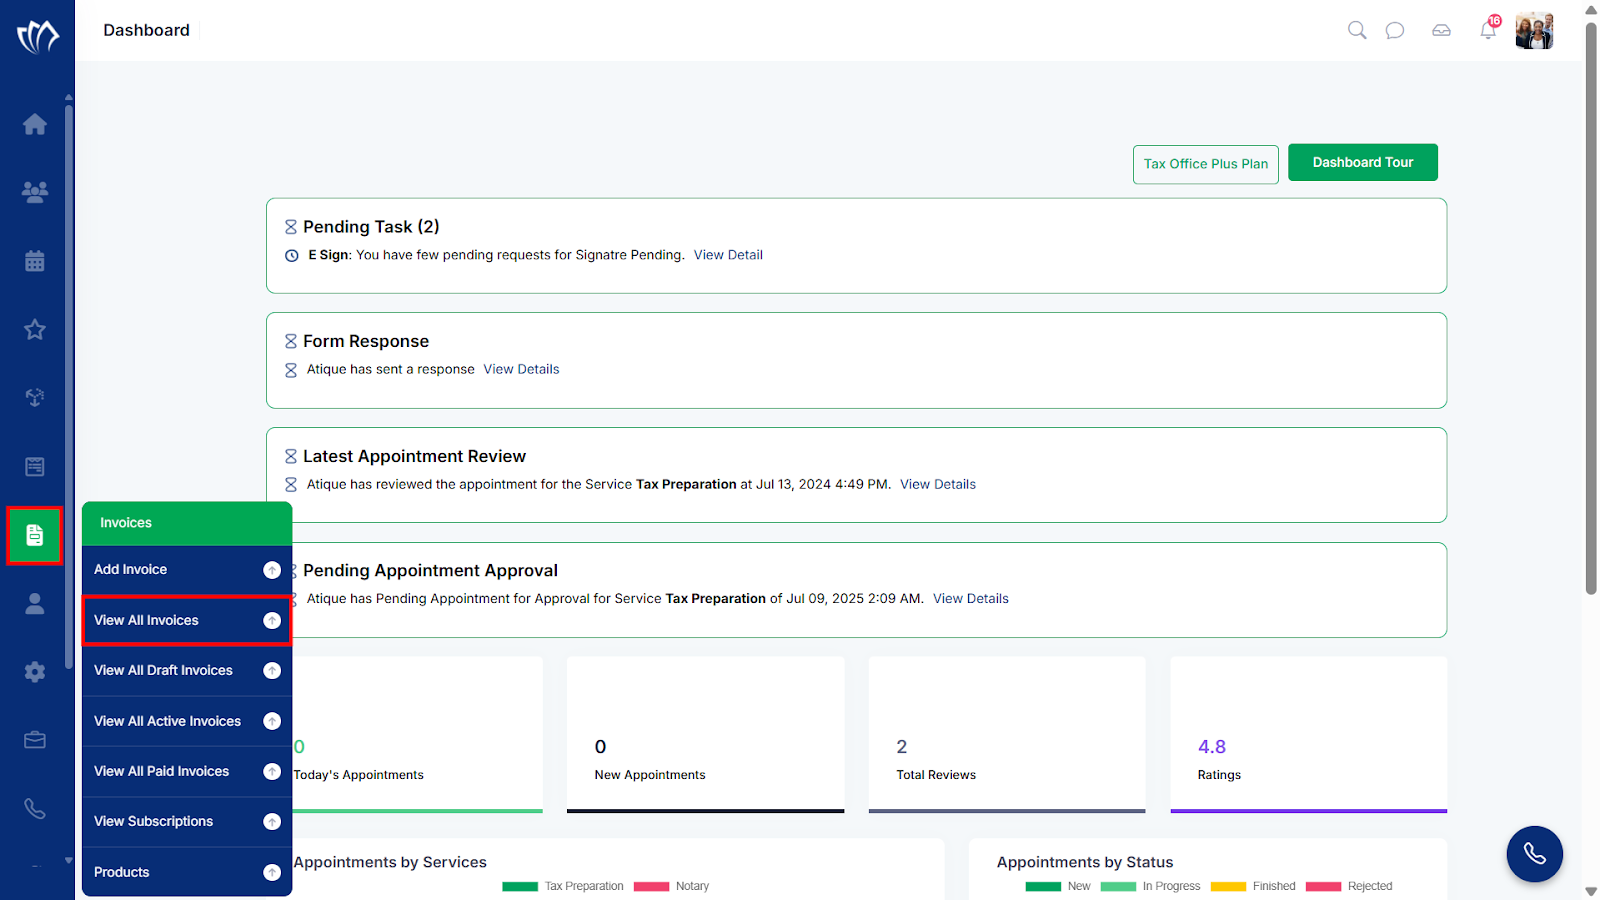
Step 1: Navigate to the left side panel, hover over the “Invoices” section, then click on the “View All Invoices” option.
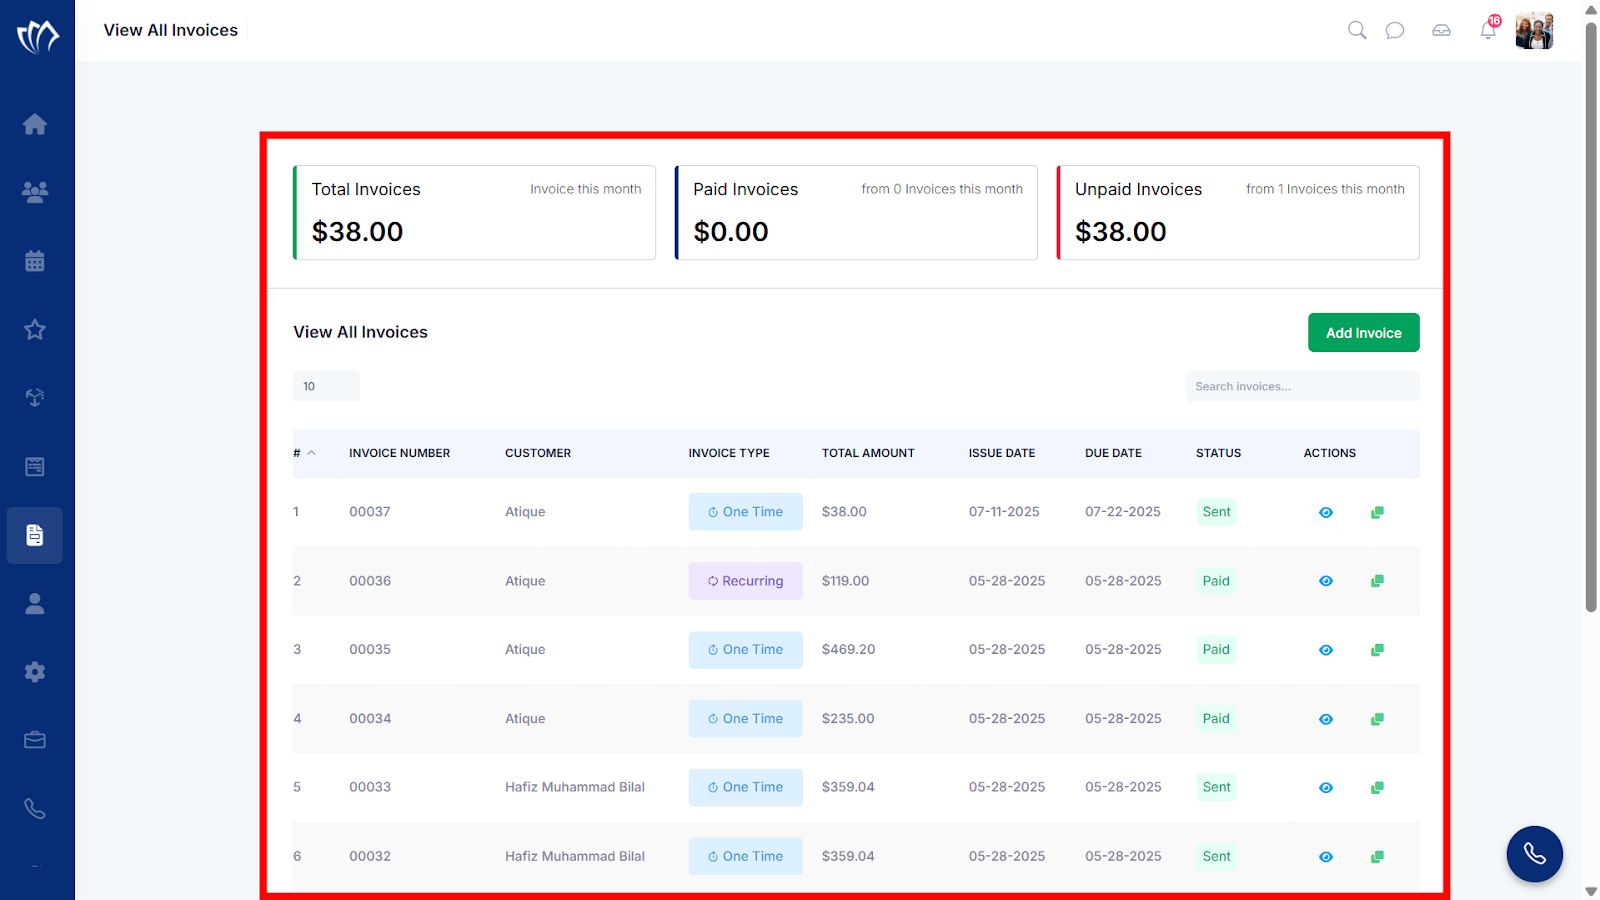
Step 2: After clicking on the “View All Invoices” option, a new screen will open with the details of all previous invoices, where you can also add a new invoice.
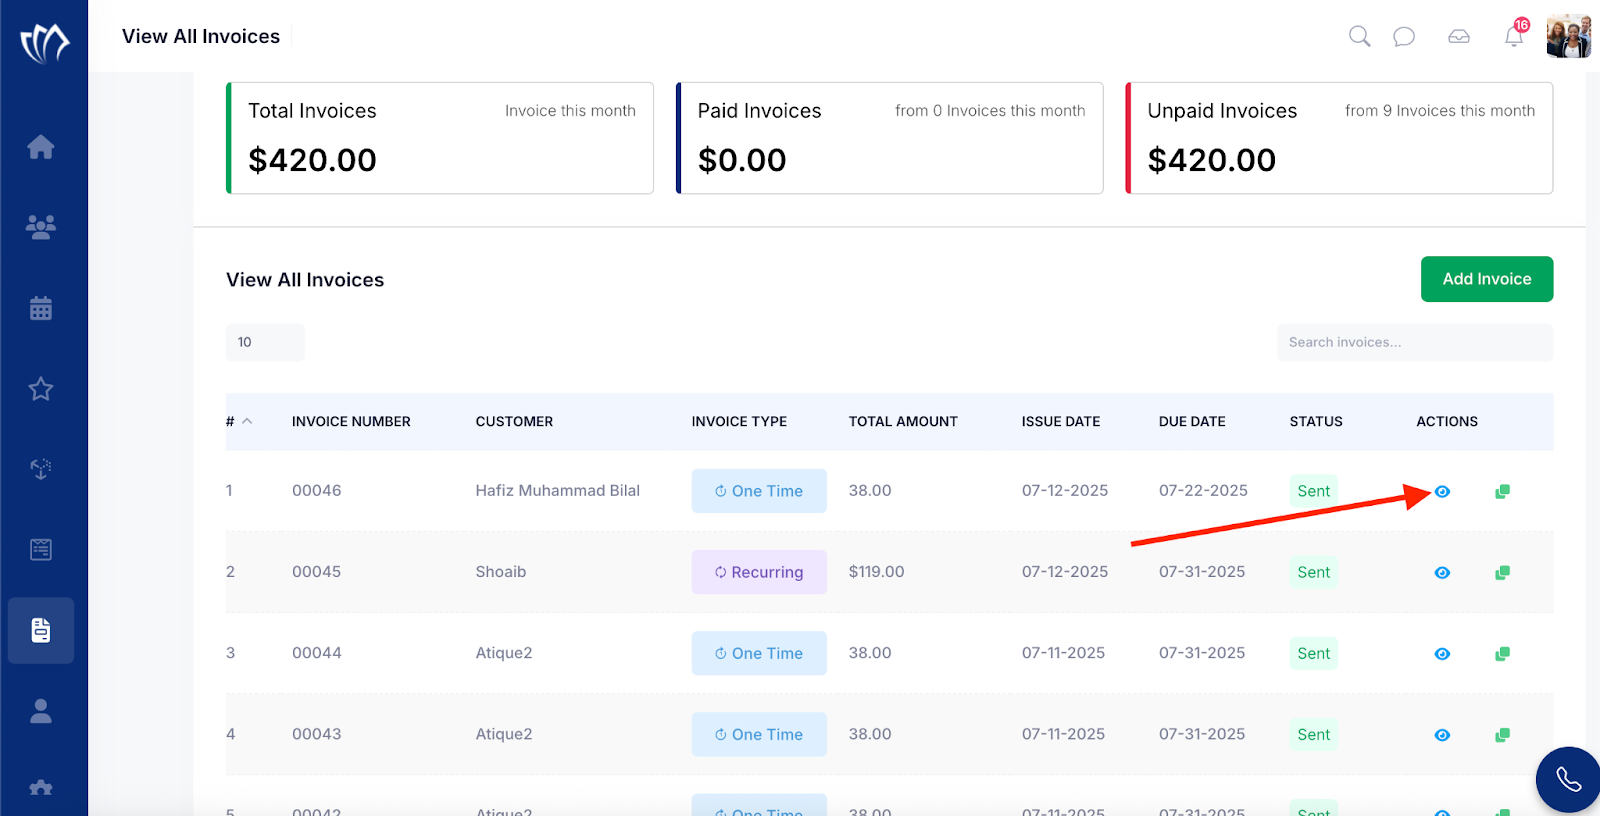
Step 3: Click the eye iconnext to any of the invoices you wish to cancel.
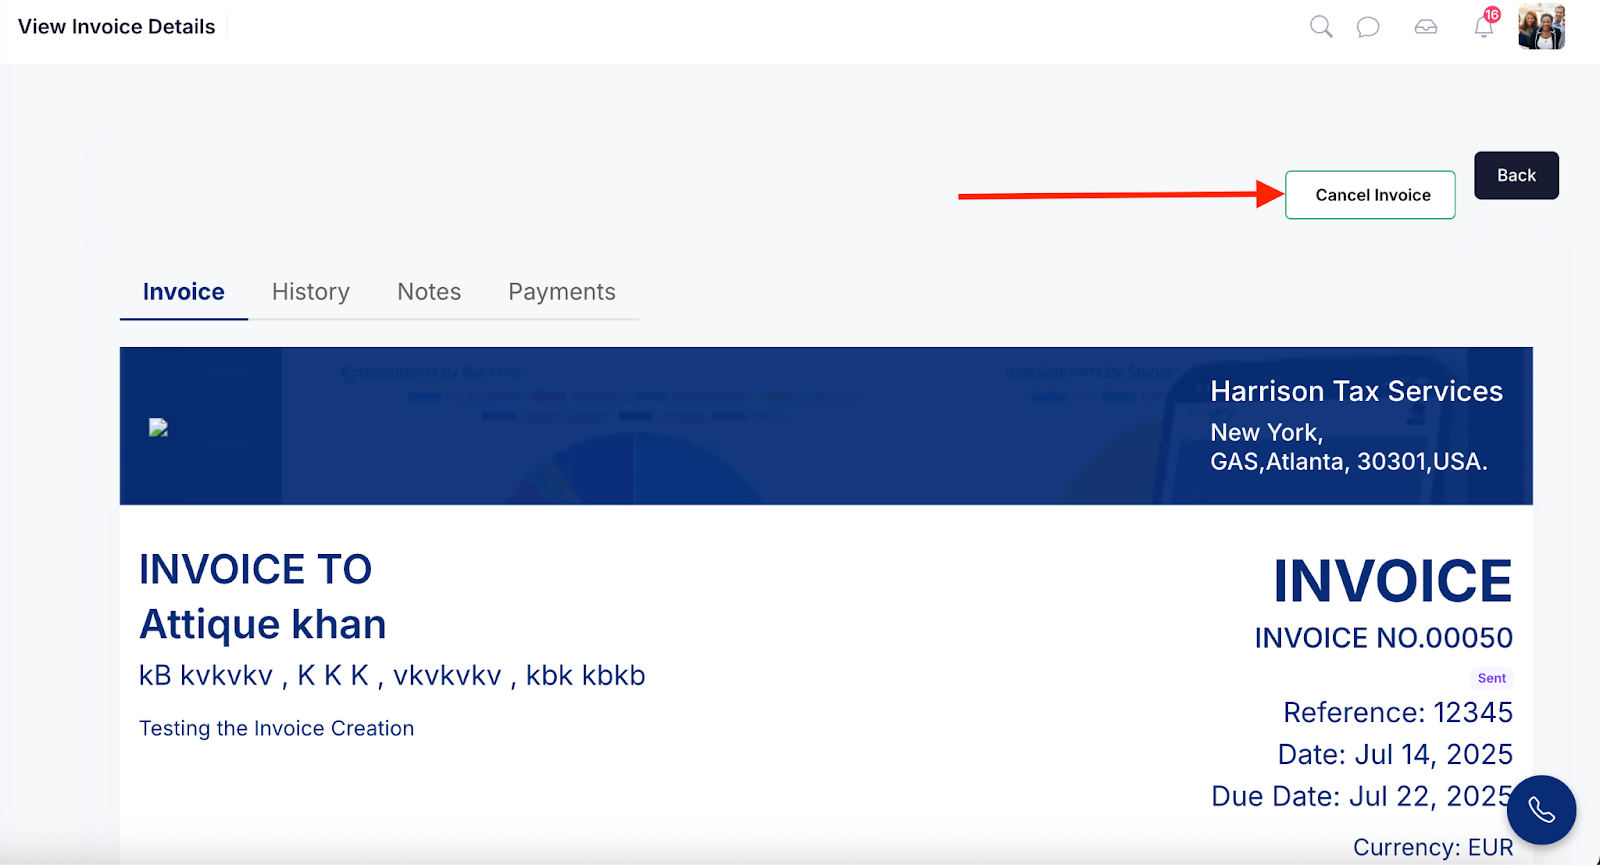
Step 4: The View Invoice Details screen will appear, where you can view all the details of the invoice. Click the Cancel Invoice button.
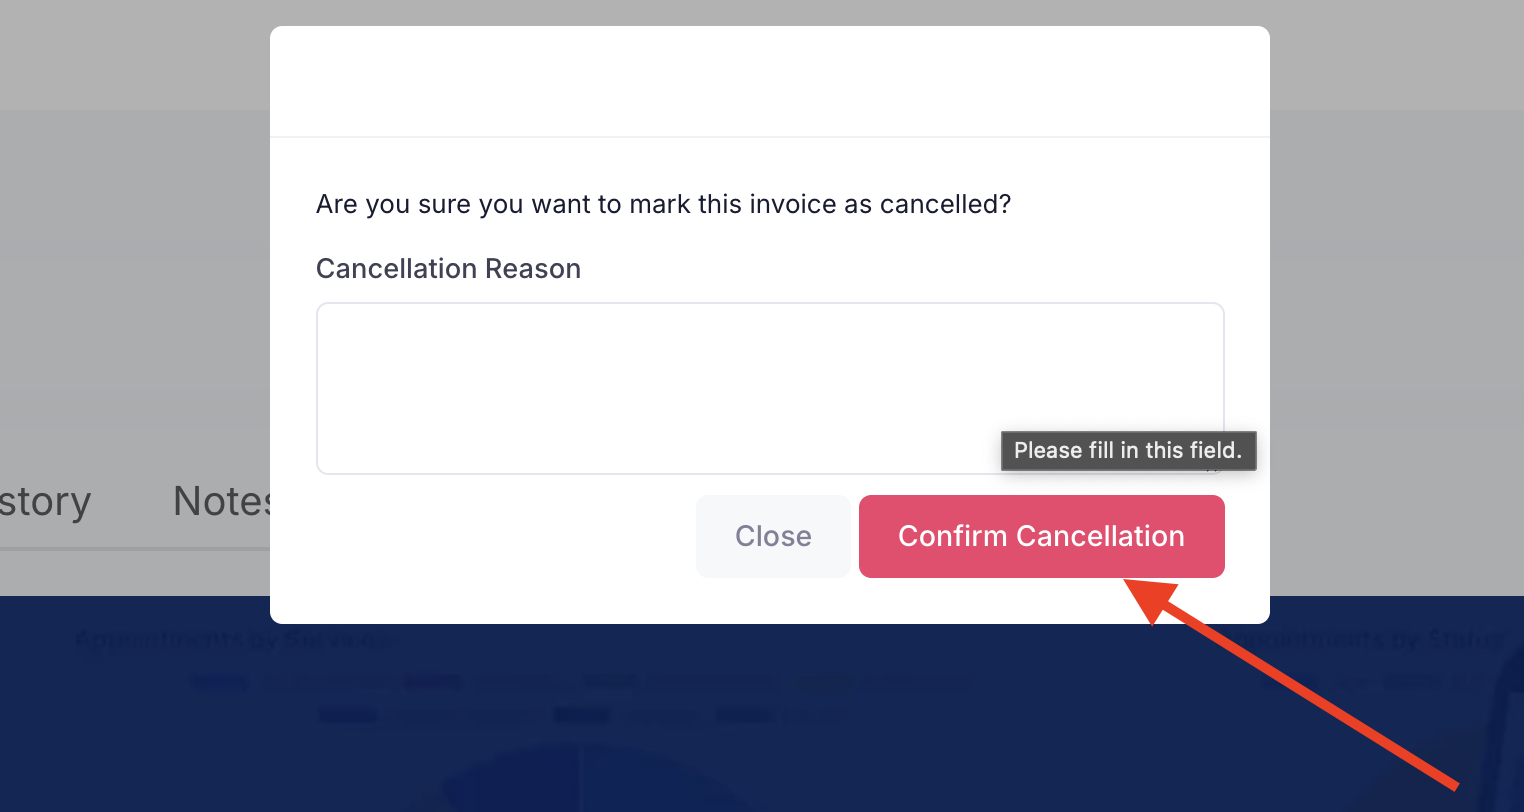
Step 5: Enter the reason for cancelling the invoice, then click the Confirm Cancellation button to proceed.
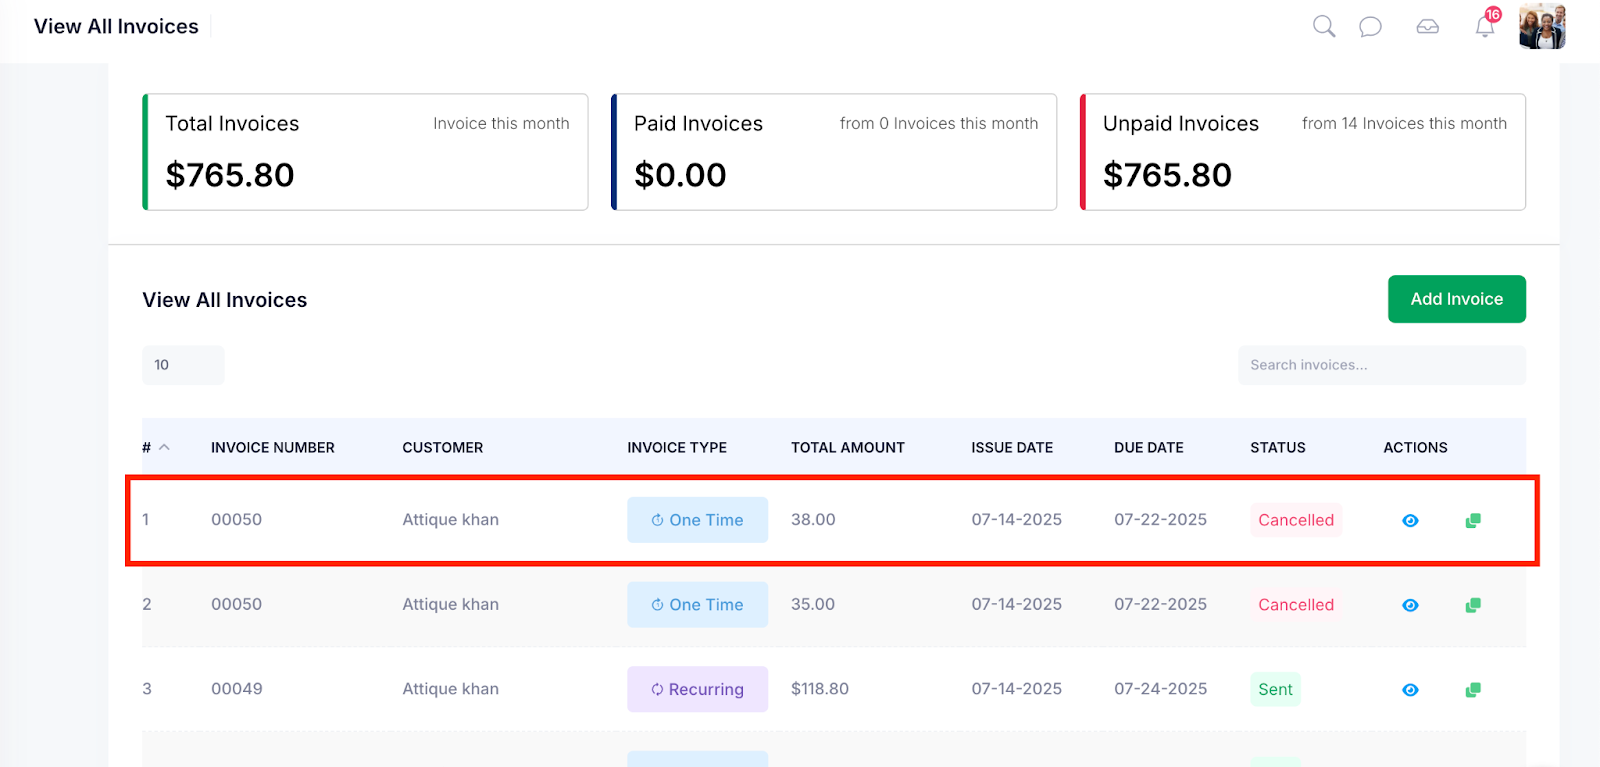
Once the invoice is successfully cancelled, it will appear on the View All Invoices screen with the status set to “Cancelled“.