TAAX Pro allows you to connect your Zoom account and manage meetings directly from the platform. Once the integration is set up, you can schedule meetings, start instant sessions, invite participants, and access meeting recordings or transcripts without switching between multiple tools.
By integrating Zoom with TAAX Pro, meeting activities can be handled from a single interface, making it easier to organize communication with team members, customers, or external participants. Meetings can be created with defined topics, schedules, durations, and participant types, allowing you to plan and manage discussions efficiently.
Let’s walk through the step-by-step process of integrating Zoom with the TAAX Pro platform and managing your video meetings directly from the dashboard.
Connect Zoom with TAAX Pro
Before creating or managing meetings, your Zoom account must be connected to the TAAX Pro platform. This integration allows TAAX Pro to schedule meetings, generate meeting links, and access recordings directly from your Zoom account.
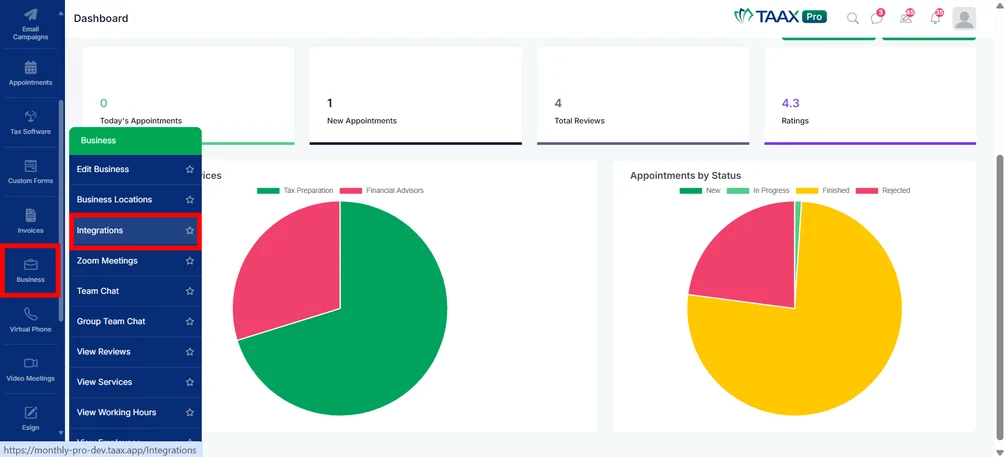
Step 1: Log in to your TAAX Pro account and navigate to Business → Integrations from the left sidebar.
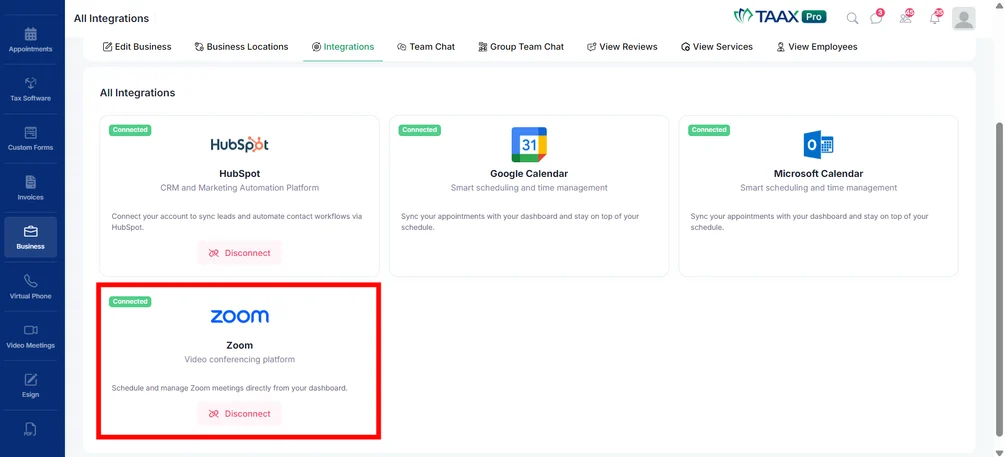
Step 2: On the Integrations page, you can see all the supported integrations available in the platform. Locate the Zoom integration from the list.
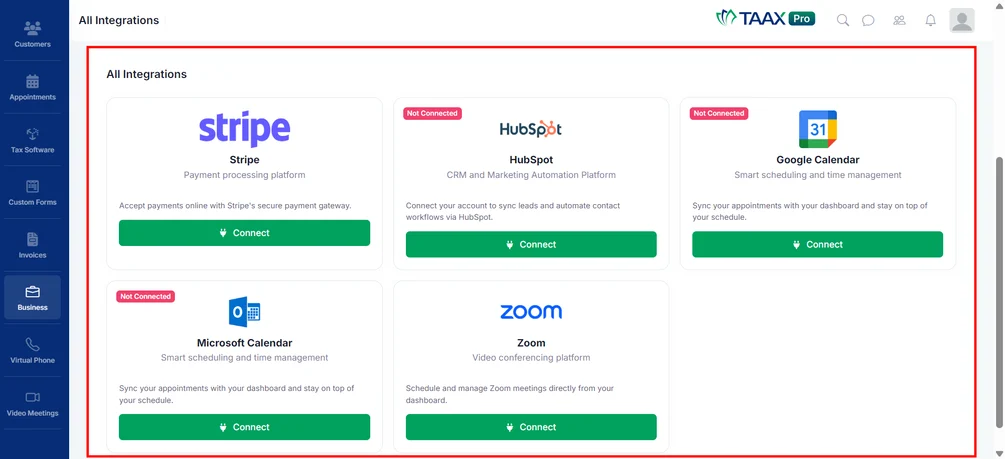
Step 3: Find Zoom in the list of integrations, then click Connect to start the connection process.
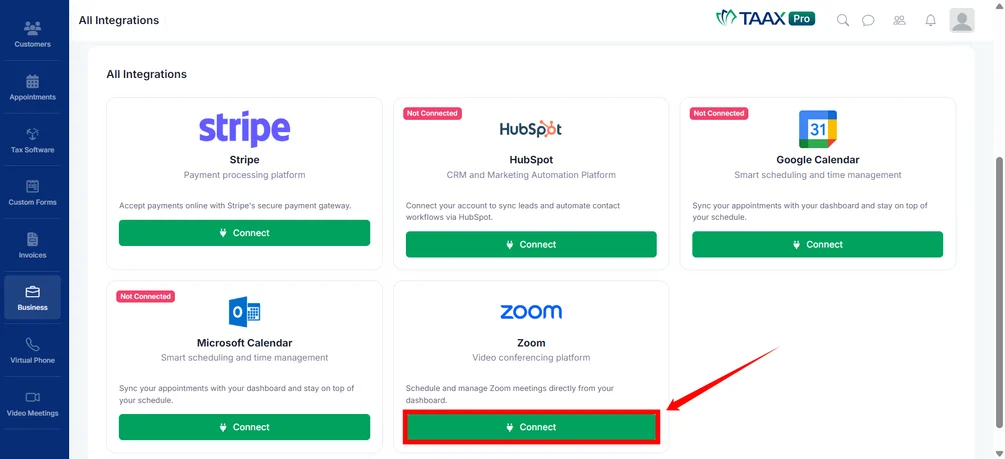
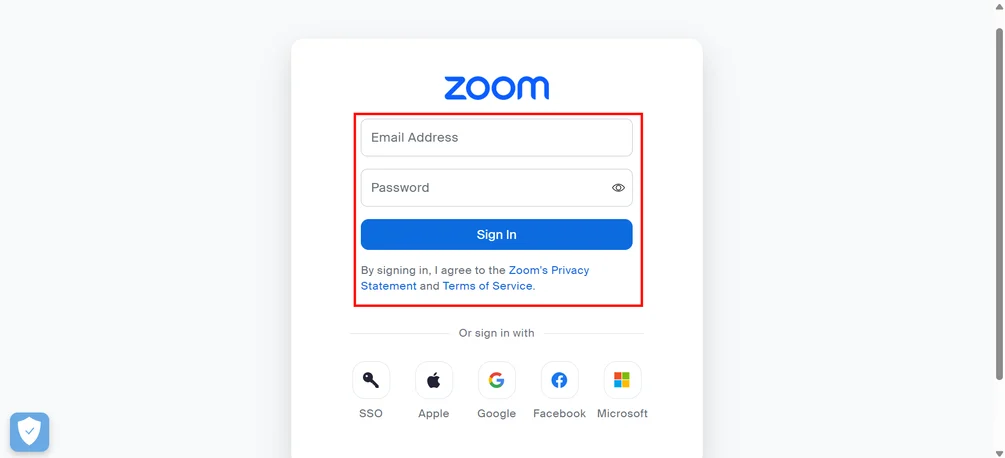
Step 4: After clicking Connect, you will be redirected to the Zoom authorization page. Sign in to your Zoom account and grant permission to complete the integration.
Step 5: Once the authorization is successful, your Zoom account will be connected to TAAX Pro, allowing you to create and manage Zoom meetings directly from the platform.
Access the Zoom Meetings Dashboard
Once the Zoom integration is successfully connected, you can access the Zoom meetings workspace to view, create, and manage your meetings.
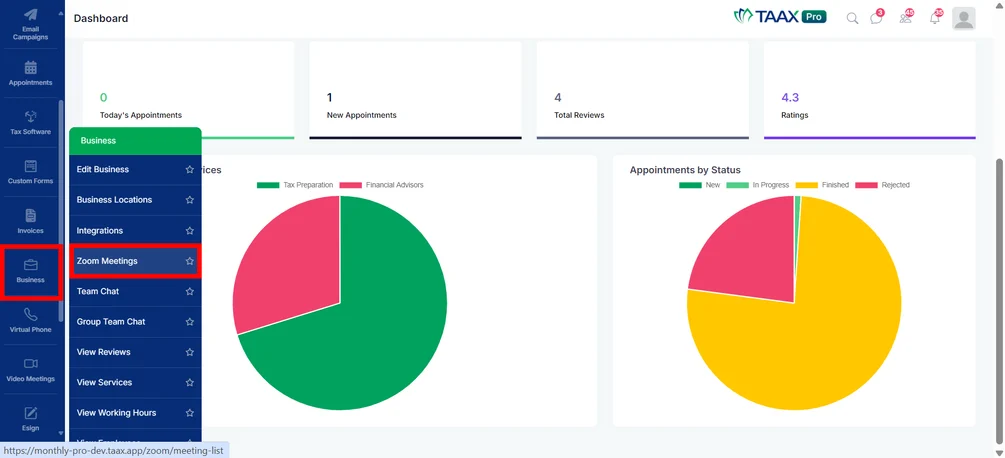
Step 1: Log in to your TAAX Pro account and navigate to Business → Zoom Meetings from the left sidebar.
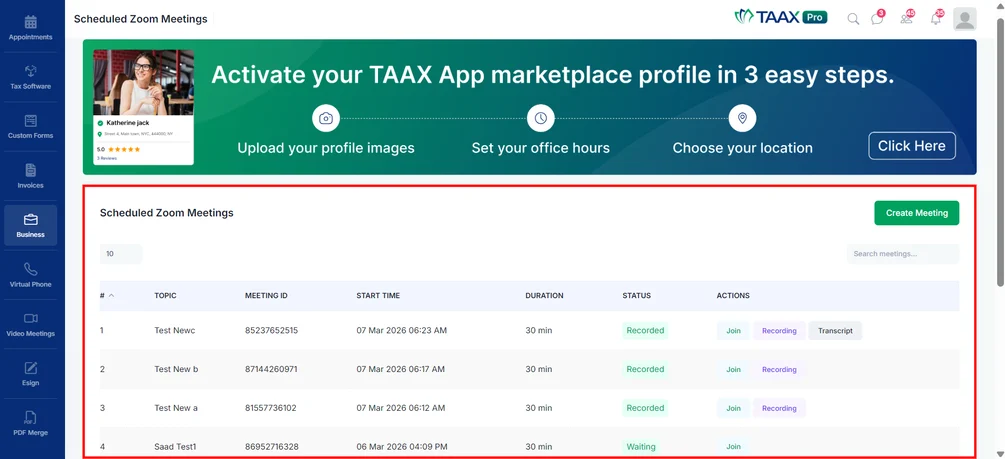
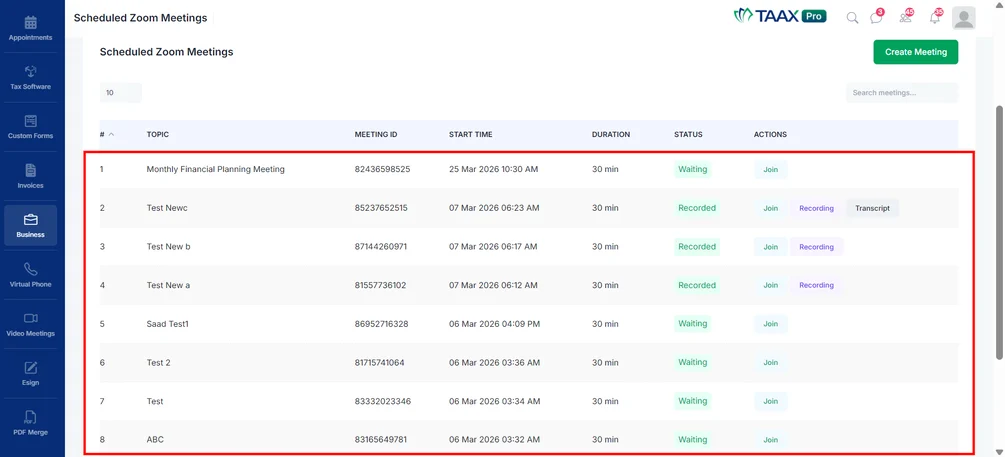
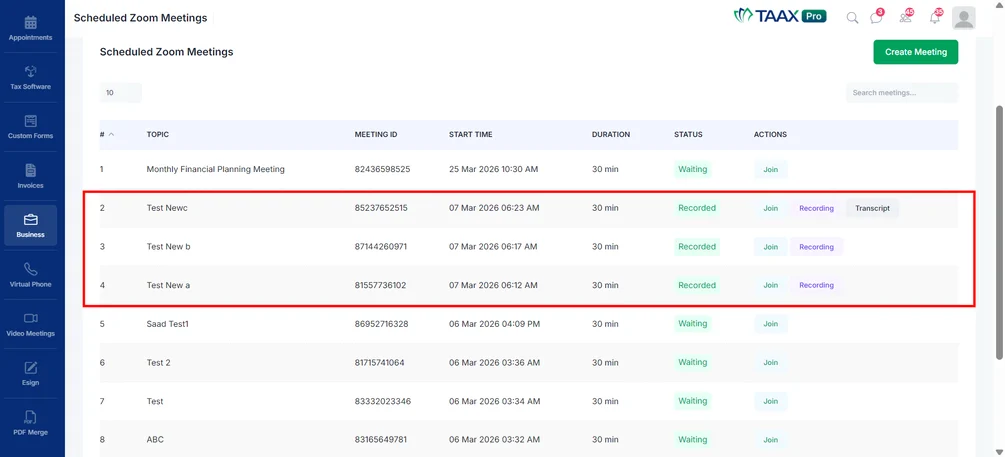
Step 2: The workspace displays a list of all existing scheduled meetings, including details such as the meeting topic, meeting ID, start time, duration, and status. From this page, you can also create a new meeting, join scheduled meetings, and access recordings or transcripts.
Create a Zoom Meeting
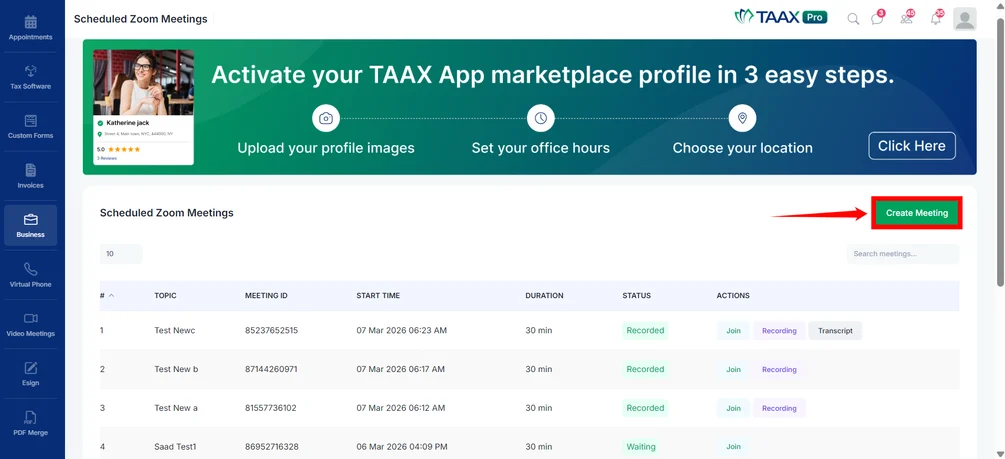
Once you have accessed the Zoom meetings workspace, you can create a new meeting directly from the Scheduled Zoom Meetings page.
Step 1: From the Scheduled Zoom Meetings workspace, click Create Meeting located at the top-right corner of the page.
Step 2: Complete the meeting form by entering the required details listed below.
| Field | Description | Example |
| Topic | Enter the title or subject of the meeting. This helps participants understand the purpose of the meeting. | Monthly Financial Planning |
| Meeting Type | Select the type of meeting. You can choose between Scheduled (planned for a specific time) or Instant (start immediately). | Scheduled |
| Meeting Date | Choose the date when the meeting will take place using the calendar selector. | 25-03-2026 |
| Meeting Time | Select the start time for the meeting. | 11:00 AM |
| Duration (Minutes) | Specify how long the meeting will last in minutes. | 30 |
| Timezone | Select the timezone in which the meeting is scheduled to ensure participants join at the correct time. | Asia/Kolkata |
| Recipient Type | Select the type of participant for the meeting. Based on the selected option (Business User, External, or Customer). | Business User |
| Select Business User / External Email / Select Customer | This field appears based on the Recipient Type selected. It allows you to specify the meeting participant by selecting a business user, entering an external email address, or choosing a customer from the system. | New1 (new1@e.com) |
| Agenda | Provide additional details or discussion points for the meeting. | Review monthly reports |
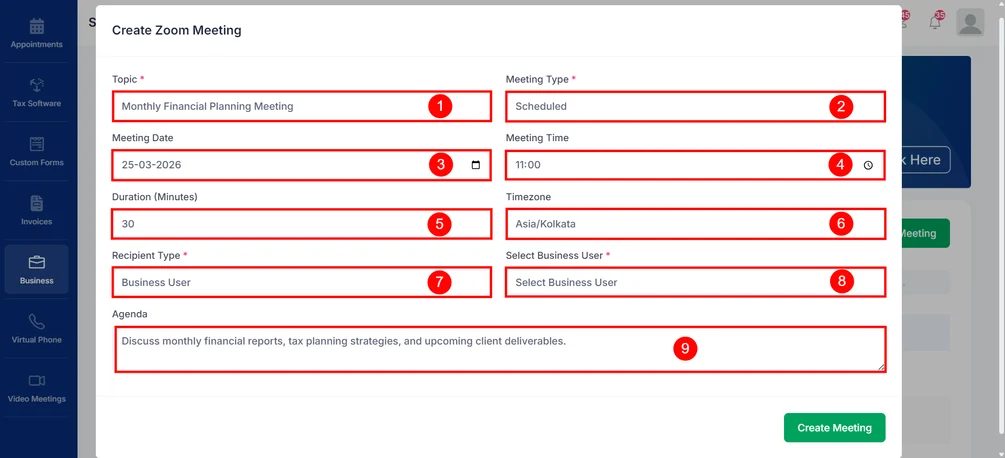
Step 3: After entering all the required meeting details, click Create Meeting at the bottom-right corner of the form to schedule the Zoom meeting.

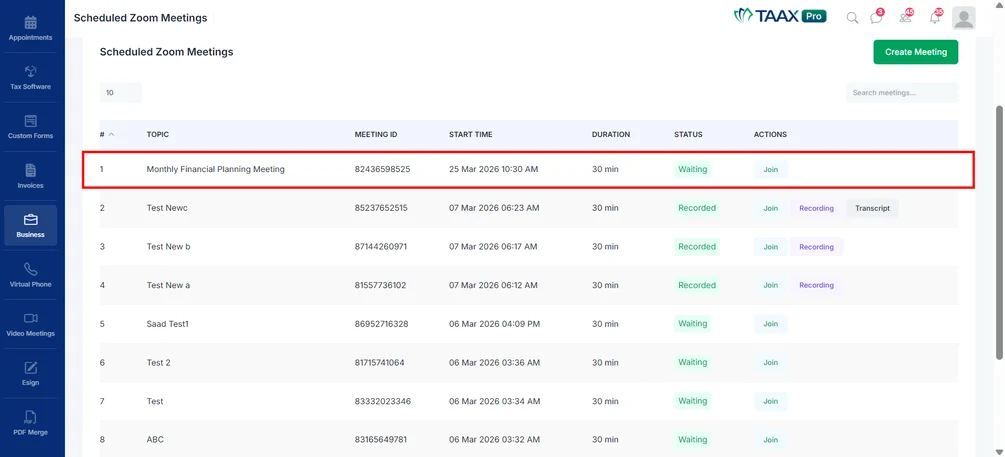
Step 4: After the meeting is created, it will appear in the Scheduled Zoom Meetings list, where you can view the meeting details, join the meeting, or access related actions such as recordings and transcripts.
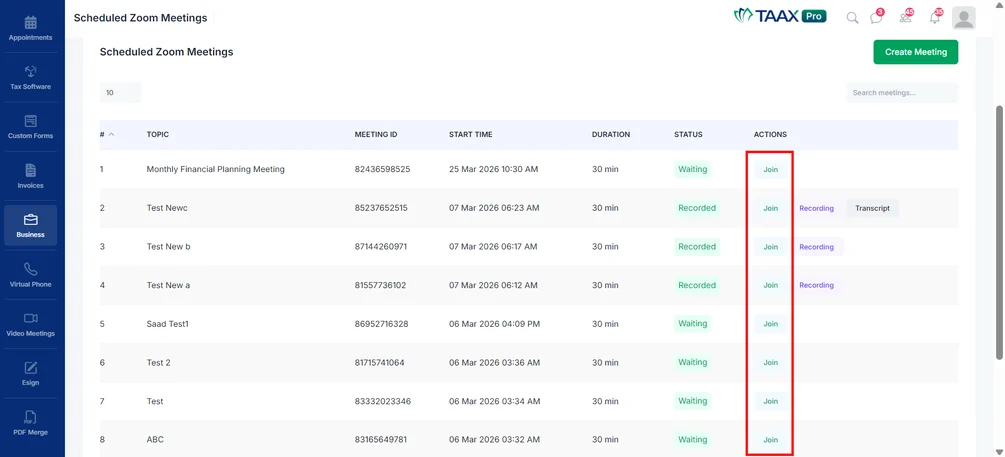
Join a Zoom Meeting
Once a meeting has been scheduled, participants can join it directly from the Scheduled Zoom Meetings workspace. This allows users to quickly access the meeting without manually searching for the Zoom link.
Step 1: From the Scheduled Zoom Meetings workspace, locate the meeting you want to join.
Step 2: Under the Actions column, click Join next to the meeting. The Zoom meeting will open, and you can join the session.
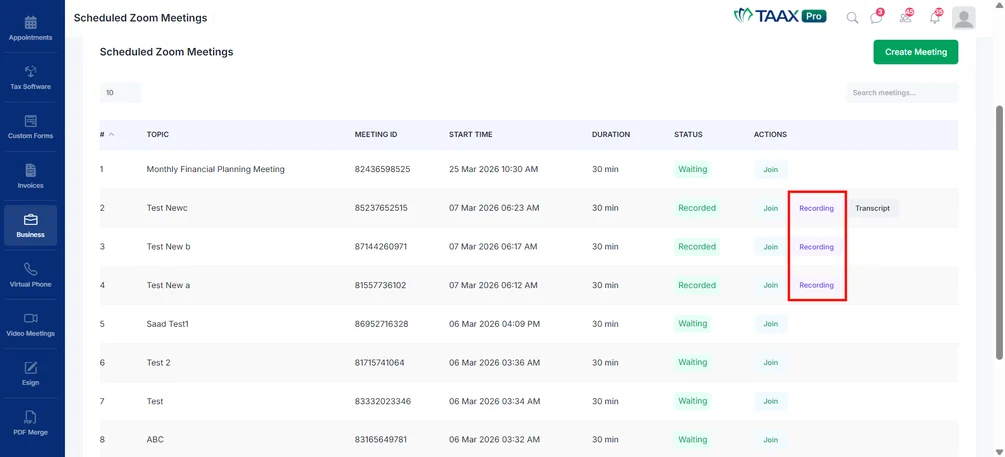
View Meeting Recordings
After a meeting is completed, the recording becomes available if recording was enabled during the meeting. You can access the recording directly from the meetings list.
Step 1: In the Scheduled Zoom Meetings workspace, locate the meeting with the Recorded status.
Step 2: Under the Actions column, click Recording to open the meeting recording. The recording will open and can be viewed from the platform.
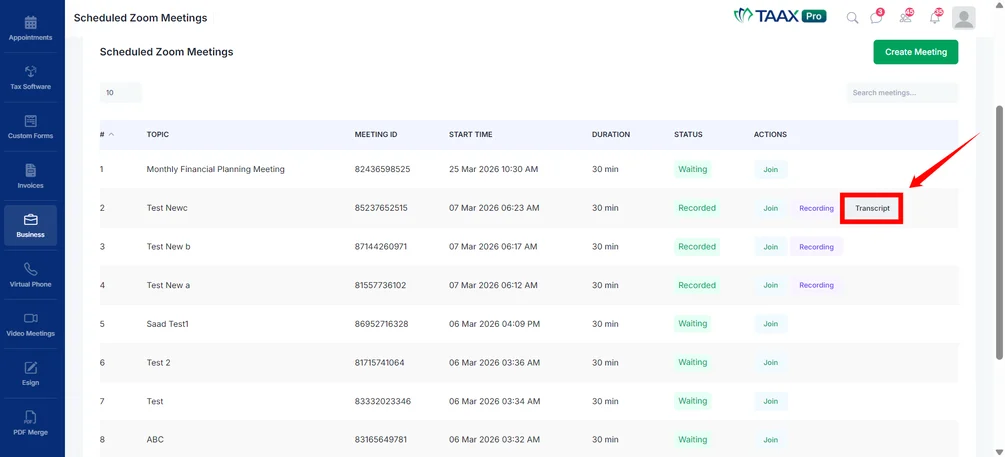
Access Meeting Transcripts
If transcription is enabled for the meeting, the transcript will be available after the meeting has been recorded. This allows users to review the conversation and key discussion points.
Step 1: In the Scheduled Zoom Meetings list, locate the recorded meeting.
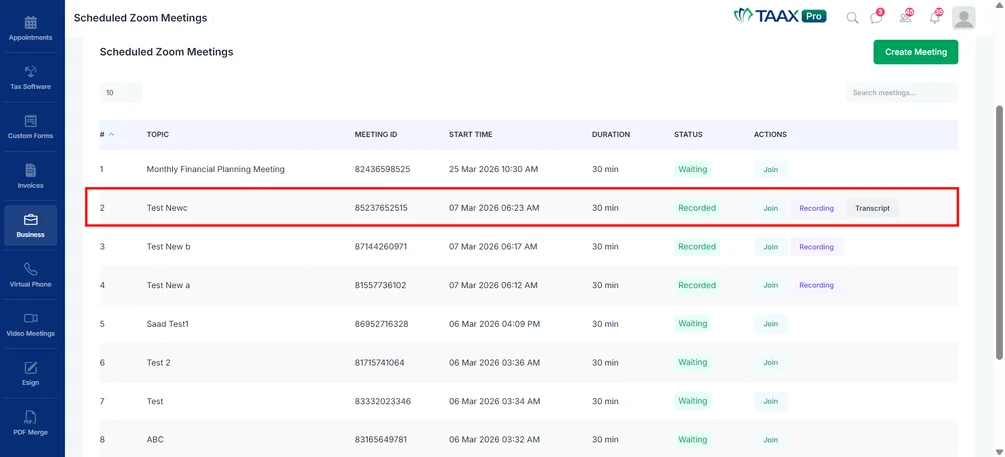
Step 2: Under the Actions column, click Transcript next to the meeting. The meeting transcript will open, allowing you to review the discussion from the meeting.