Inviting customers on the TAAX Pro platform is the first step to bringing them into your workspace. Once invited, customers receive a link to join the platform where they can view their sessions, upload documents, and communicate with your team. This process creates a shared space where all activity, calls, messages, files, and tasks can be tracked and stored under the customer’s profile.
Let’s walk through the step-by-step guide on how to invite customers on the TAAX Pro platform.
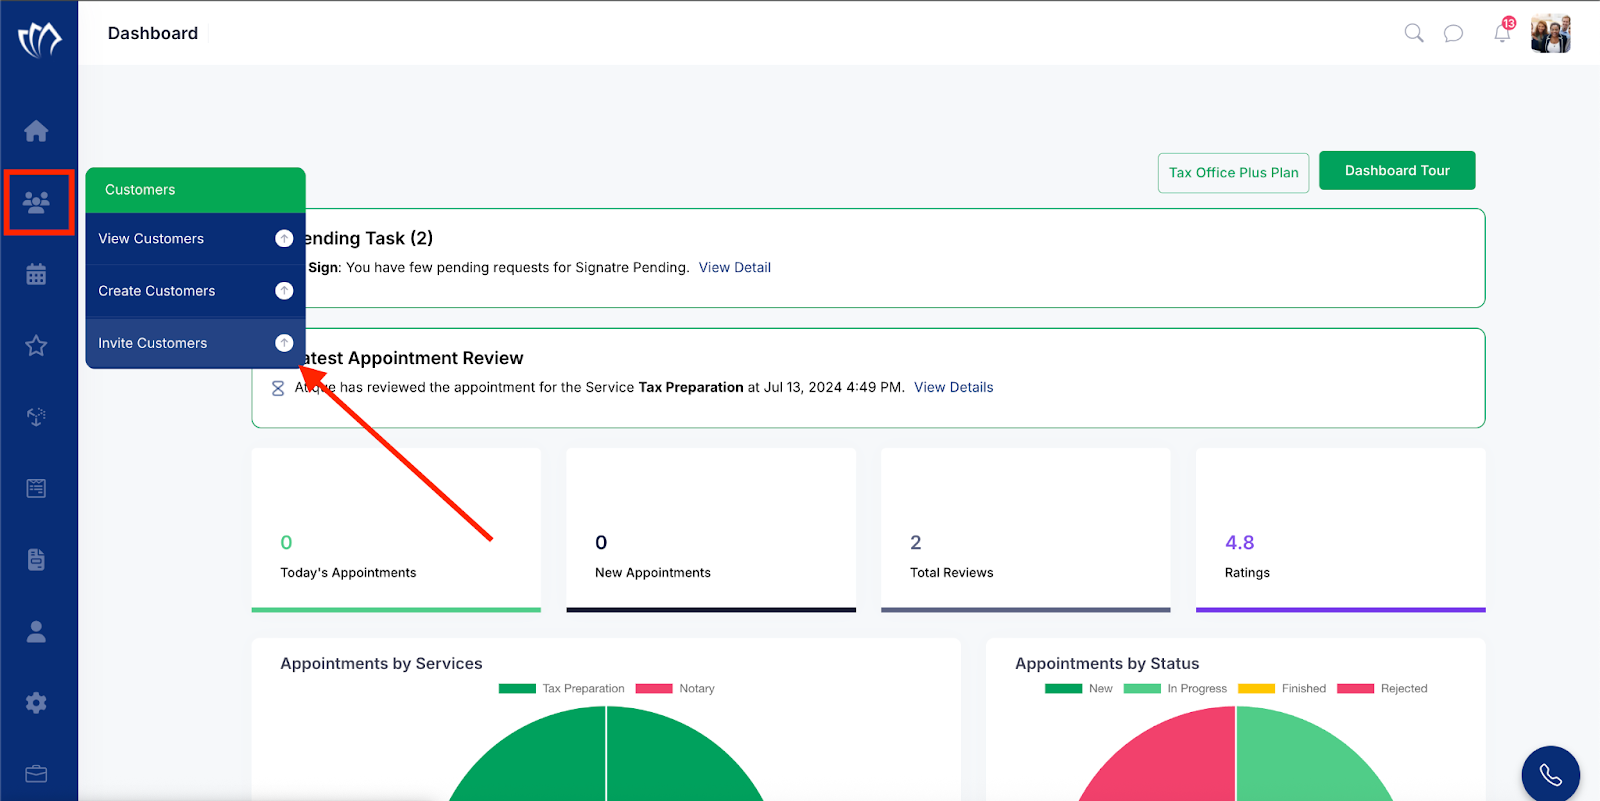
Step 1: Move your cursor over the Customer icon located on the left side panel. When the menu expands, click on the “Invite Customers” option.
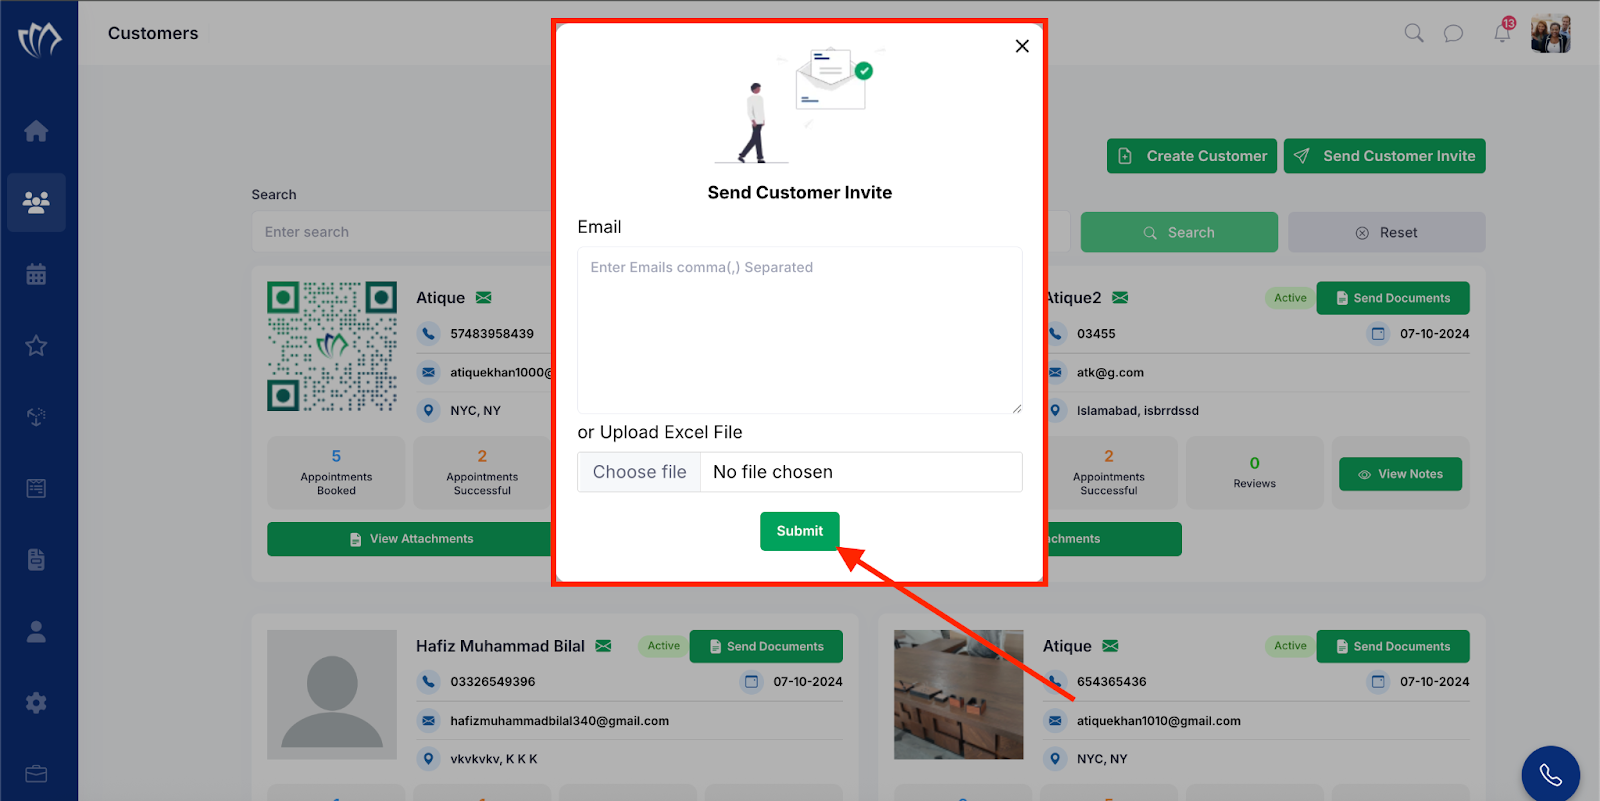
Step 2: A new invite form will open in the center of the screen. Enter all required details in the form fields, then click the “Submit” button to send the invite.
Note: You can upload an Excel file to invite multiple customers at once. Add all the email addresses in the file, then upload it to send bulk invitations.
After sending the invite, the selected members will receive an email. They can accept the invitation to join and will be added as customers on the TAAX Pro platform.
