Control how phone numbers are managed within the system, including their assignment, usage, and availability. It provides a centralized view of all numbers, whether currently assigned to you, assigned to other employees, or released for future use, enabling you to take key actions such as making calls, updating assignees, activating/inactivating numbers, or releasing them when no longer needed.
Follow the step-by-step guide below to manage the numbers on the TAAX Pro platform.
Manage My Numbers
You can make calls from my numbers, manage these numbers by releasing them, marking them as active or inactive, and updating the assigned employee as needed.
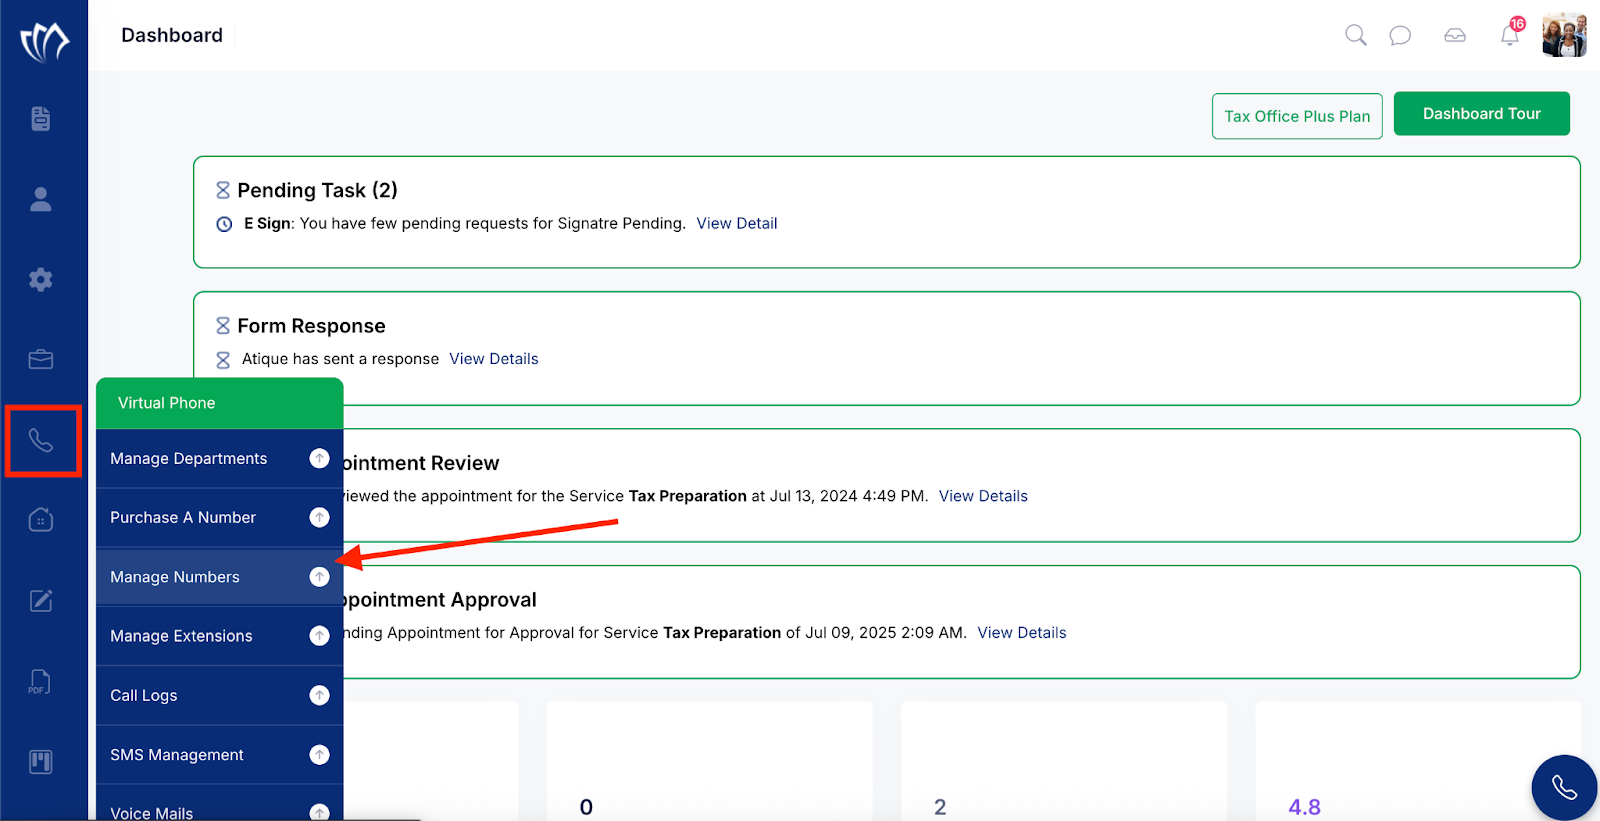
Step 1: Navigate to the left side panel, hover over the “Virtual Phone” section, then click on the “Manage Number” option.
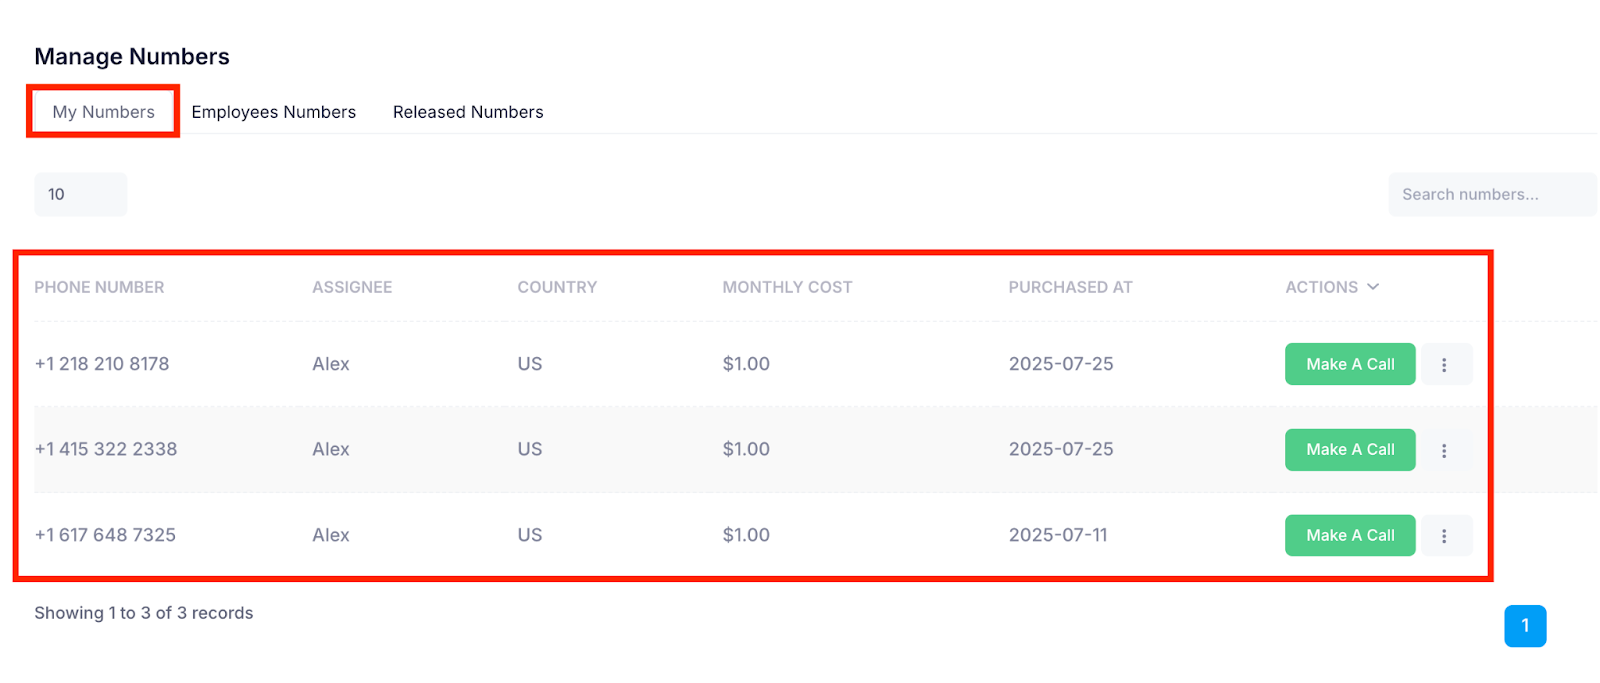
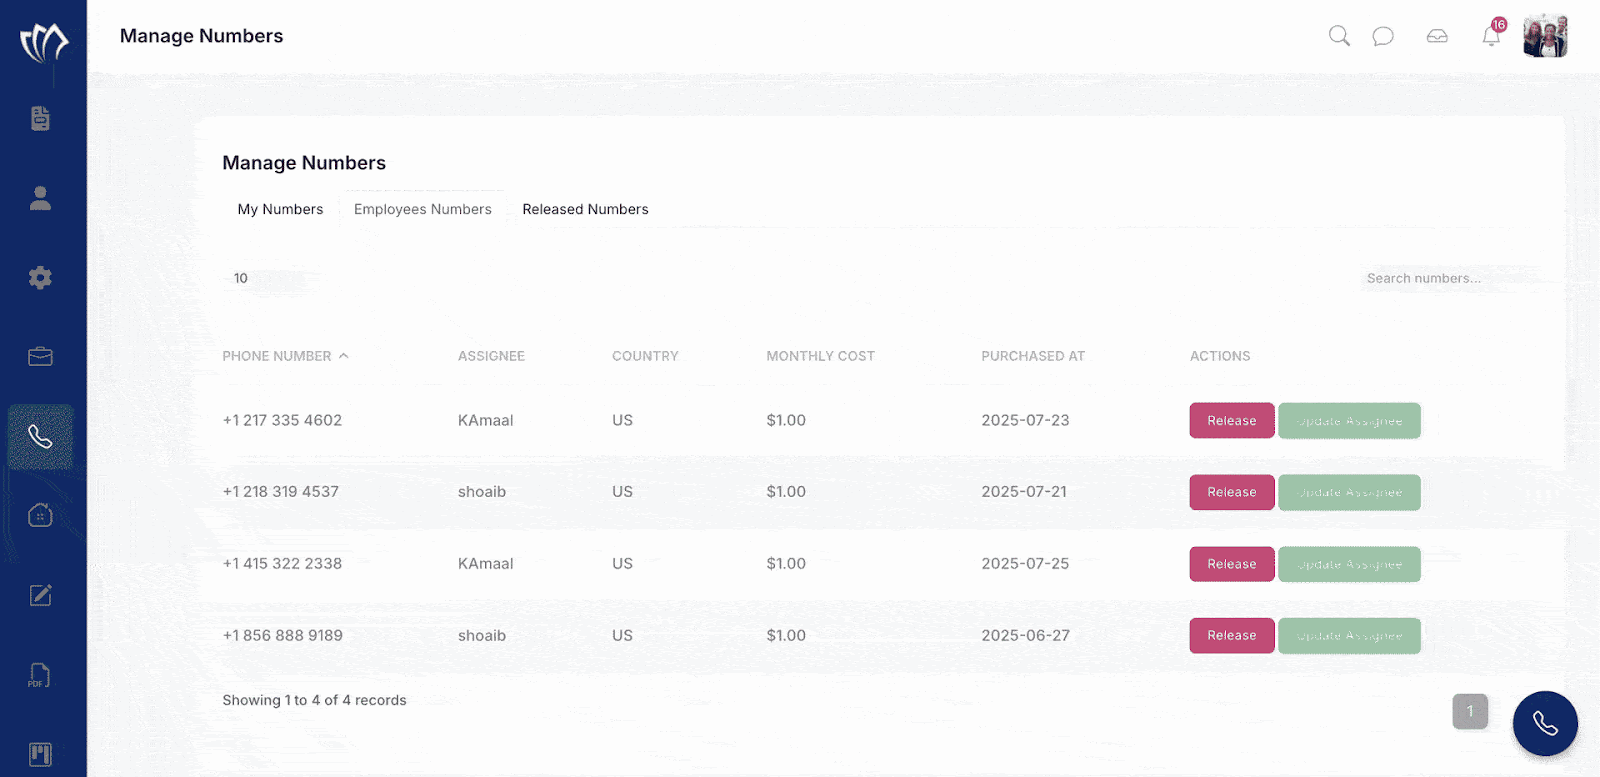
Step 2: The Manage Numbers screen will appear, displaying three sections for managing phone numbers. In the My Numbers section, you can view all numbers currently assigned to you, along with their status and relevant details.
Making a Call
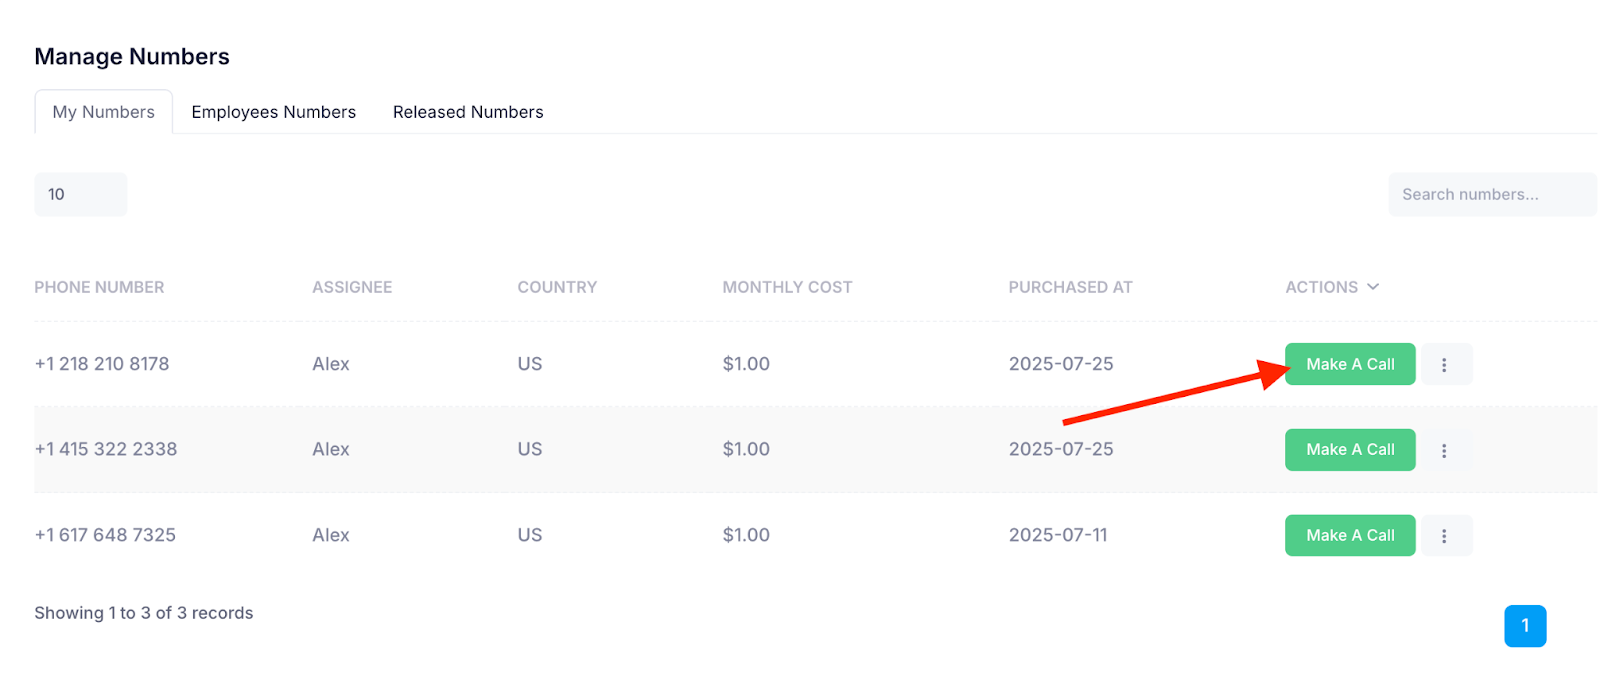
The numbers assigned to you are the ones you can use to call customers directly from the platform.
Step 1: Click the Make a Call button to initiate a call to any of your assigned customers directly from the platform.
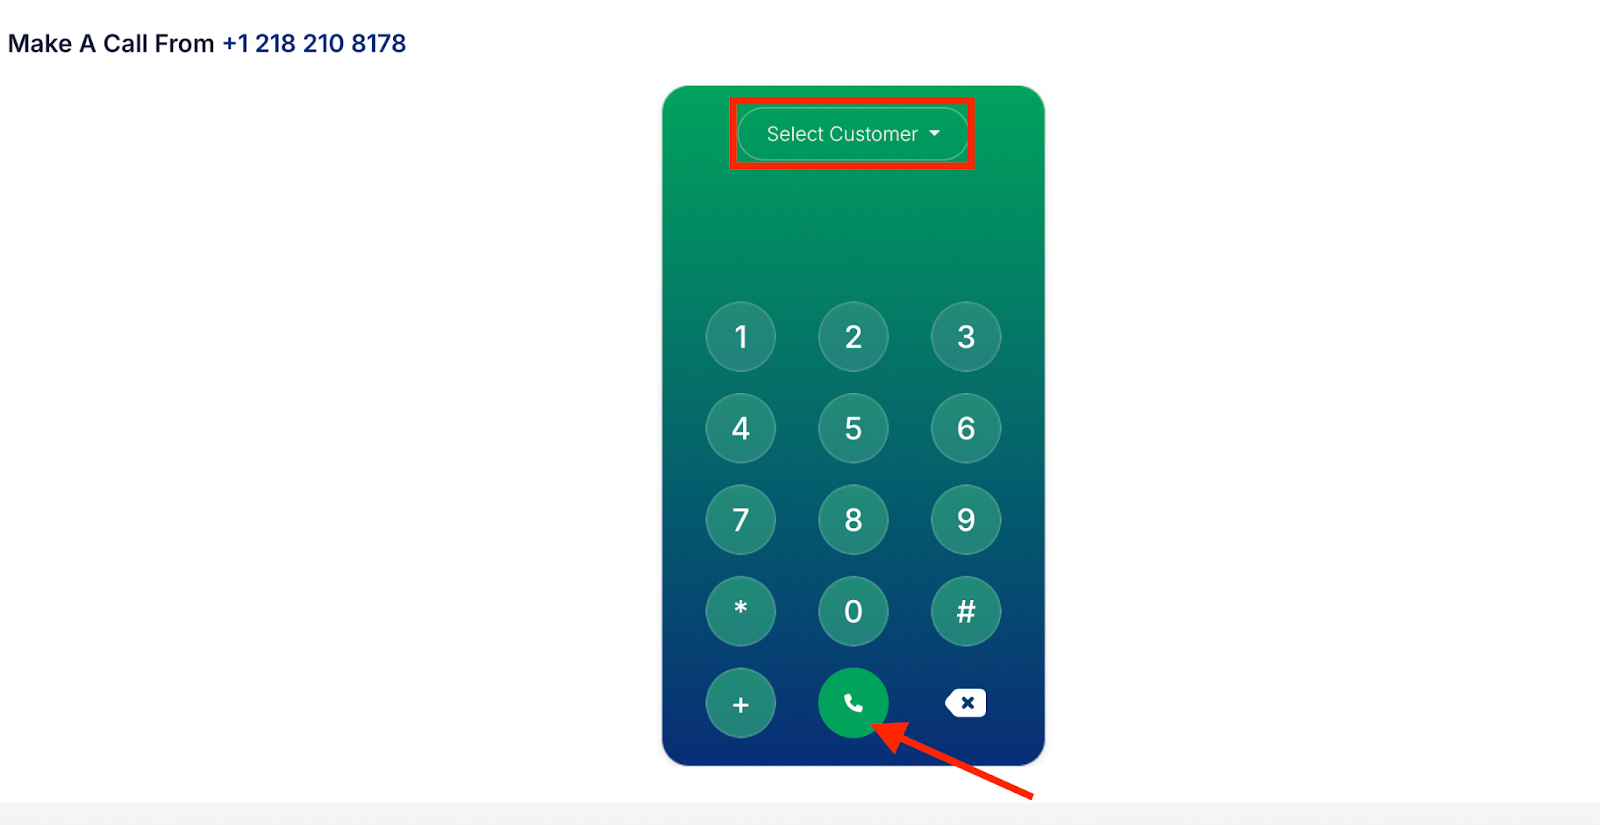
Step 2: Choose the customer from the dropdown above the dial pad, or manually enter the customer’s number using the dial pad. Then, click the Phone Call button to initiate the call.
Release a Number
This will remove the number from the platform directory and unassign it from your account.
Step 1: Click the three-dots menu next to the number you want to manage, and select Release from the dropdown list.
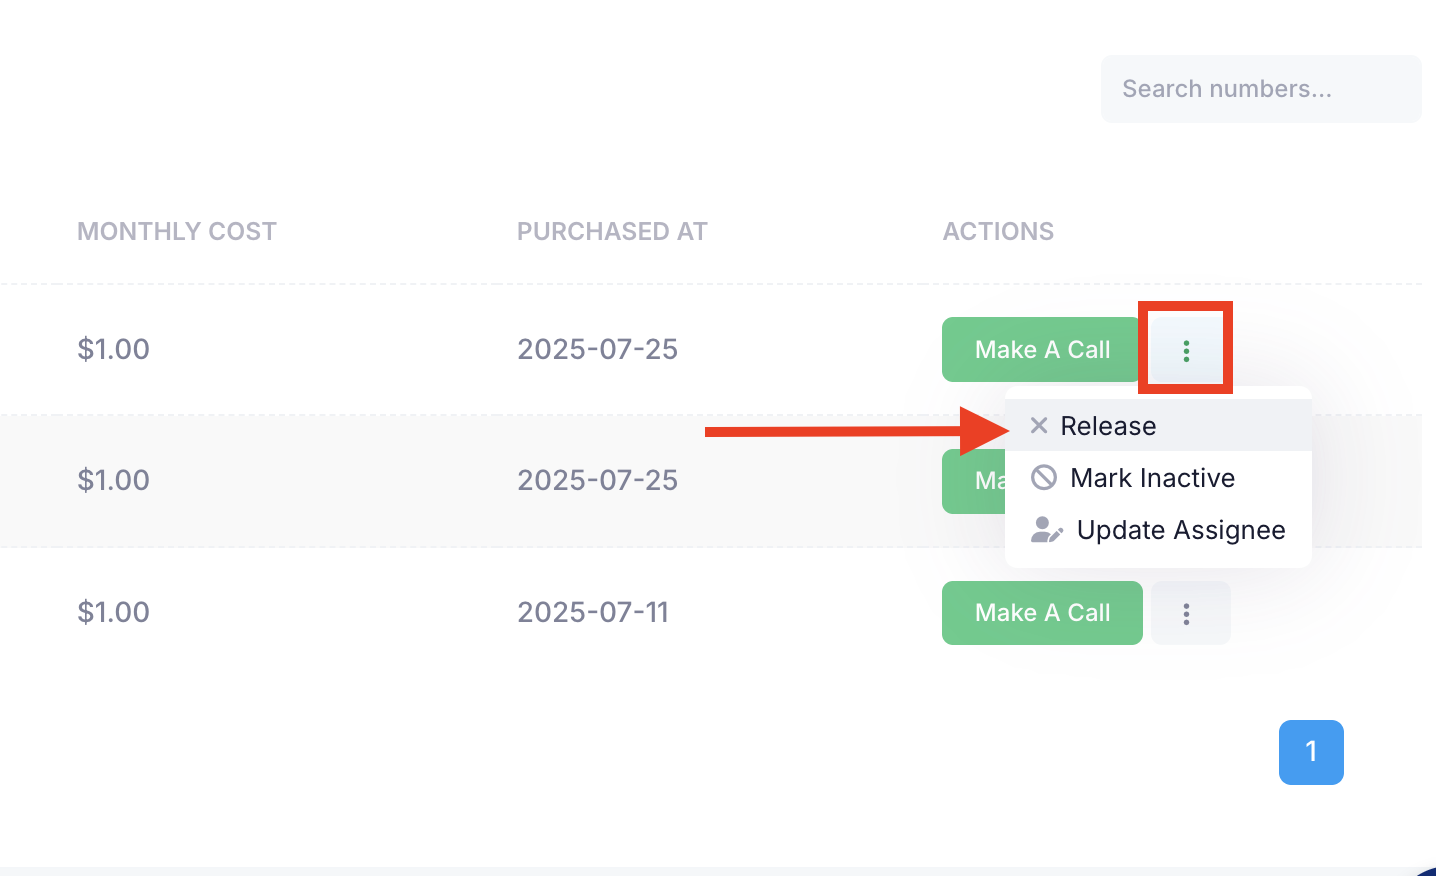
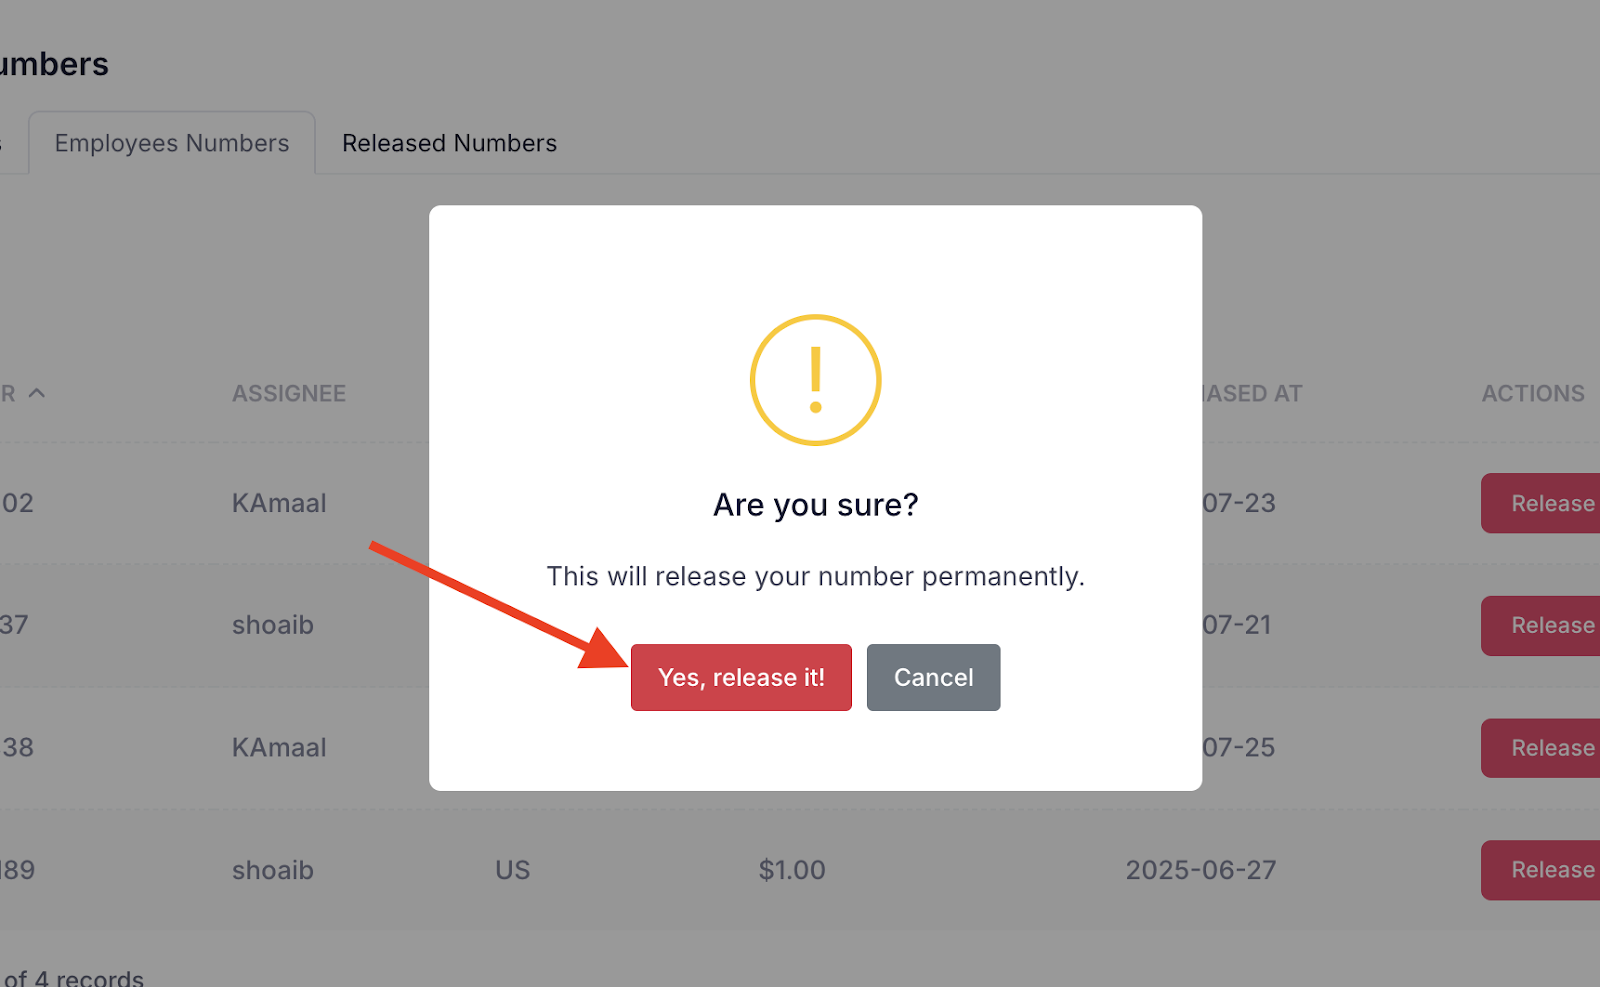
Step 2: A confirmation pop-up will appear. Click the Yes, release it! button to release the number from the system.
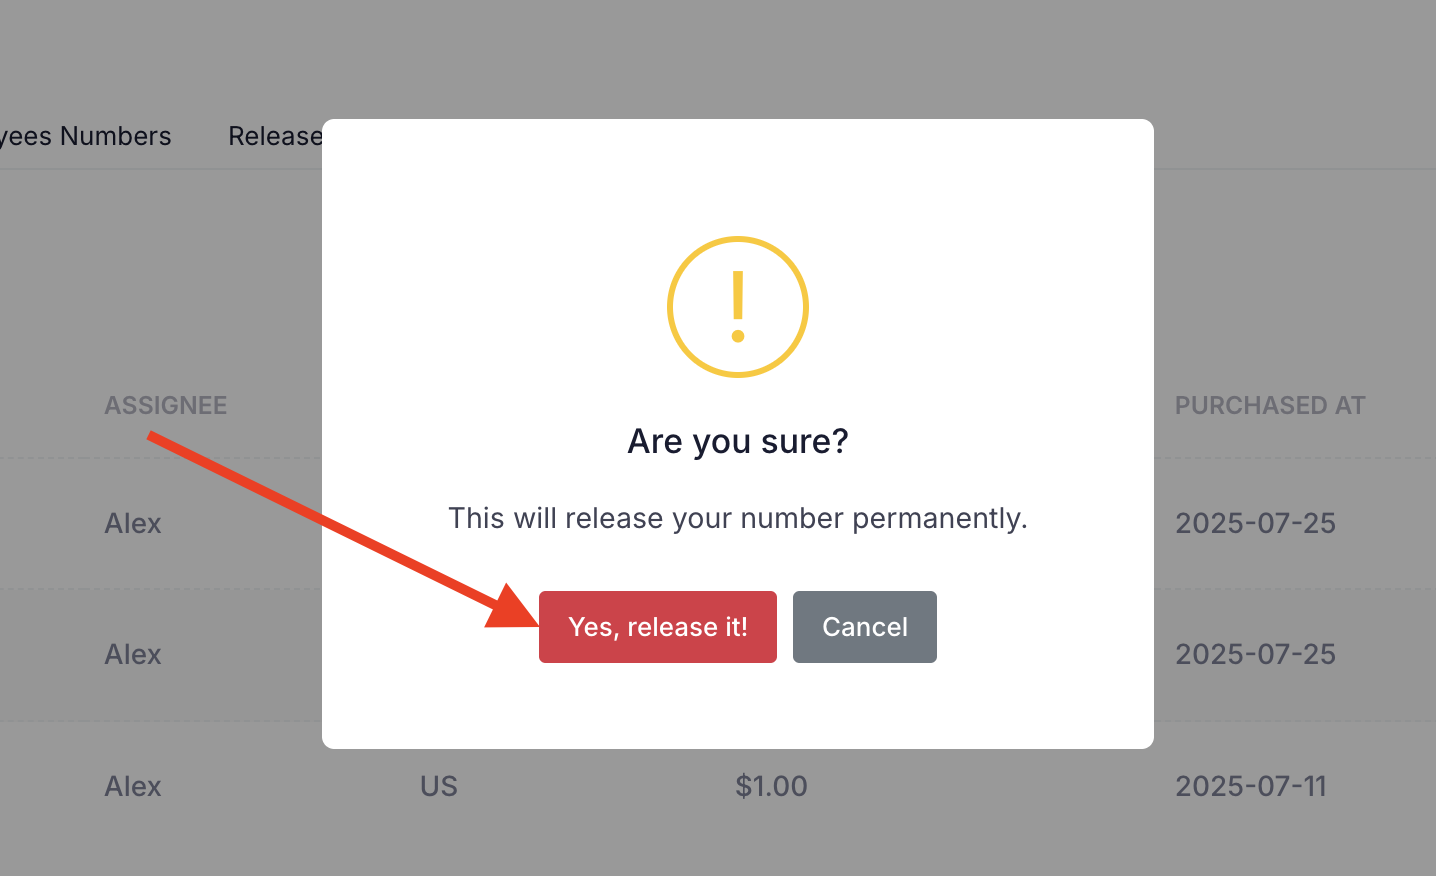
After releasing the number, it will be removed from the My Numbers screen and will no longer be available to make calls.
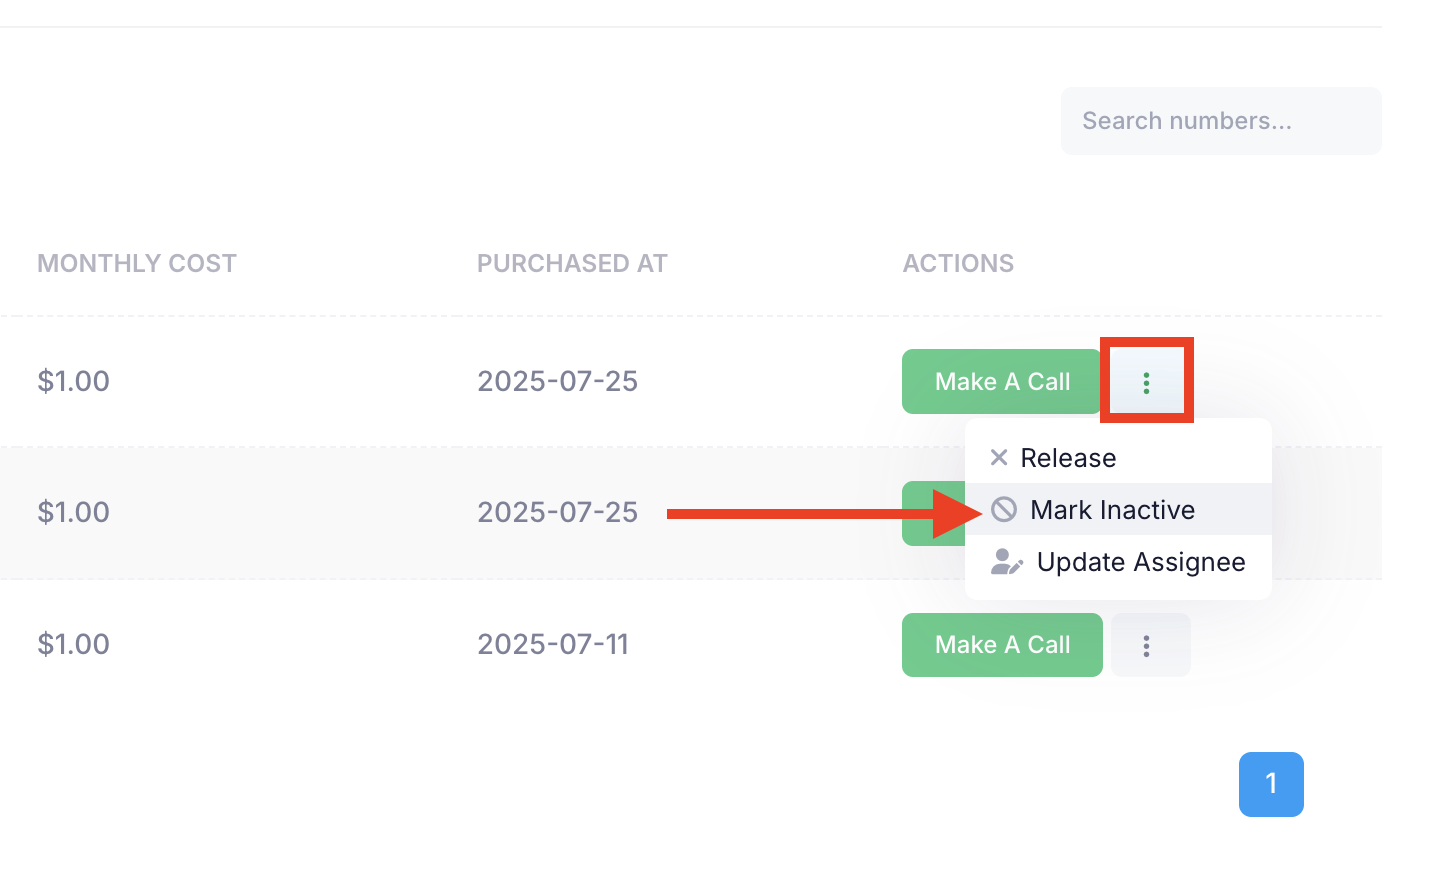
Mark Inactive
This action will change the number’s status to Inactive in the system, making it temporarily unavailable for use.
Step 1: Click the three-dots menu next to the number you want to manage, then select Mark Inactive from the dropdown list.
Step 2: A confirmation pop-up will appear. Click the Yes, update it! button to mark the number inactive in the system.

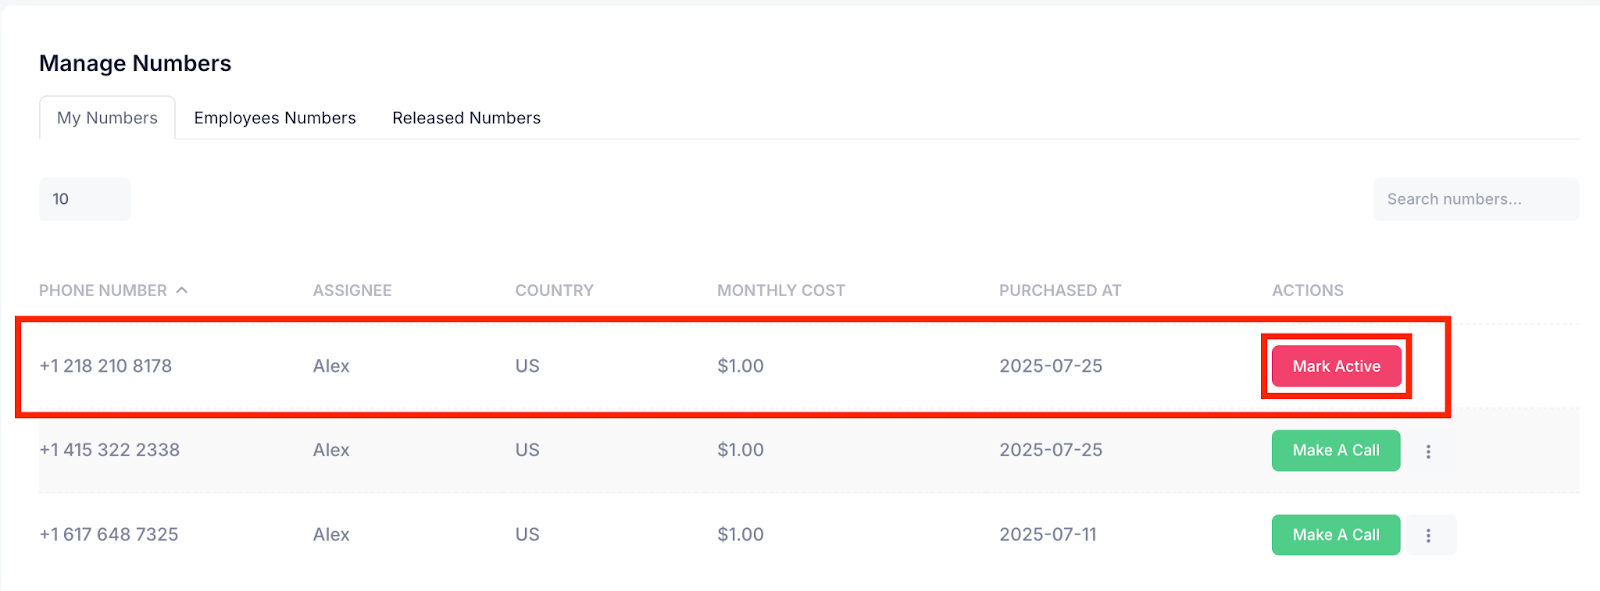
After marking the number as Inactive, its status will be updated accordingly in the My Numbers screen. A Mark Active button will appear next to the inactive number, allowing you to reactivate it whenever needed.
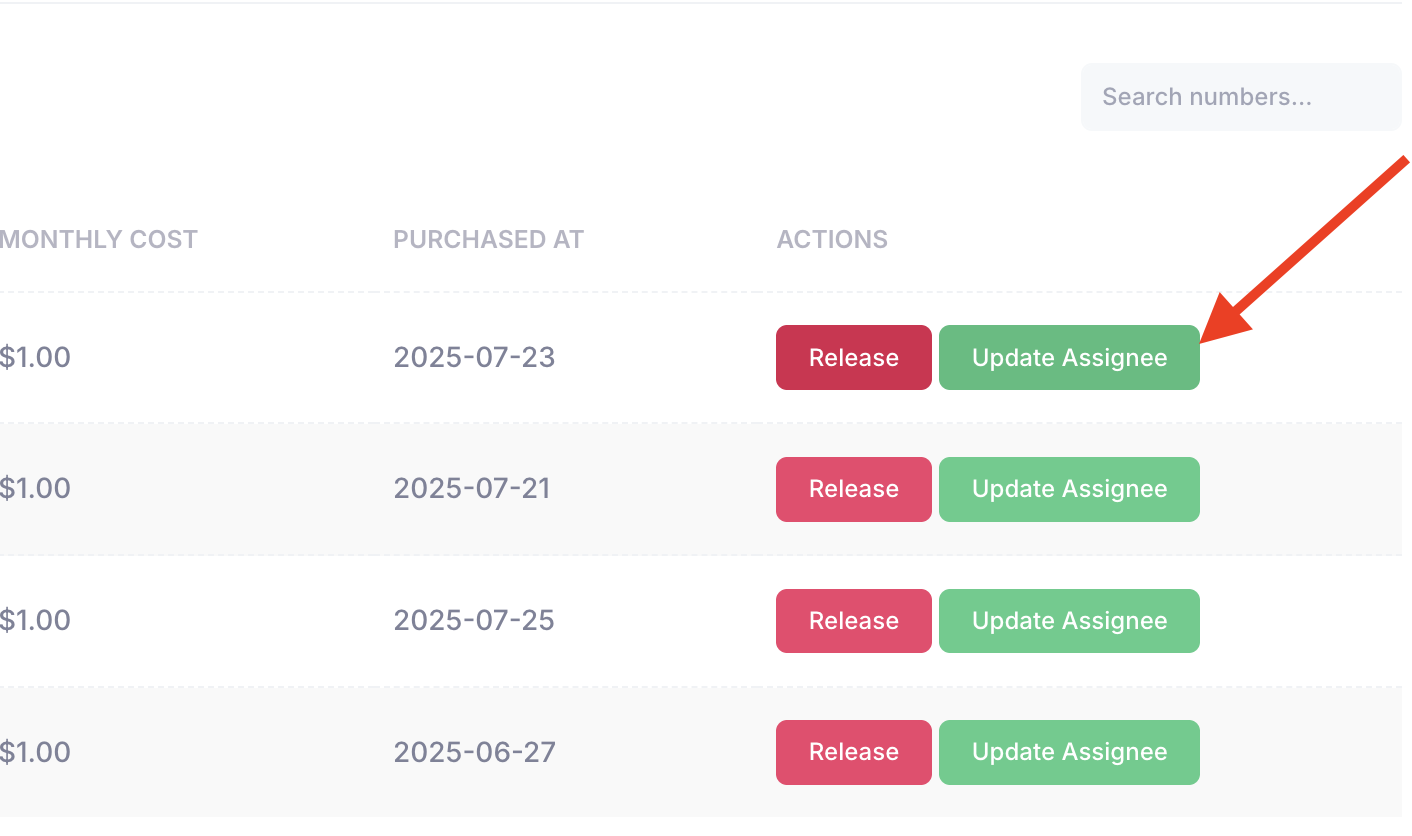
Update Assignee
This action allows you to reassign the number to a different employee, making it available for use by the newly selected user in the system.
Step 1: Click the three-dots menu next to the number you want to manage, then select Update Assignee from the dropdown list.
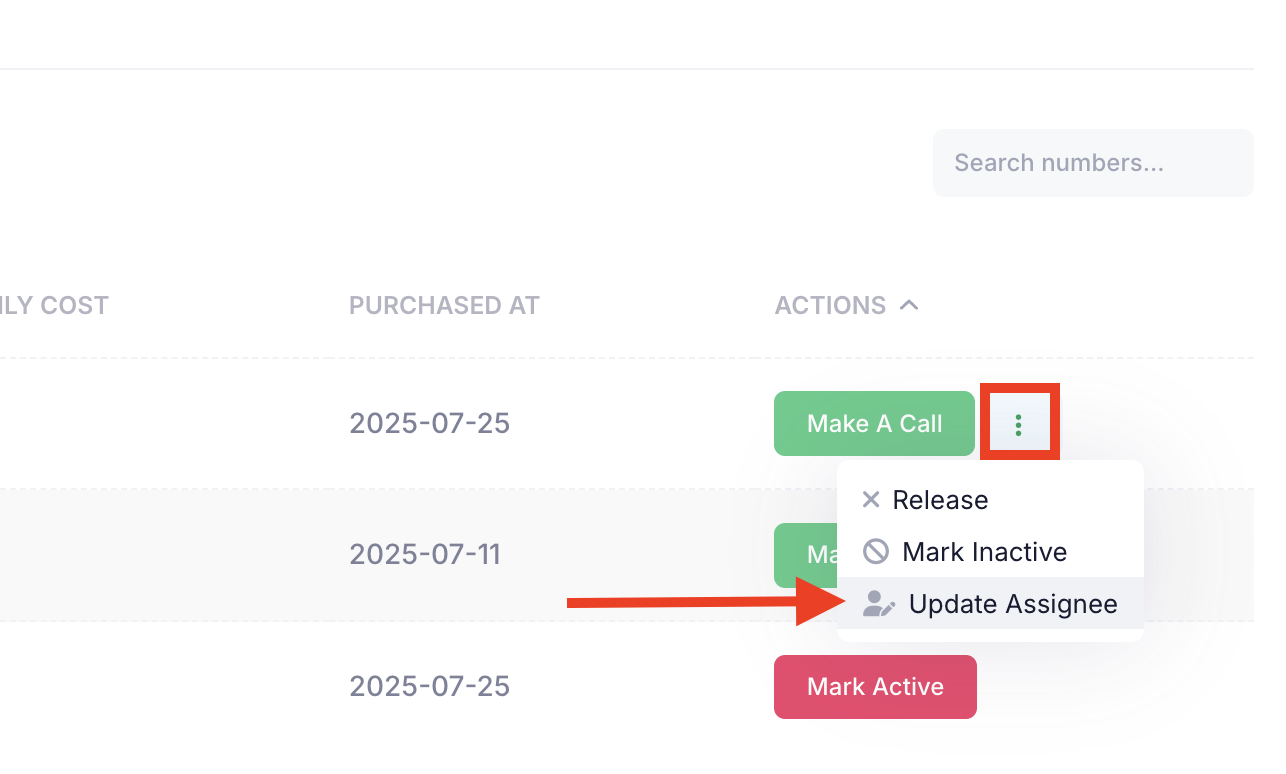
Step 2: After clicking on the Update Assignee option, a modal window will appear at the top of the screen, prompting you to re–assign the number to the appropriate employee.
Click the Update Assignee button to re-assign the employee to the number.

After updating the assigned number to another employee, the number will be removed from your My Numbers screen and will appear under the new assignee’s account, reflecting the updated assignment.
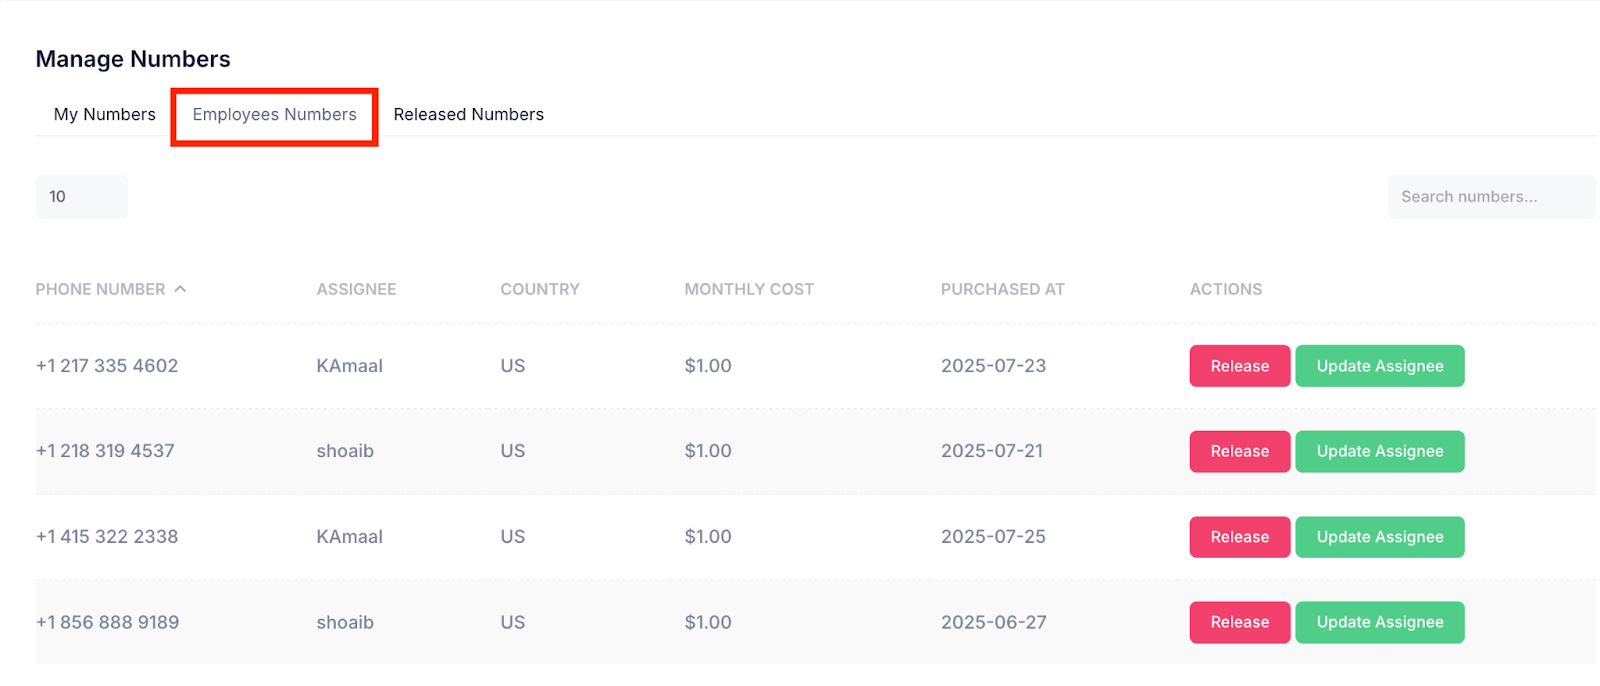
Manage Employees Numbers
The Employees’ Numbers section shows all phone numbers assigned to other employees in your organization. From this section, you can view assigned numbers details, release numbers, and update the assignee of the number.
Release the Number
Step 1: Select the Employees Numbers section from the tabs present at the Manage Numbers screen.
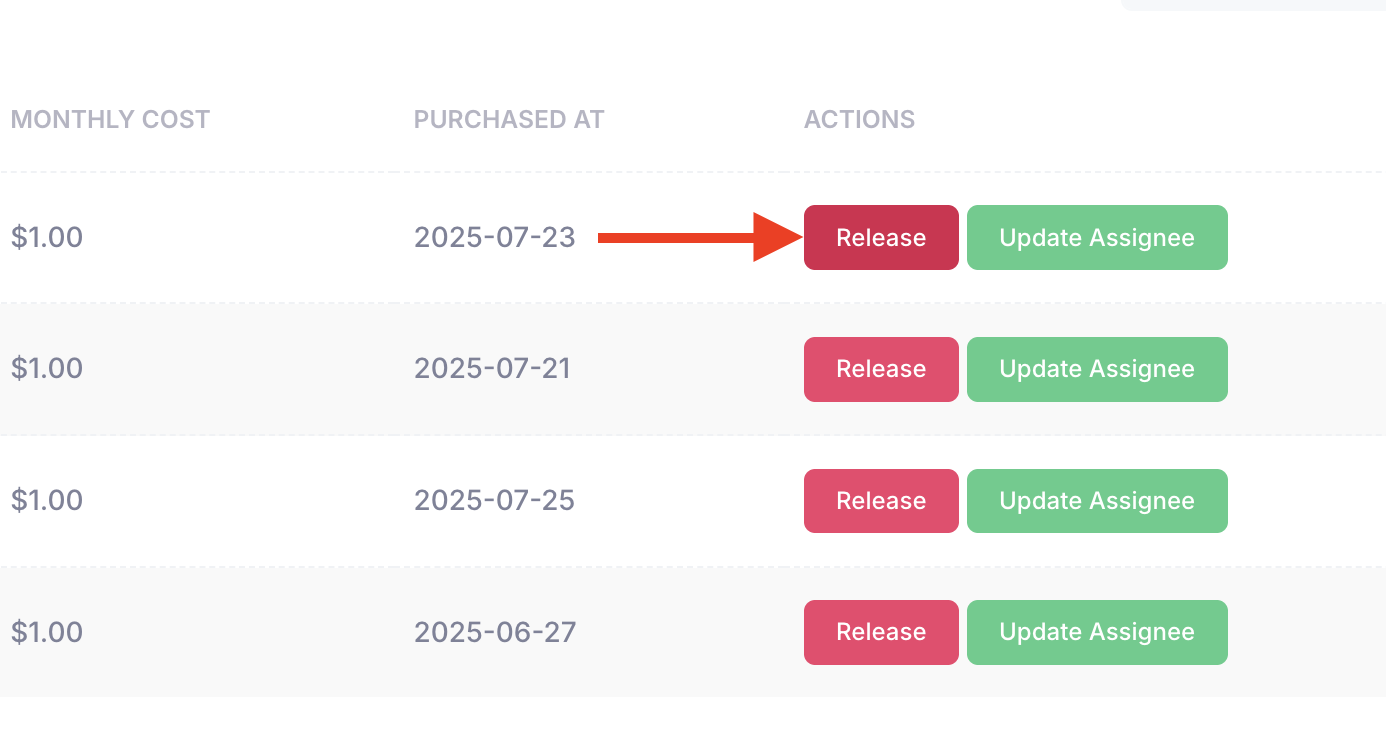
Step 2: Click the Release button to release the number. This will remove the number from the system
Step 2: A confirmation pop-up will appear. Click the Yes, release it! button to release the number from the system.
After releasing the number, it will be removed from the My Numbers screen and will no longer be available to make calls.
Update Assignee
Step 1: Click the Update Assignee button. This action allows you to reassign the number to a different employee, making it available for use by the newly selected user in the system.
Step 2: After clicking on the Update Assignee option, a modal window will appear at the top of the screen, prompting you to re–assign the number to the appropriate employee.
Click the Update Assignee button to re-assign the employee to the number.
After updating the assigned number to another employee, the assignee will be updated from the Employees Numbers screen.
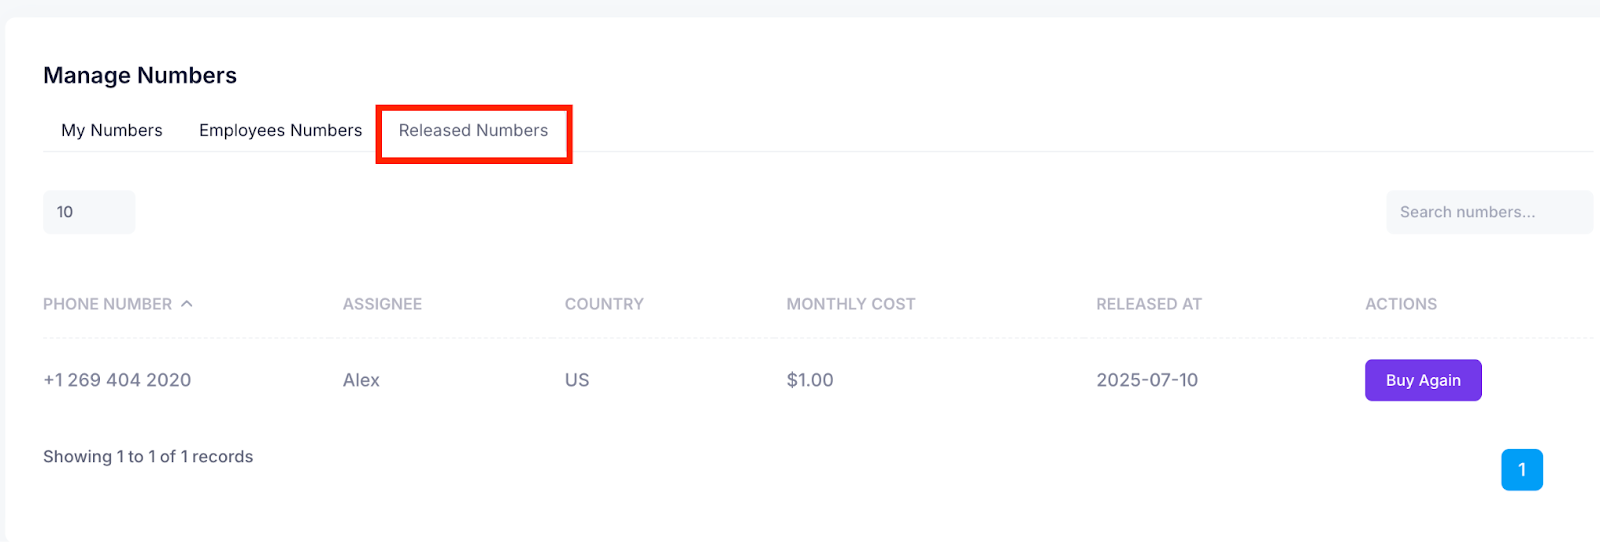
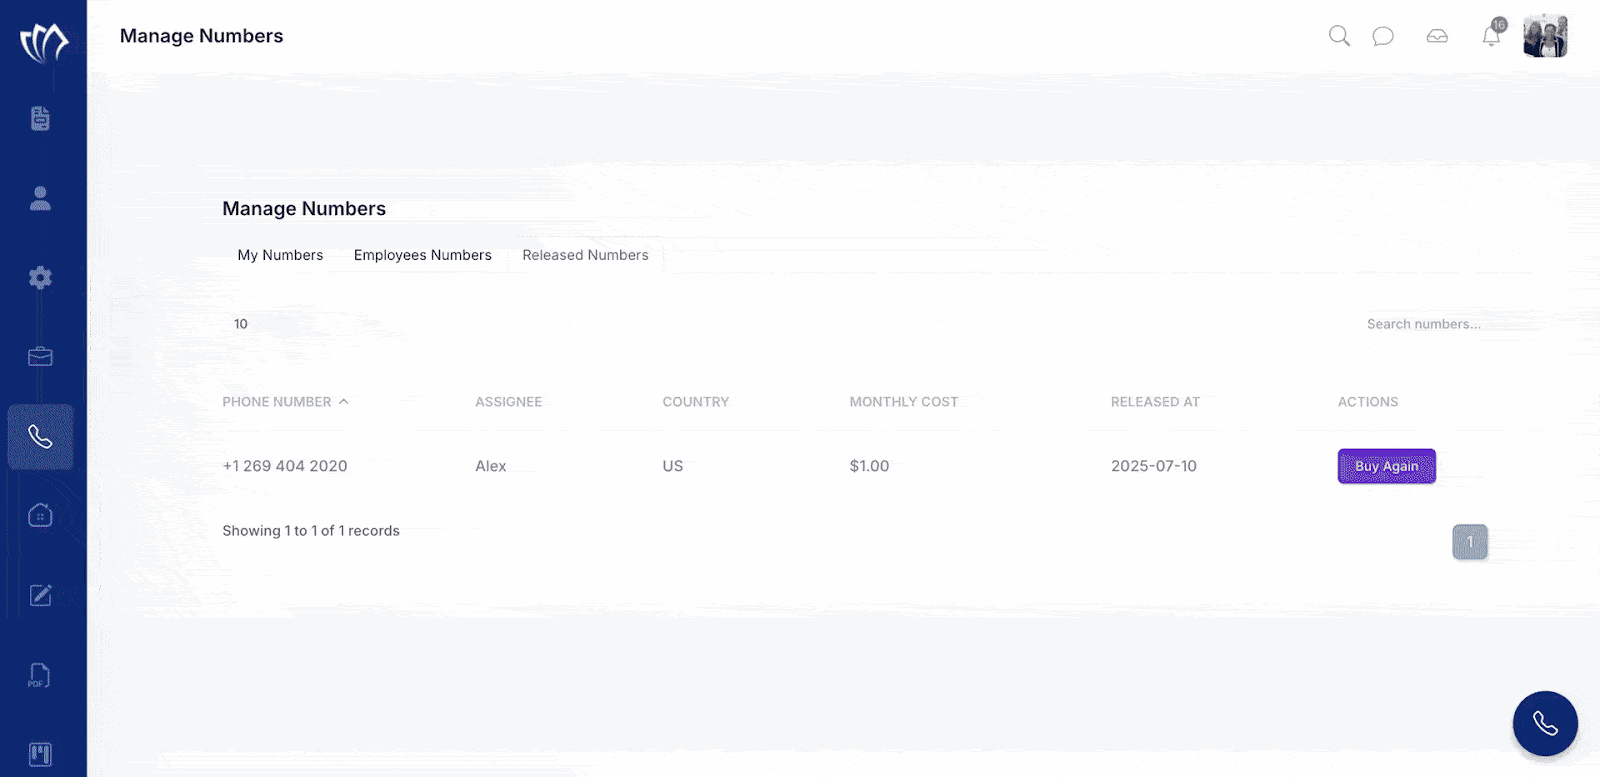
Buy Released Numbers Again
The Released Numbers section lists all phone numbers that have been previously released. From here, you can repurchase and reassign these numbers for future use within the organization.
Step 1: From the Manage Numbers screen, select the Released Numbers tab. This section displays all phone numbers that have been released and are no longer assigned to any employee.
Step 2: A list of all released numbers will appear on the screen. To repurchase a number, click the Buy Again button next to the desired number.
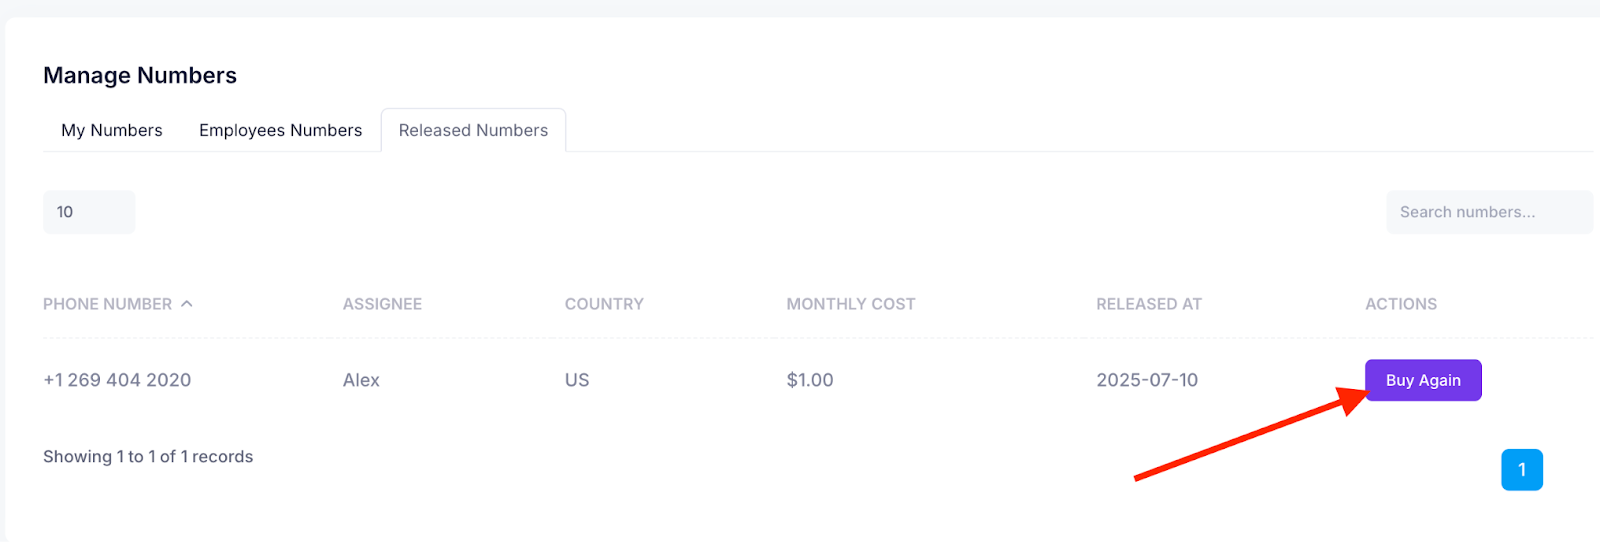
Step 3: A modal window will appear at the top of the screen, prompting you to assign the purchased number to the appropriate employee. Select the employee from the list to complete the assignment.
Click the Purchase & Assign button to proceed. This will purchase the selected number and assign it to the chosen employee.
After purchasing the numbers, you can view them in the Employees Numbers section.