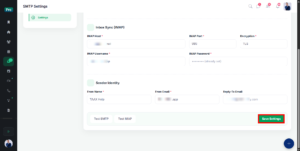
The SMTP Settings feature in TAAX Pro allows you to integrate your custom business email domain directly with the platform. By configuring both incoming (IMAP) and outgoing (SMTP) mail protocols, you enable two-way email synchronization. This ensures that you can receive client messages directly in your TAAX Pro Inbox and dispatch outbound communications, tax updates, and replies using your verified business domain identity.
Properly establishing your email server configuration ensures message deliverability, protects domain reputation with security encryption, and maintains consistent company branding across all client interactions.
Access SMTP Settings
Step 1: Log in to your TAAX Pro portal and navigate to your email configuration settings using either of the following methods:
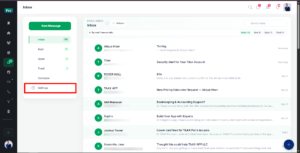
- From the Mailbox Folder Panel (Direct Click): While inside your mailbox, click the Settings button (gear icon) located at the bottom of the left mailbox card.
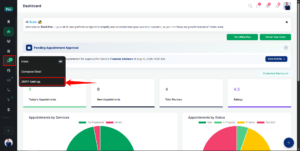
- From the Main Sidebar (Hover Flyout): Hover your cursor over the Inbox menu on the main left sidebar under the CORE section and click SMTP Settings from the flyout menu.
Step 2: The SMTP Settings configuration page will open, where you can set up Outgoing Mail (SMTP), Inbox Sync (IMAP), and your Sender Identity.
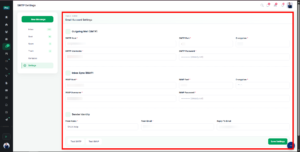
Note: The page itself is titled Email Account Settings, while the sidebar and flyout menu label it SMTP Settings — both refer to the same configuration screen.
Configure Outgoing Mail (SMTP)
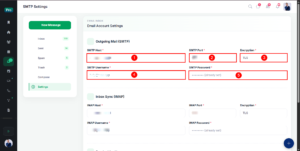
The Outgoing Mail (SMTP) configuration controls how messages and replies are dispatched from TAAX Pro through your mail provider. Provide the required details in the fields below:
| SR. NO. | Field | Description |
|---|---|---|
| 1 | SMTP Host | Enter your email provider’s outgoing SMTP server hostname (e.g., smtp.titan.email, smtp.gmail.com, or smtp.office365.com). |
| 2 | SMTP Port | Enter the outgoing port number designated by your provider (commonly 465 for SSL/TLS or 587 for STARTTLS). |
| 3 | Encryption | Specify the security encryption protocol used by your outgoing server (e.g., TLS or SSL). |
| 4 | SMTP Username | Enter the full email address used to authenticate with your outgoing mail server (e.g., help@taax.app). |
| 5 | SMTP Password | Enter the account password or app-specific password generated by your email host for third-party application access. |
Note: If a password has already been configured, this field displays (already set) instead of the actual value. Leave it unchanged to keep the existing password, or enter a new value to replace it.
Configure Inbox Sync (IMAP)
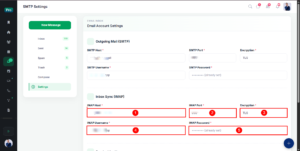
The Inbox Sync (IMAP) configuration allows TAAX Pro to fetch and display incoming emails inside your platform Inbox folder. Enter the following server details:
| SR. NO. | Field | Description |
|---|---|---|
| 1 | IMAP Host | Enter your email provider’s incoming IMAP server address (e.g., imap.titan.email, imap.gmail.com, or outlook.office365.com). |
| 2 | IMAP Port | Enter the incoming mail port specified by your email host (commonly 993 for secure IMAP connections). |
| 3 | Encryption | Specify the encryption method required by your incoming server (e.g., TLS or SSL). |
| 4 | IMAP Username | Enter the account username or primary email address used to access incoming mail (e.g., help@taax.app). |
| 5 | IMAP Password | Enter the account password or app-specific password used to authorize incoming message retrieval. |
Note: As with the SMTP Password field, this field displays (already set) if a password has already been configured. Leave it unchanged to keep the existing password, or enter a new value to replace it.
Configure Sender Identity
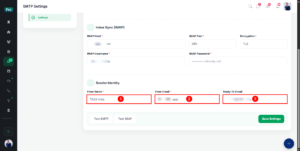
The Sender Identity parameters determine the branding and contact details displayed to clients when they receive your messages or click reply:
| SR. No. | Field | Description |
|---|---|---|
| 1 | From Name | Enter the business name, company title, or personal name you want recipients to see in their inbox header (e.g., TAAX Help). |
| 2 | From Email | Enter the verified email address that should appear as the official sender (e.g., help@taax.app). |
| 3 | Reply-To Email | Enter an alternate email address where customer replies should be directed if different from the From Email (e.g., support@company.com). |
Test SMTP and IMAP
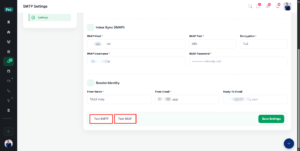
Before saving your configuration, use these buttons to confirm your server credentials connect properly with your host:
| Button | Description |
|---|---|
| Test SMTP | Sends a test handshake to confirm that outbound messages can be dispatched without errors. |
| Test IMAP | Verifies that incoming inbox synchronization connects successfully. |
Save Settings
Once both tests confirm a successful connection, click the green Save Settings button at the bottom-right corner of the page to apply and store your configuration.