Managing your subscription controls your billing, plan usage, and access to features. Whether you’re using a trial or a paid plan, it’s important to know when your subscription renews, the services you’re being billed for, and how to switch plans if your needs change.
If you need to scale your operations or reduce costs, updating the subscription settings makes those adjustments instantly. It avoids service interruptions caused by failed payments or expired billing methods. Keeping the Subscription updated ensures smooth access to TAAX features without unexpected issues.
Follow the step-by-step guide below to manage your subscription on the TAAX Pro platform.
Step 1: Navigate and click on your profile from the top-right corner of the interface, and select the “Subscription” option from the drop-down list.

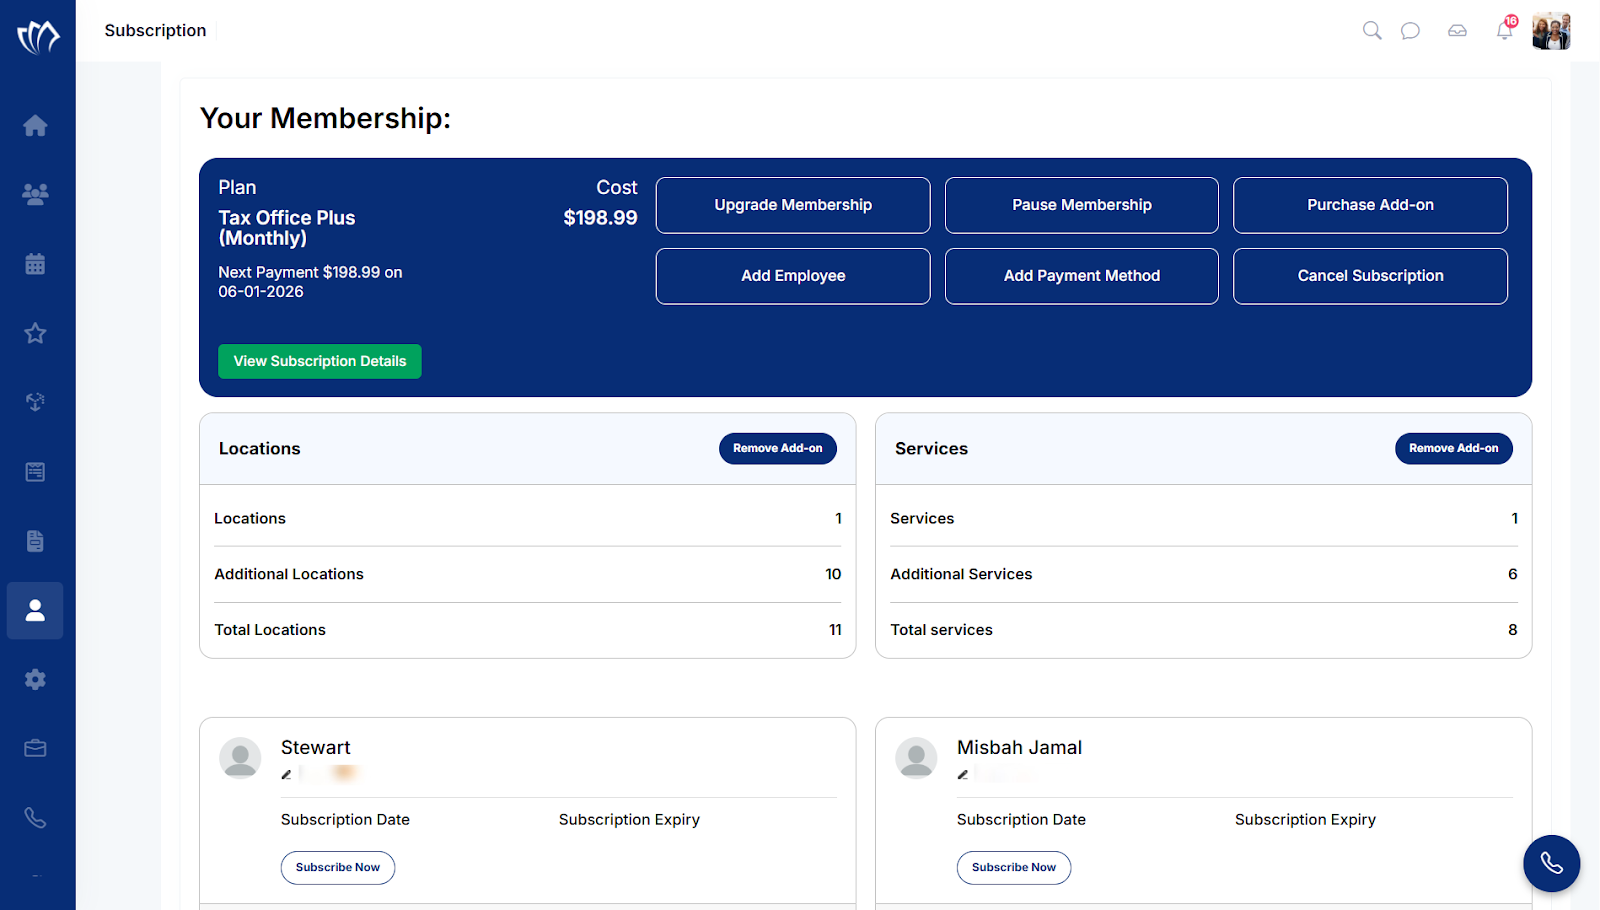
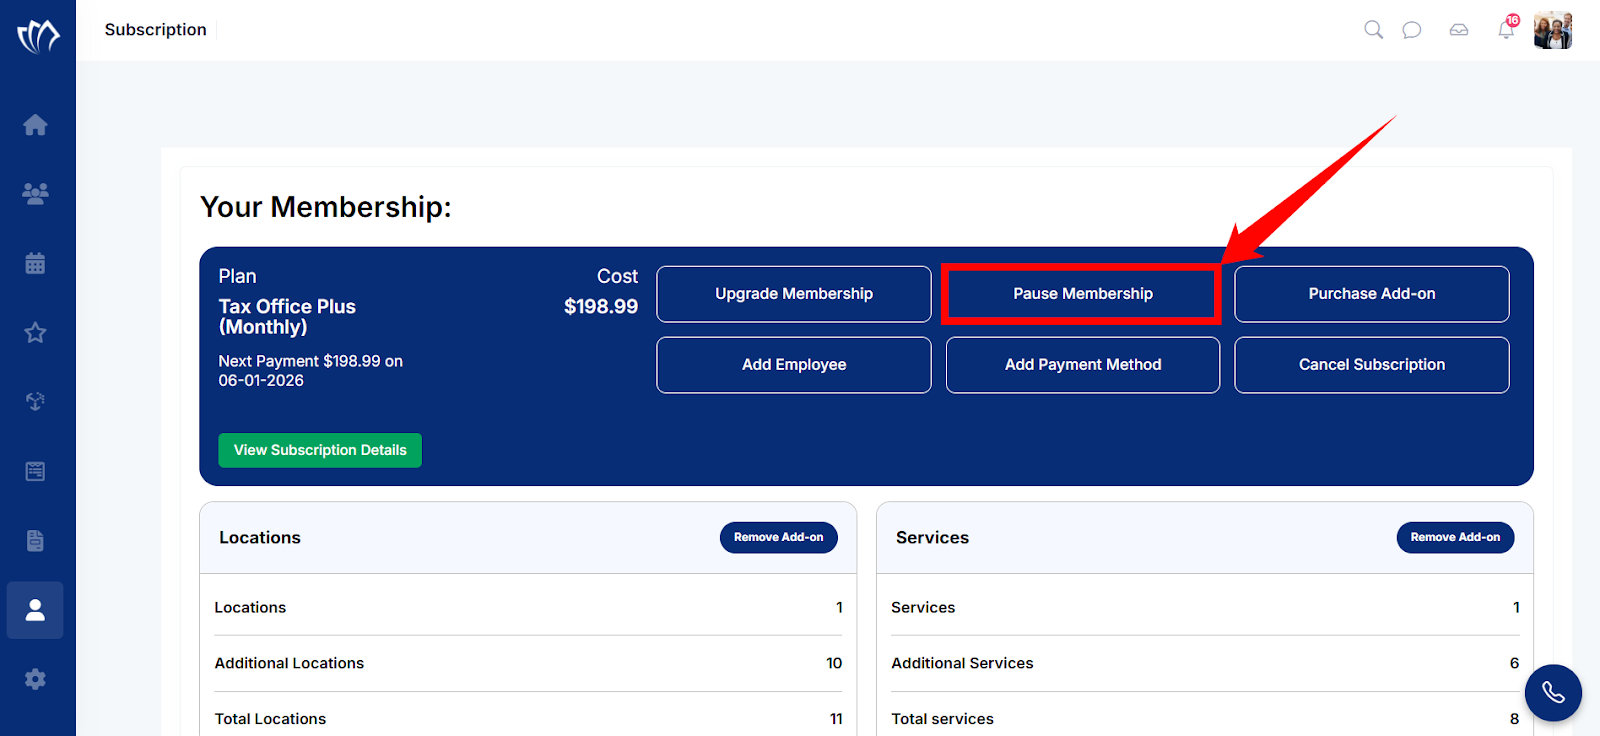
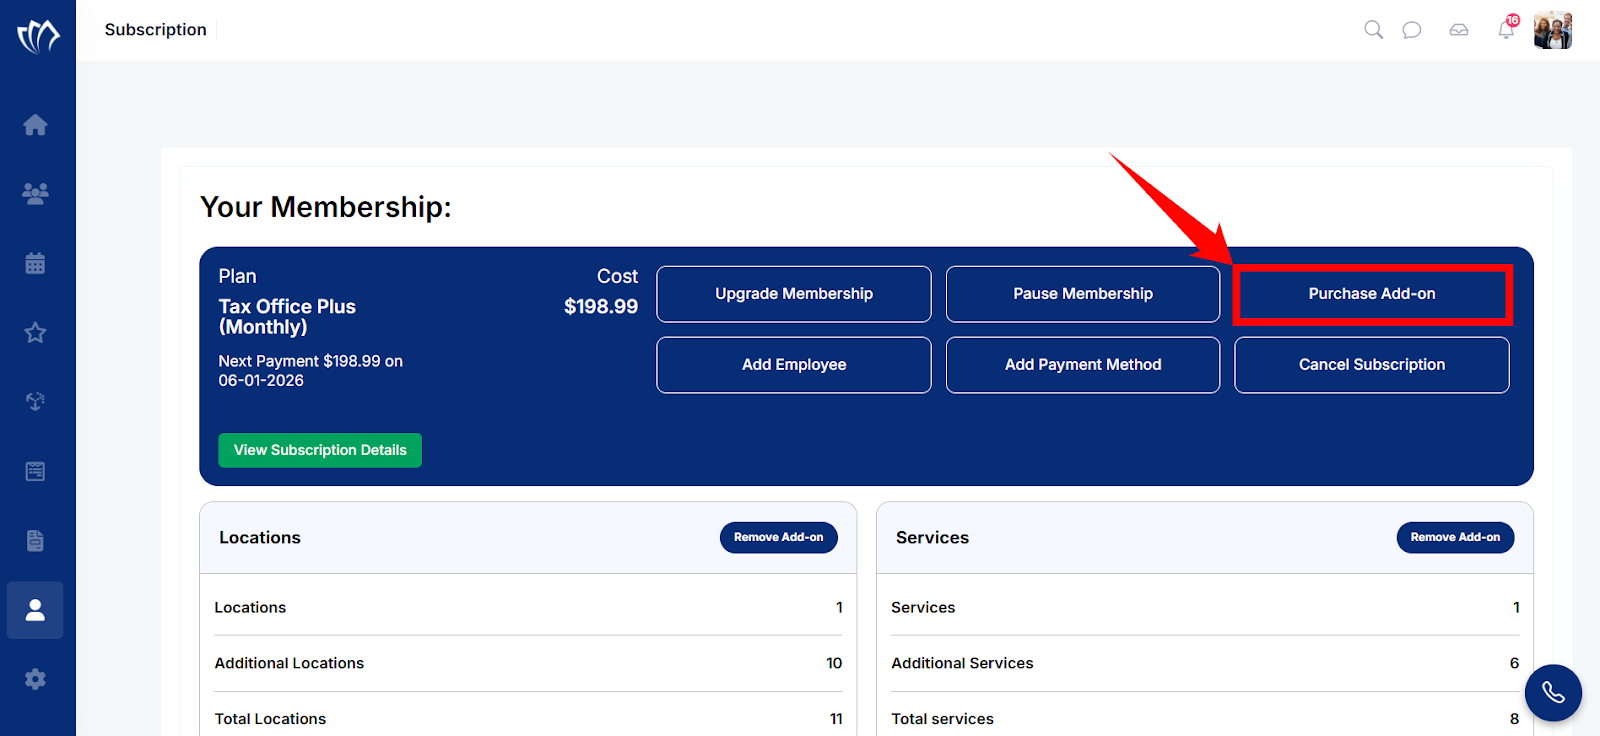
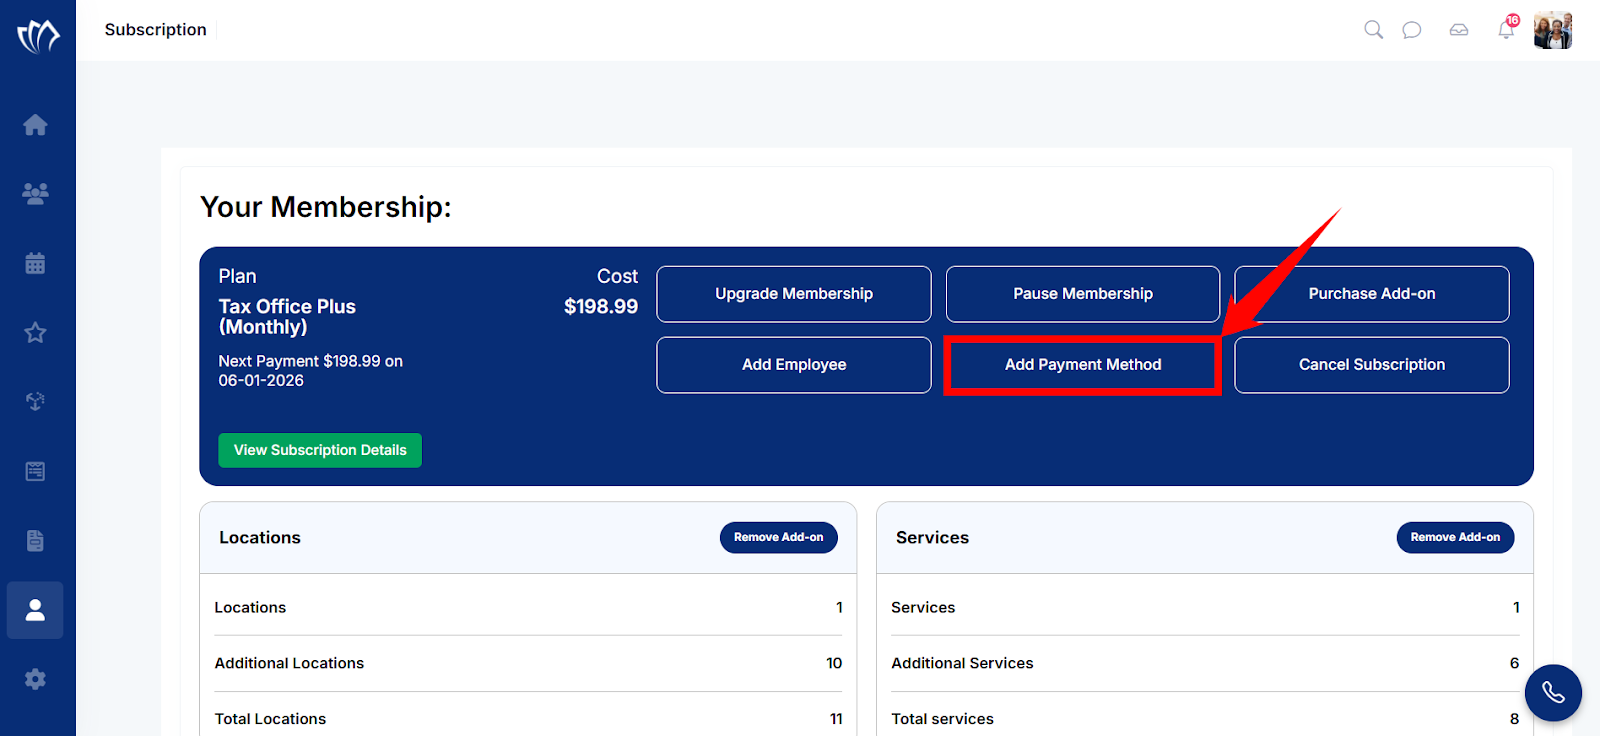
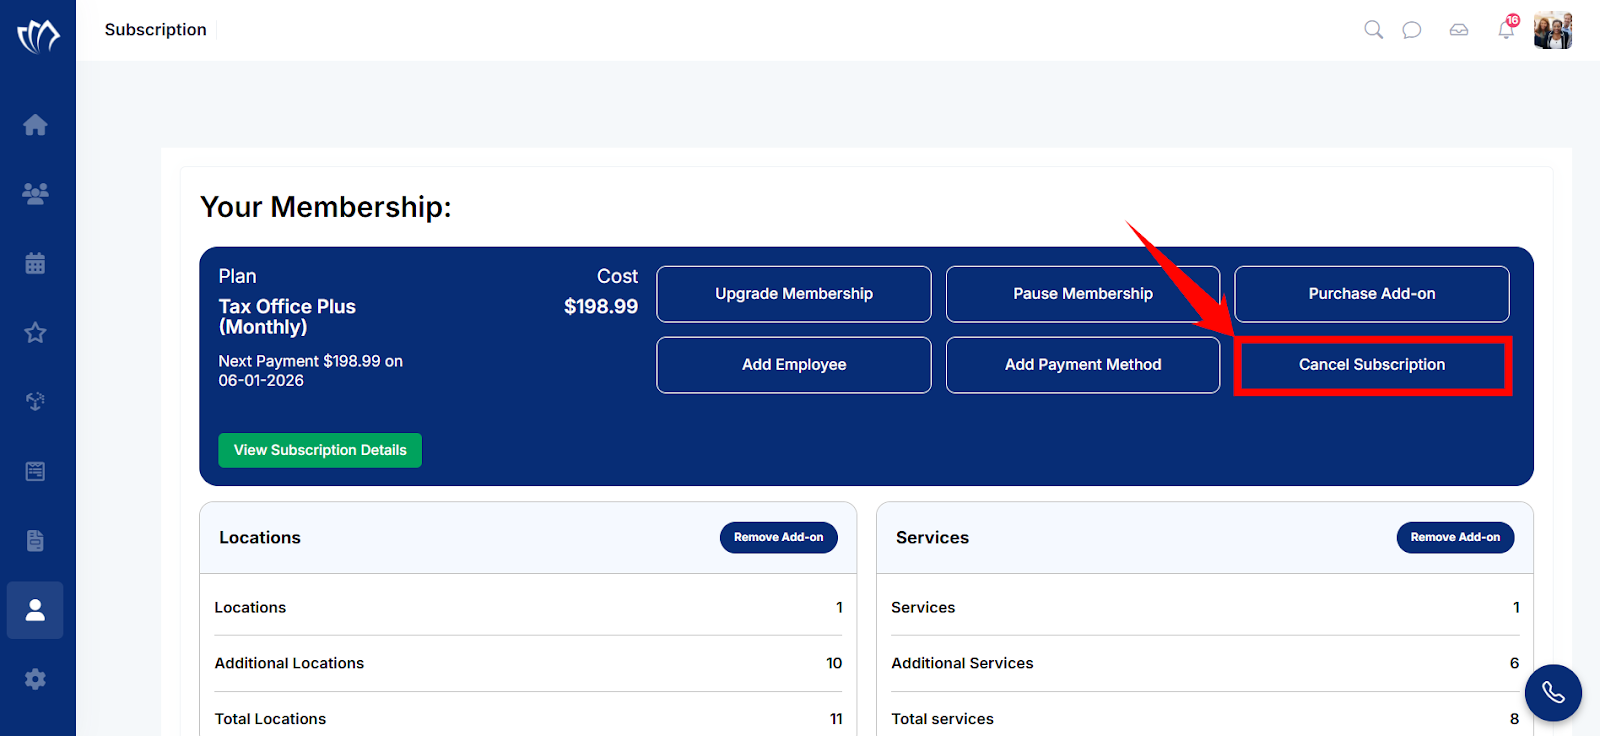
Step 2: A Membership screen will appear. Here, you can upgrade membership, pause membership, purchase add-ons, add employees, add a payment method, and cancel your subscription.
Upgrade Membership
Upgrading your subscription gives you access to more tools, advanced modules, and higher usage limits to grow teams or expand services. When your current plan no longer fits your workflow, switching to a higher tier avoids restrictions and keeps you productive.
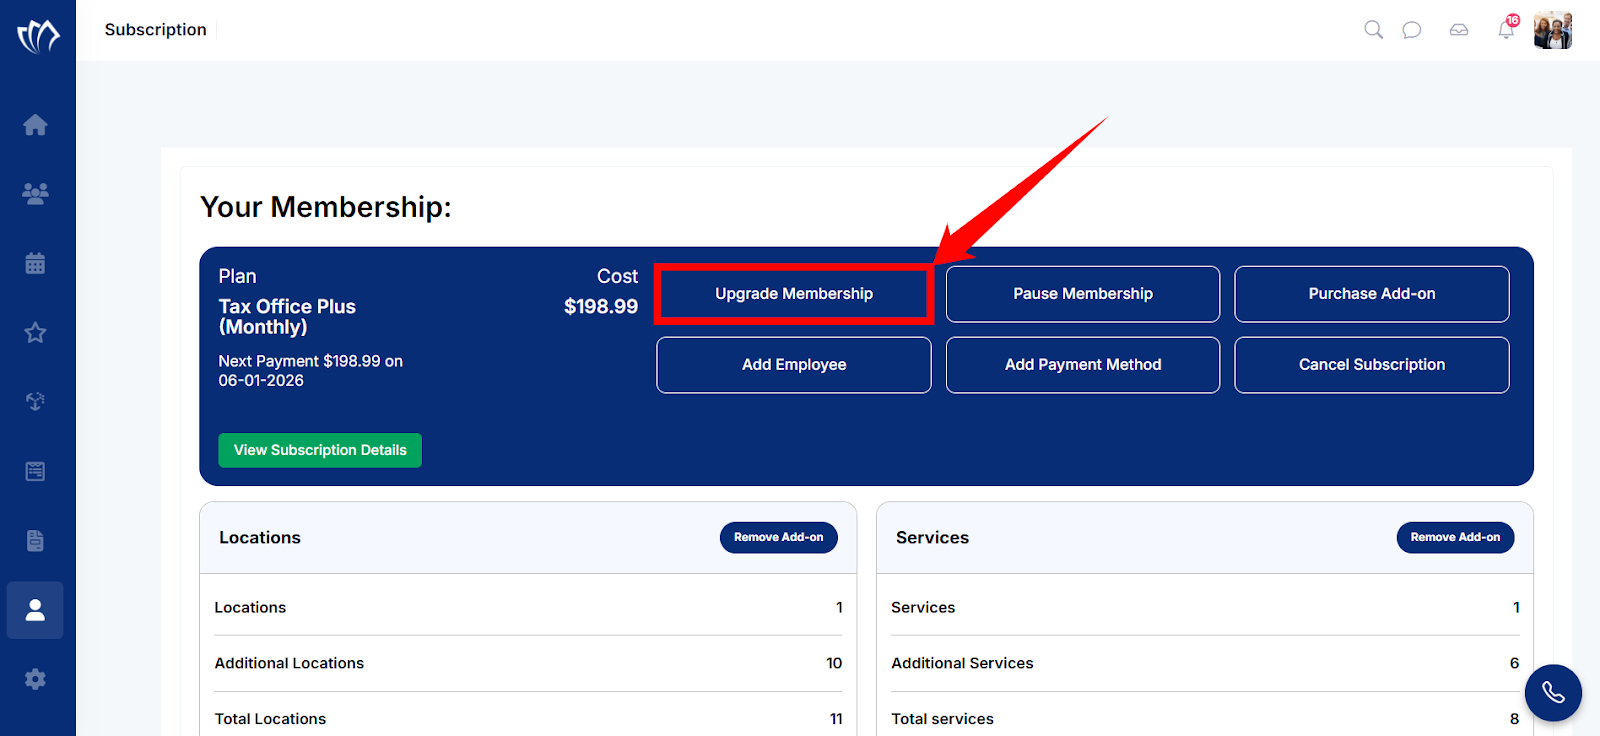
Step 1: Click on the “Upgrade Membership” button in the “Your Membership:” modal.
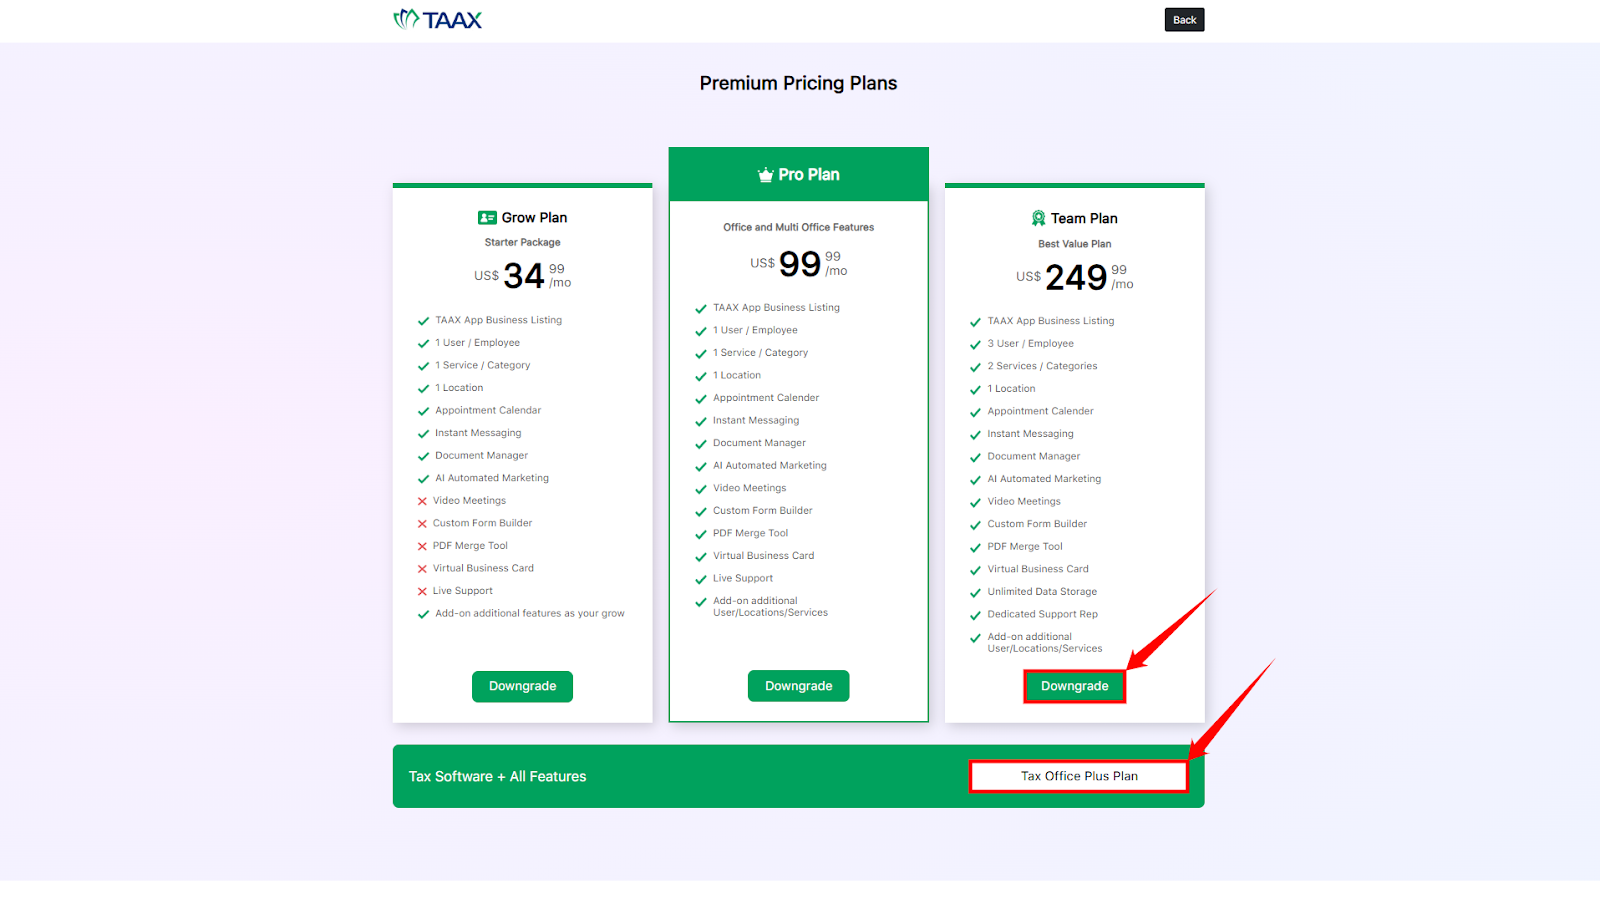
Step 2: A new screen will appear with different Premium Pricing Plans.
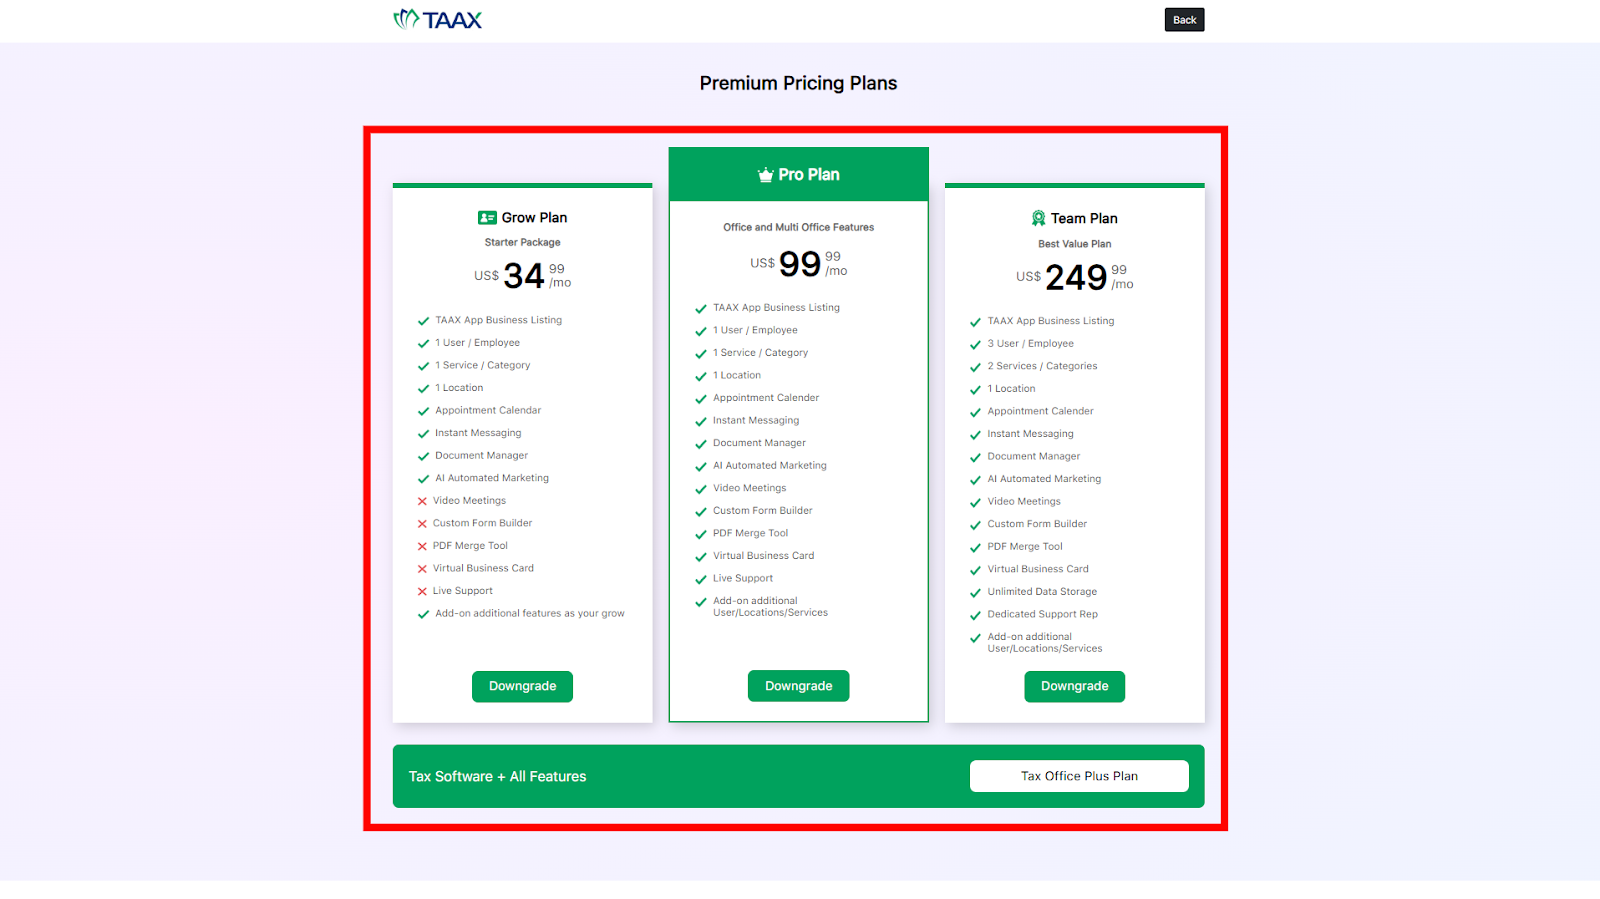
Step 3: You can either downgrade the plan by clicking on the “Downgrade” button under a plan. But if you want to upgrade the plan, you can choose an appropriate plan to upgrade.
Pause Membership
Pausing your subscription temporarily stops the subscription services when you are not using the platform. You don’t want to lose your data or settings by doing so. It prevents billing during the inactive period while keeping everything ready for when you resume.
Step 1: Click on the “Pause Membership” button in the “Your Membership:” modal.
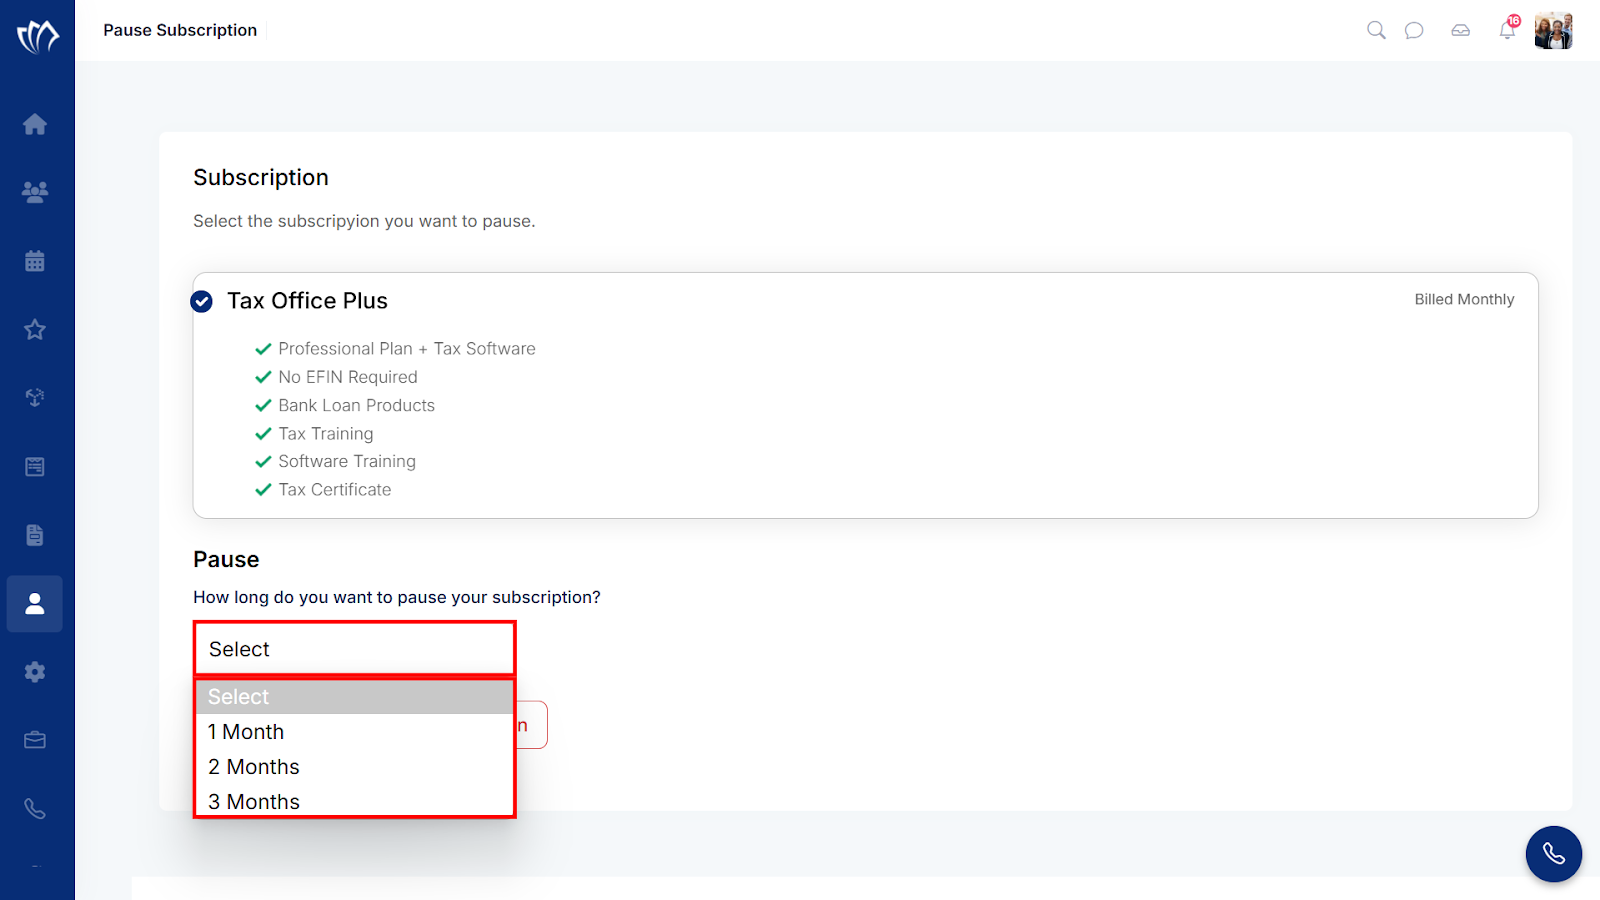
Step 2: A new screen will open. Click on the Pause dropdown to select the duration for how long you want to pause the subscription
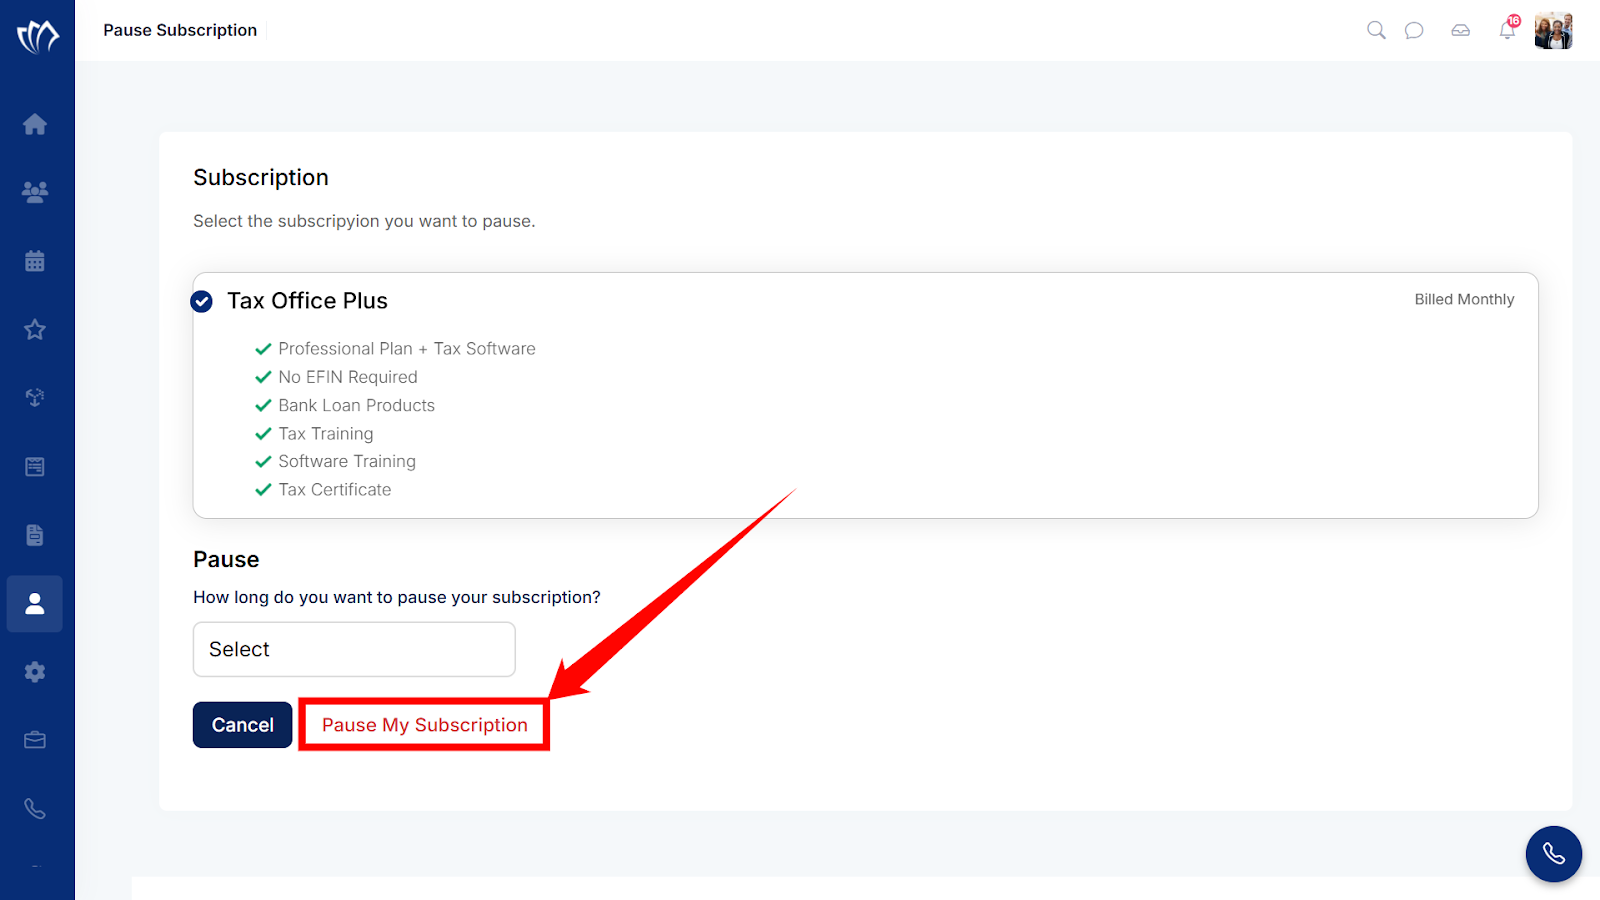
Step 3: Click on the “Pause My Subscription” button.
Purchase Add-Ons
Purchasing an add-on expands your current subscription with specific features that match your workflow needs. This is useful when your base plan is active, but you need access to tools like extra storage, additional users, or premium modules. It keeps your setup flexible without switching your entire subscription.
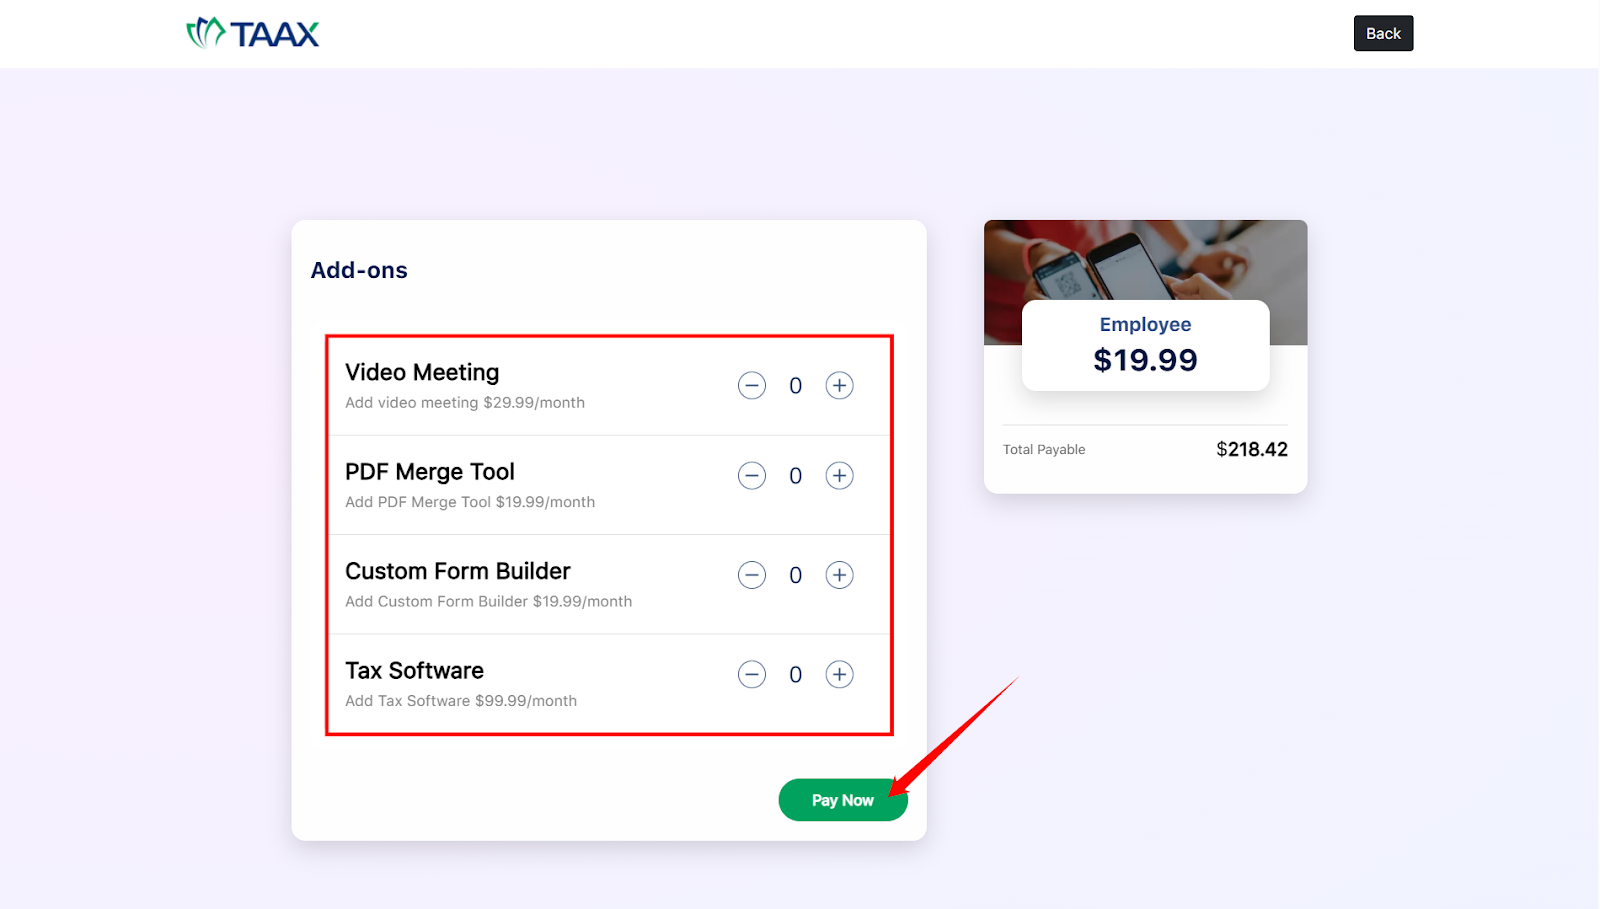
Step 1: Click on the “Purchase Add-Ons” button in the “Your Membership:” modal.
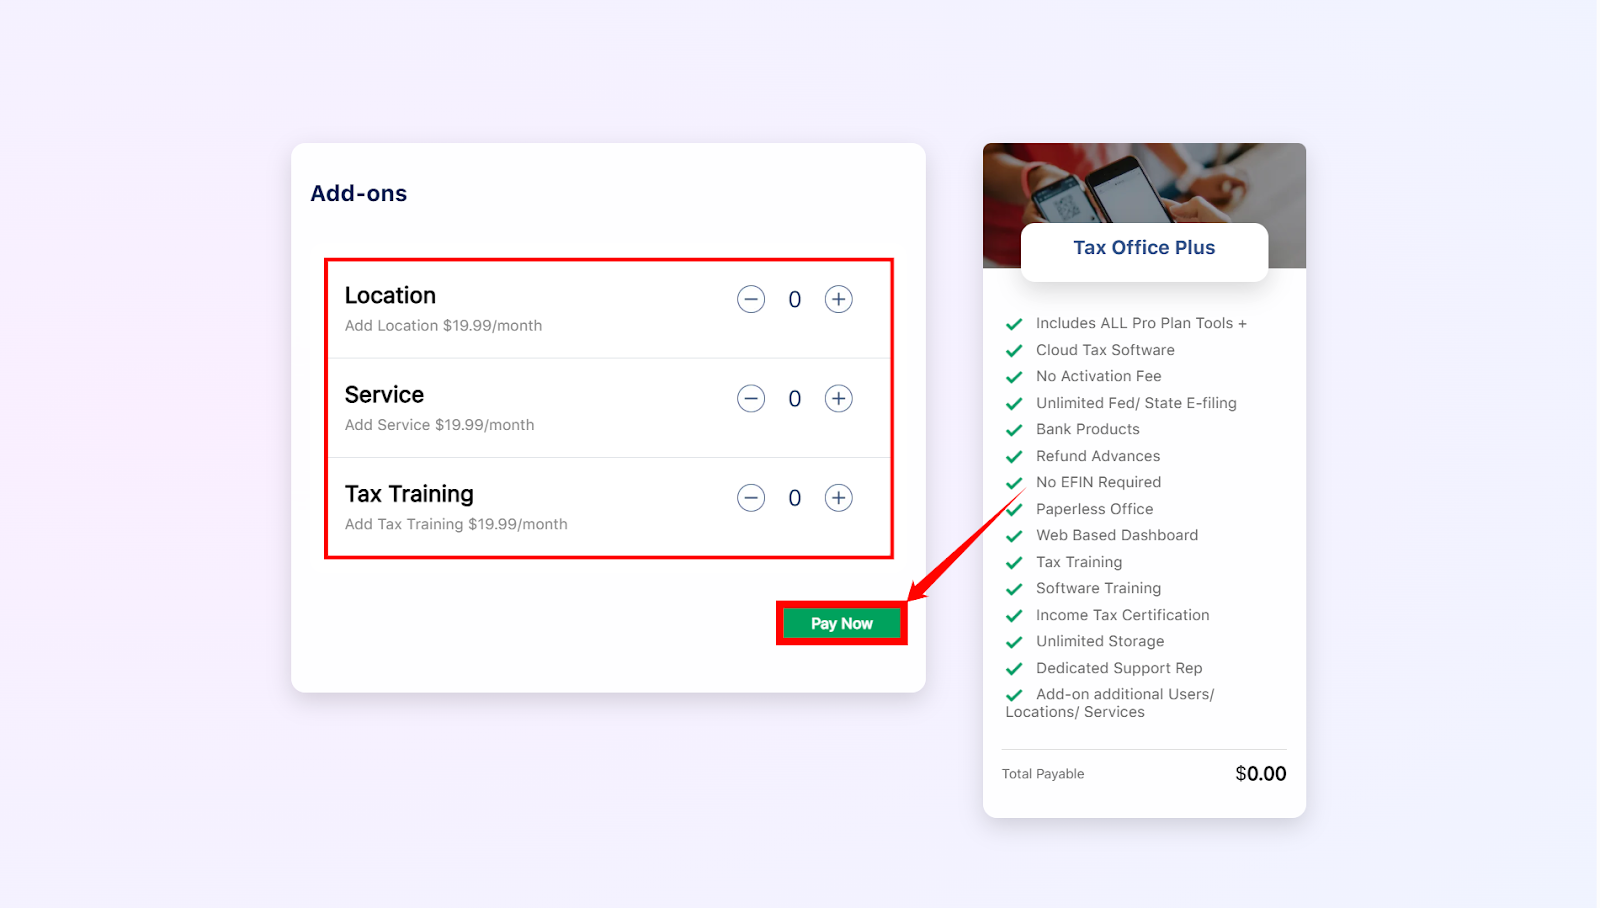
Step 2: A new screen will open. Adjust the number of specific add-ons by clicking on the “+” or “–” signs that you want to add, then click on the “Pay Now” button.
Add Employees
Adding employees builds a shared workspace where each team member can manage their tasks, schedules, and sessions. It shares tasks, keeps track of who’s available, and avoids doing the same work twice. This setup structures your operations as the team grows.
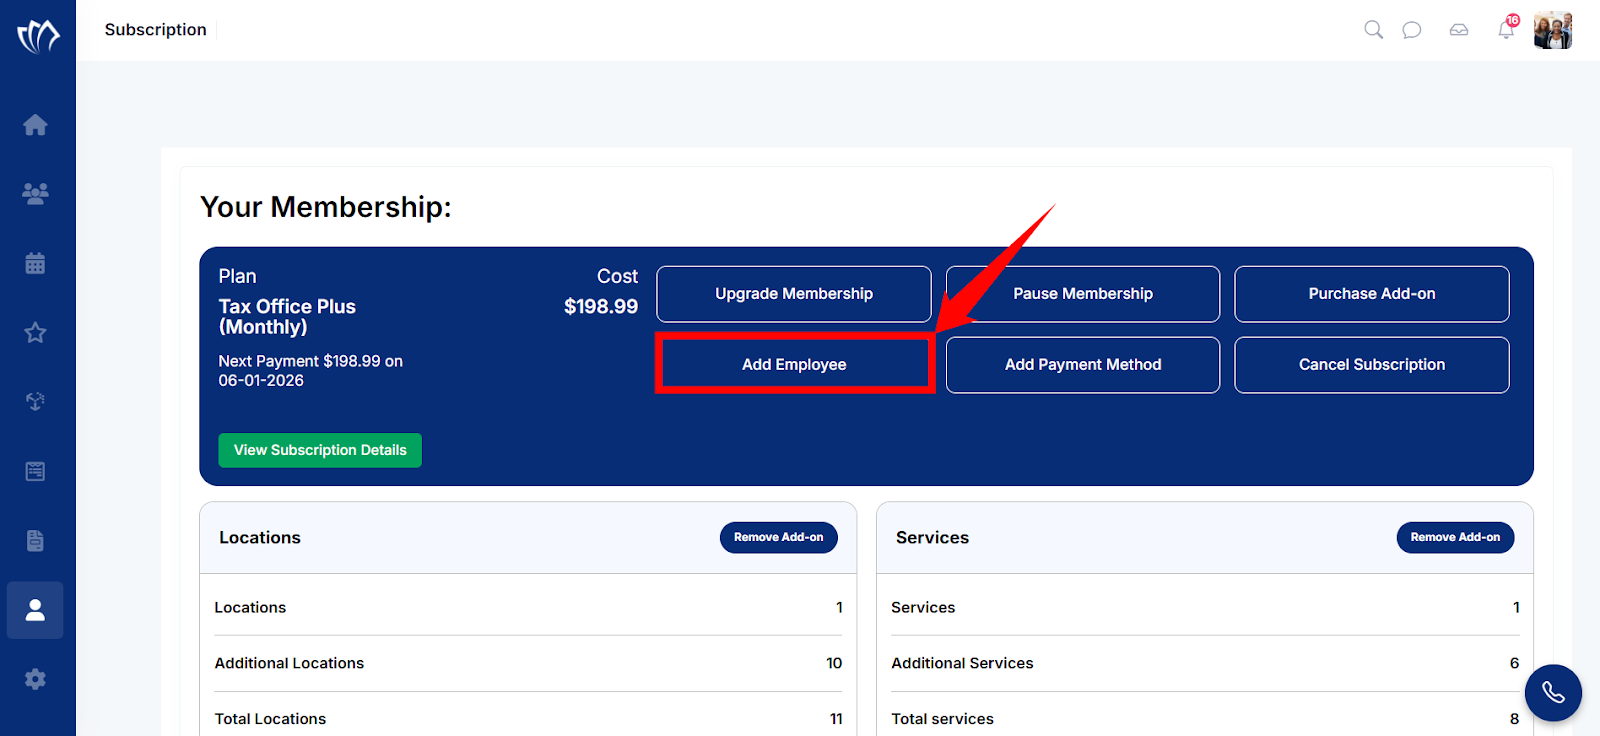
Step 1: Click on the “Add Employees” button in the “Your Membership” modal.
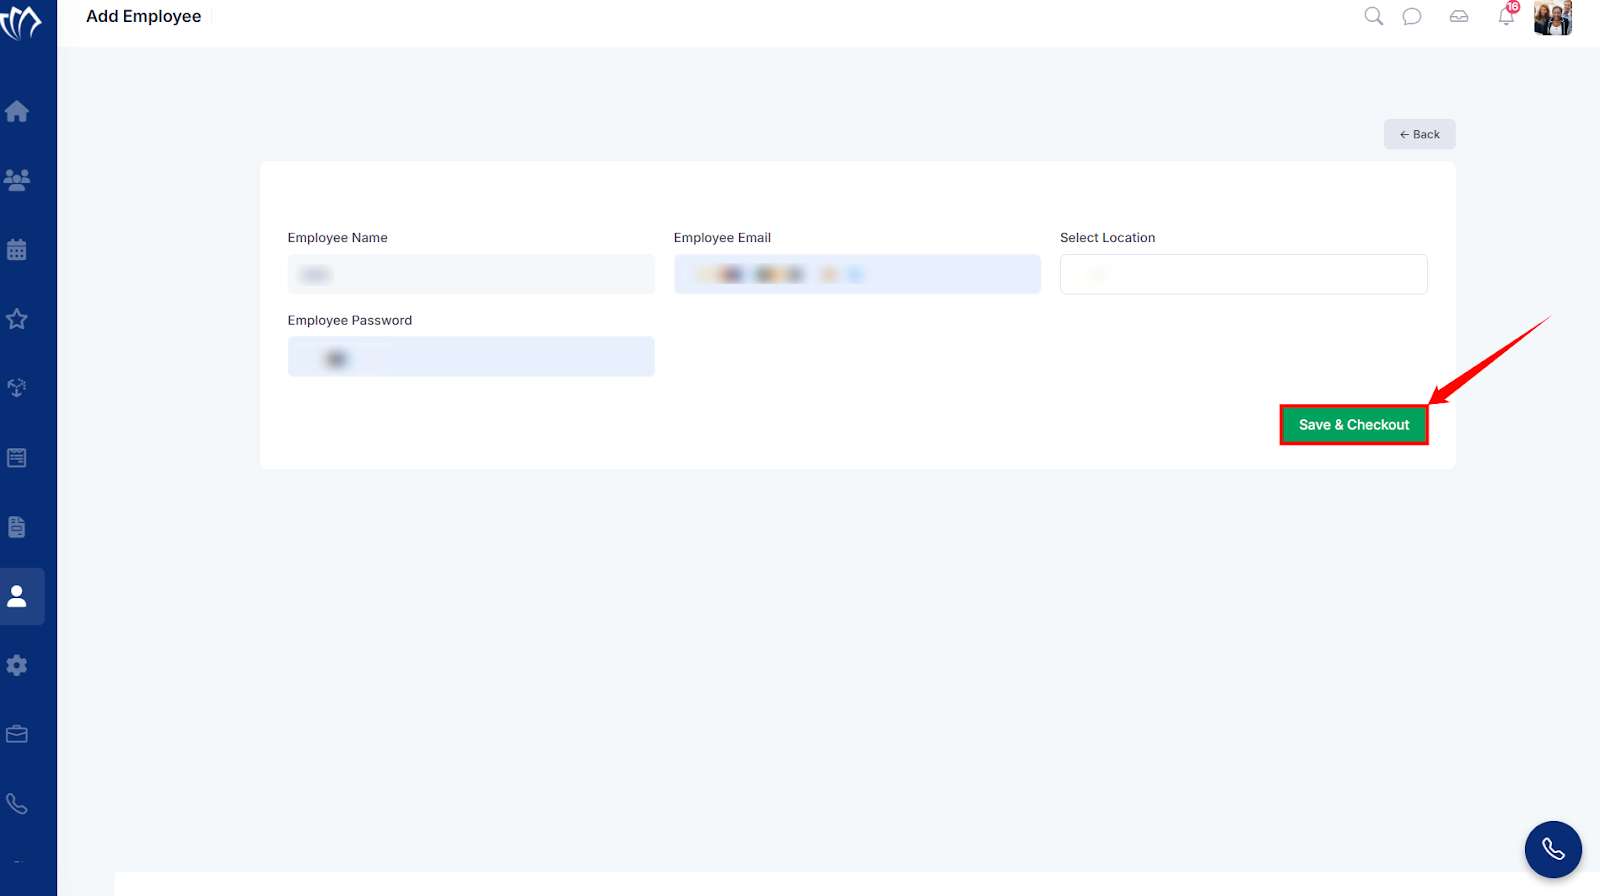
Step 2: A new screen will open. Fill in all the necessary fields, then click on the “Save & Checkout” button.
Add A Payment Method
Adding a payment method keeps your subscription, add-ons, and other services running without interruptions. It maintains uninterrupted access to platform features and avoids failed transactions or account restrictions. Updating your payment details also makes future upgrades or renewals hassle-free.
Step 1: Click on the “Add A Payment Method” button in the “Your Membership:” modal.
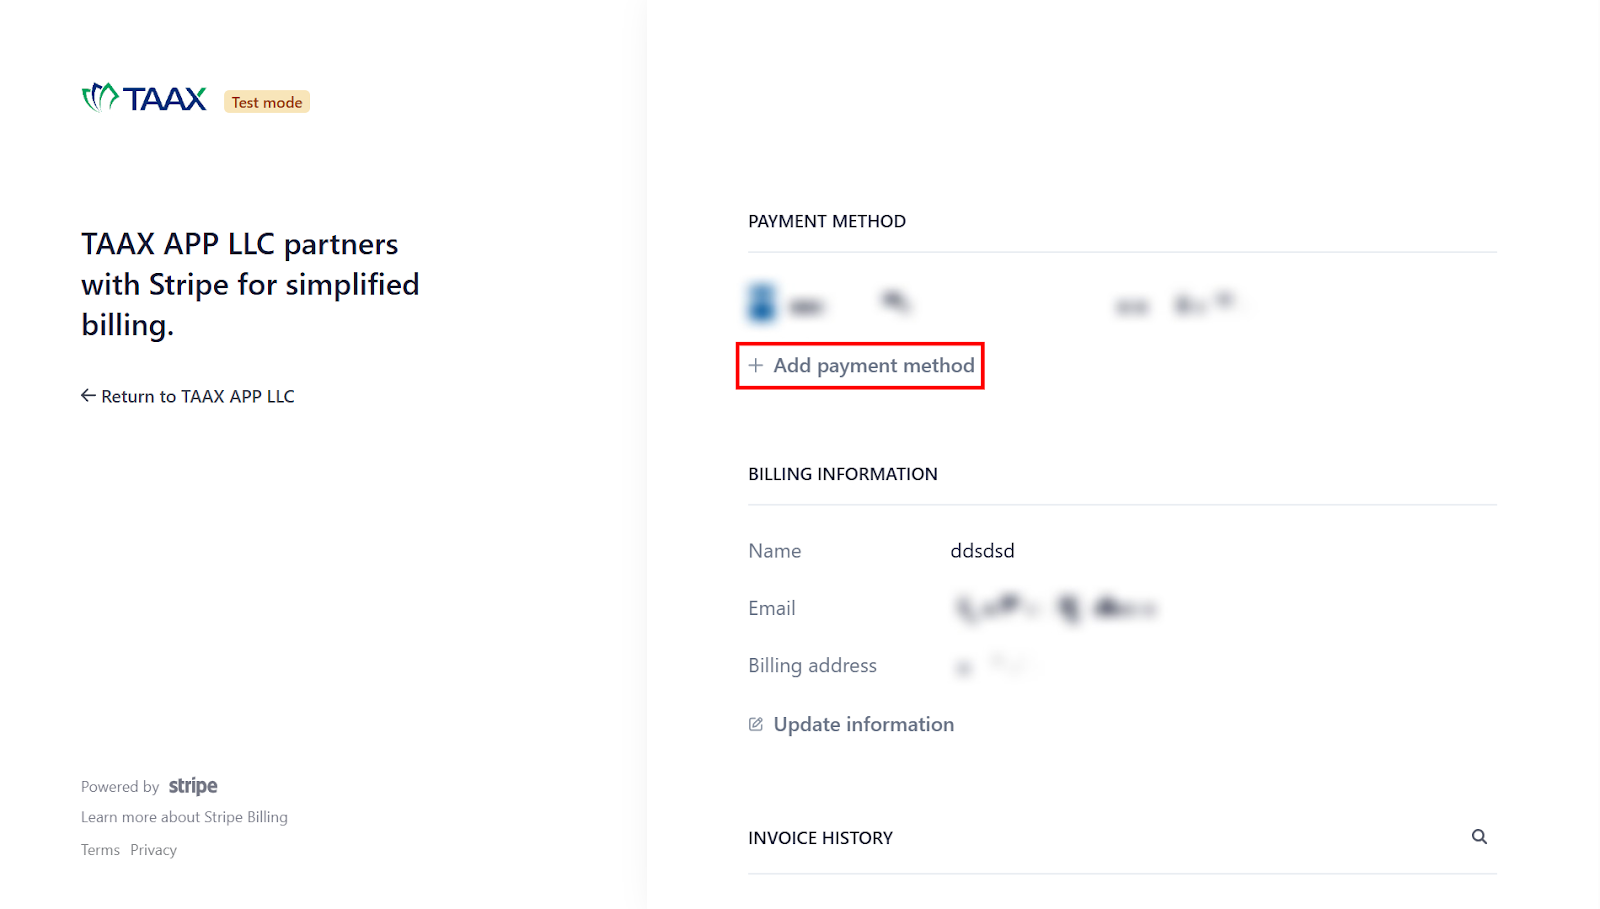
Step 2: A new screen will open with previous payment methods, if added earlier. Click on the “+ Add Payment Method” button to start adding a payment method.
Step 3: A new screen will open with 2 payment options: Card and Cash App Pay.
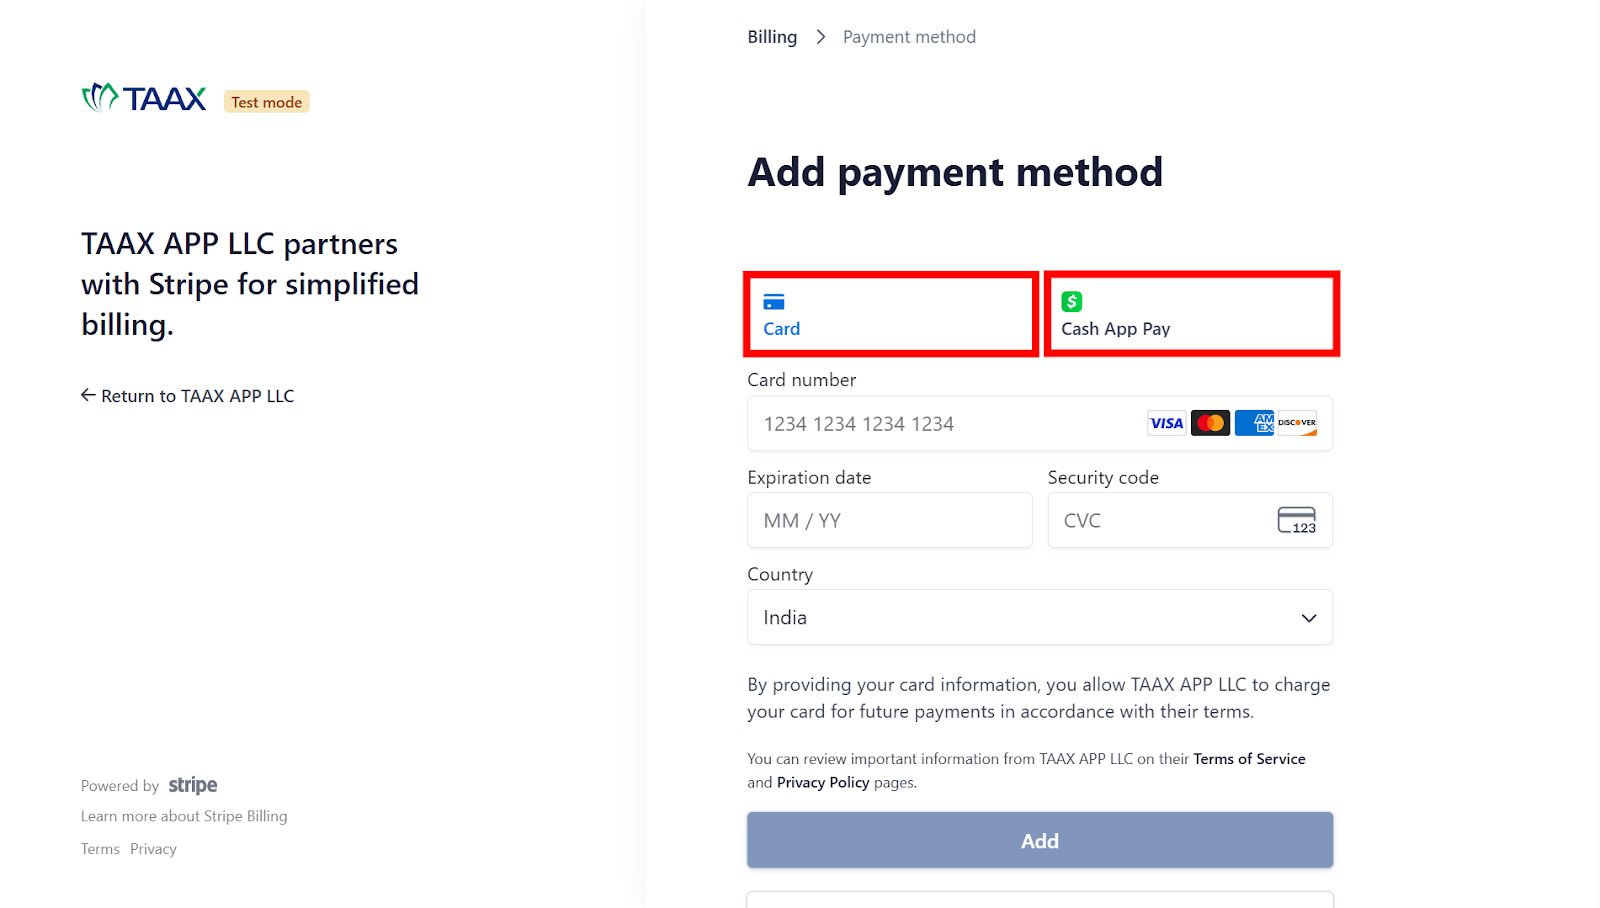
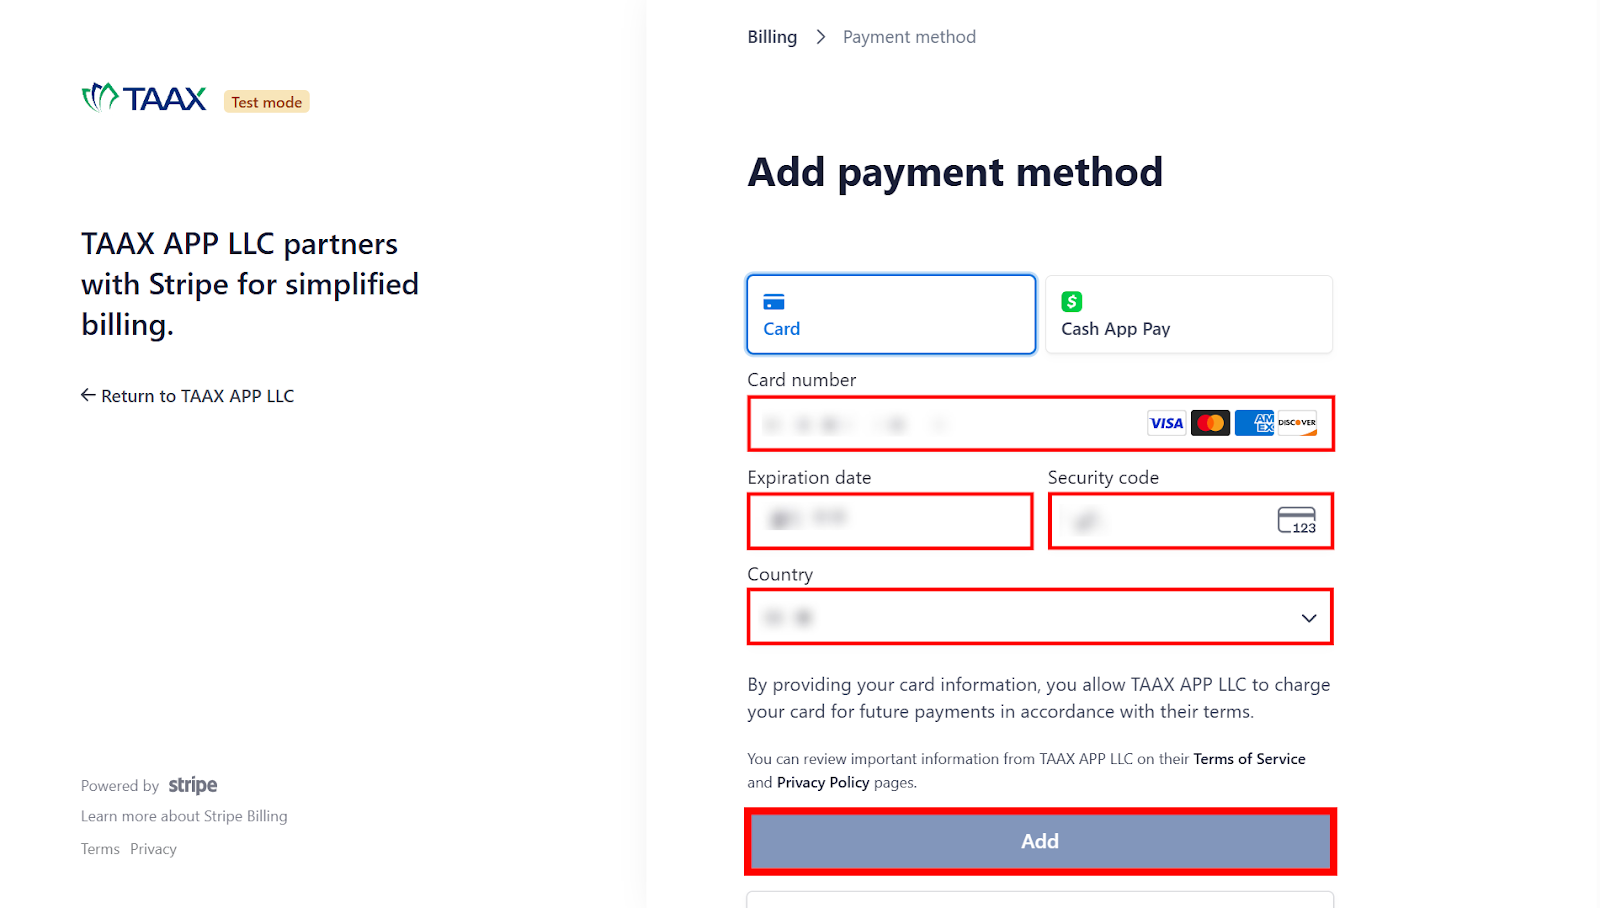
Step 4: If you choose the card as a payment method, click on that option, fill in all the necessary fields, then click on the “Add” button.
OR
Step 4: If you choose “Cash App Pay” as a payment method, click on that option, click on the “Add” option, a QR will open, then scan it with the “Cash App Pay” app in your smartphone.
Cancel Your Subscription
Canceling your subscription helps when you’re not using the platform or switching to another tool. It stops future billing and closes access to features tied to your subscription. This step ensures you only pay for what you use and prevents unnecessary charges.
Step 1: Click on the “Cancel Your Subscription” button in the “Your Membership:” modal.
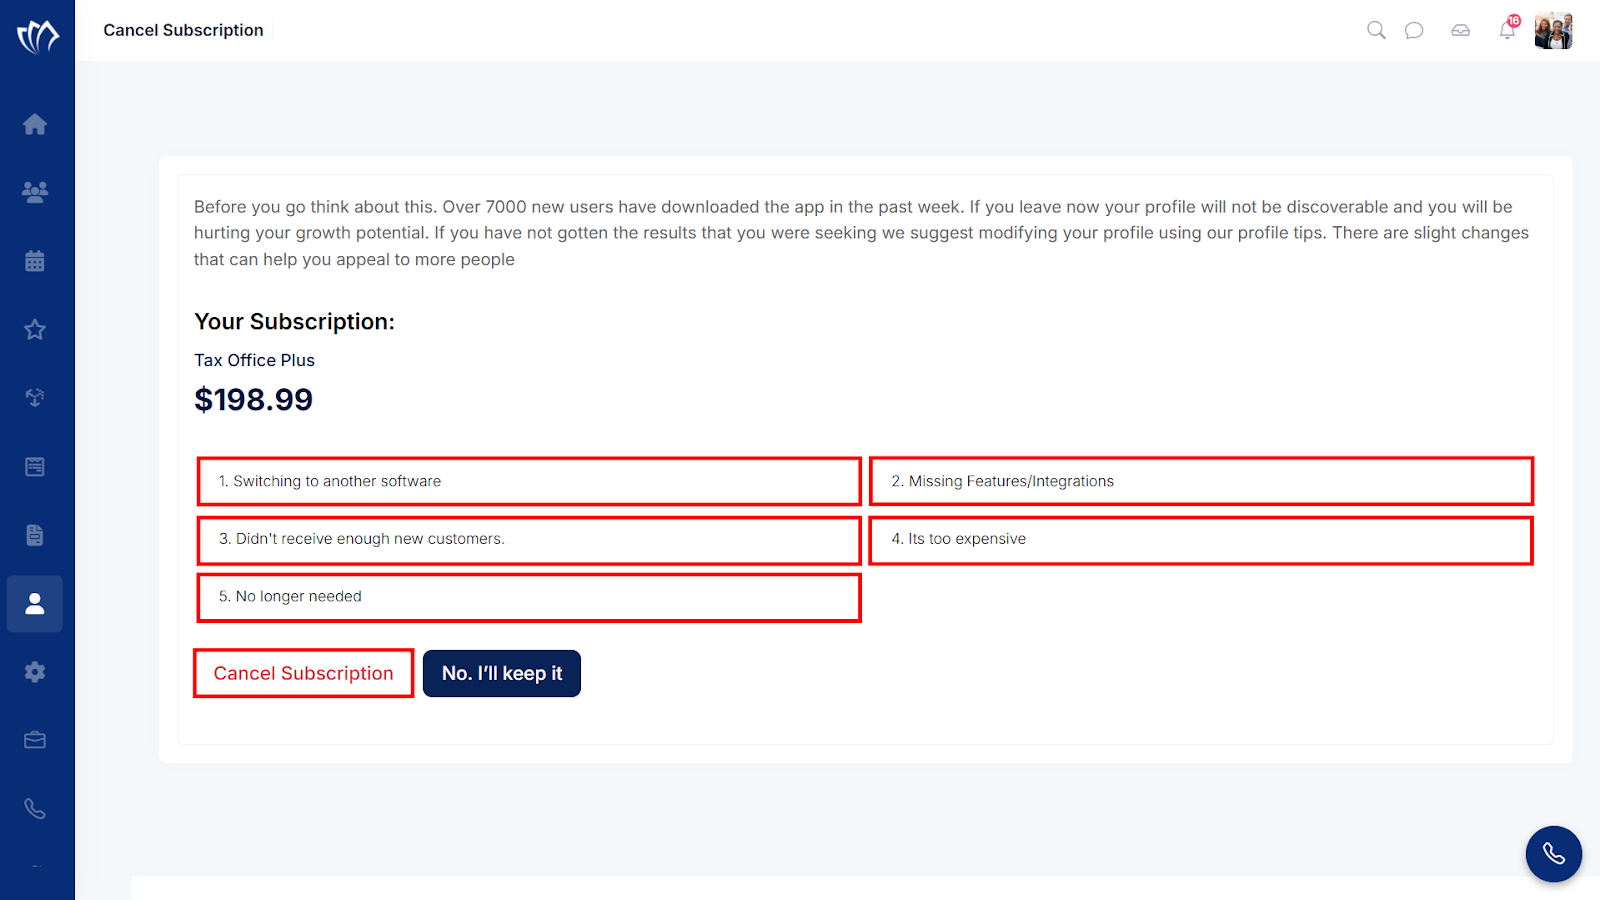
Step 2: A new screen will appear with some reasons why you are canceling your subscription. Select one of the reasons, then click on the “Cancel Subscription” button.
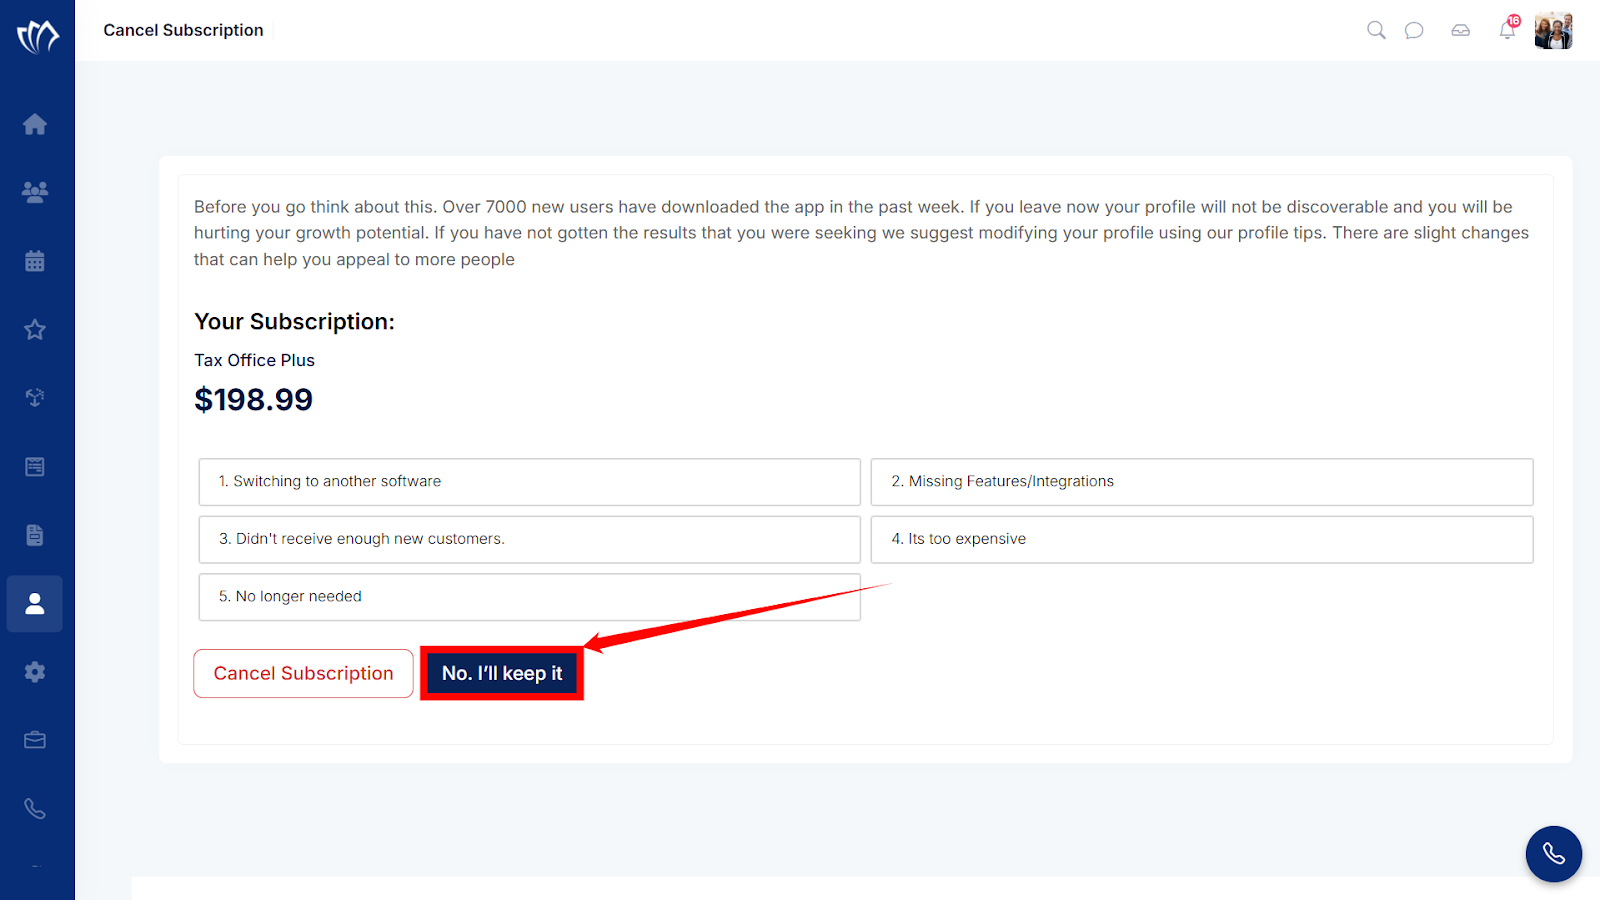
Step 3: If you change you mind and dosen’t want to cancel the subscription, click on the “No. I’ll Keep It” button.
View Subscription Details
Viewing your subscription details shows your plan, billing cycle, and features. It shows you how to use the platform, when it renews, and if you need to make changes. Checking this information can prevent unexpected charges.
Step 1: Click on the “View Subscription Details” button in the “Your Membership:” modal.
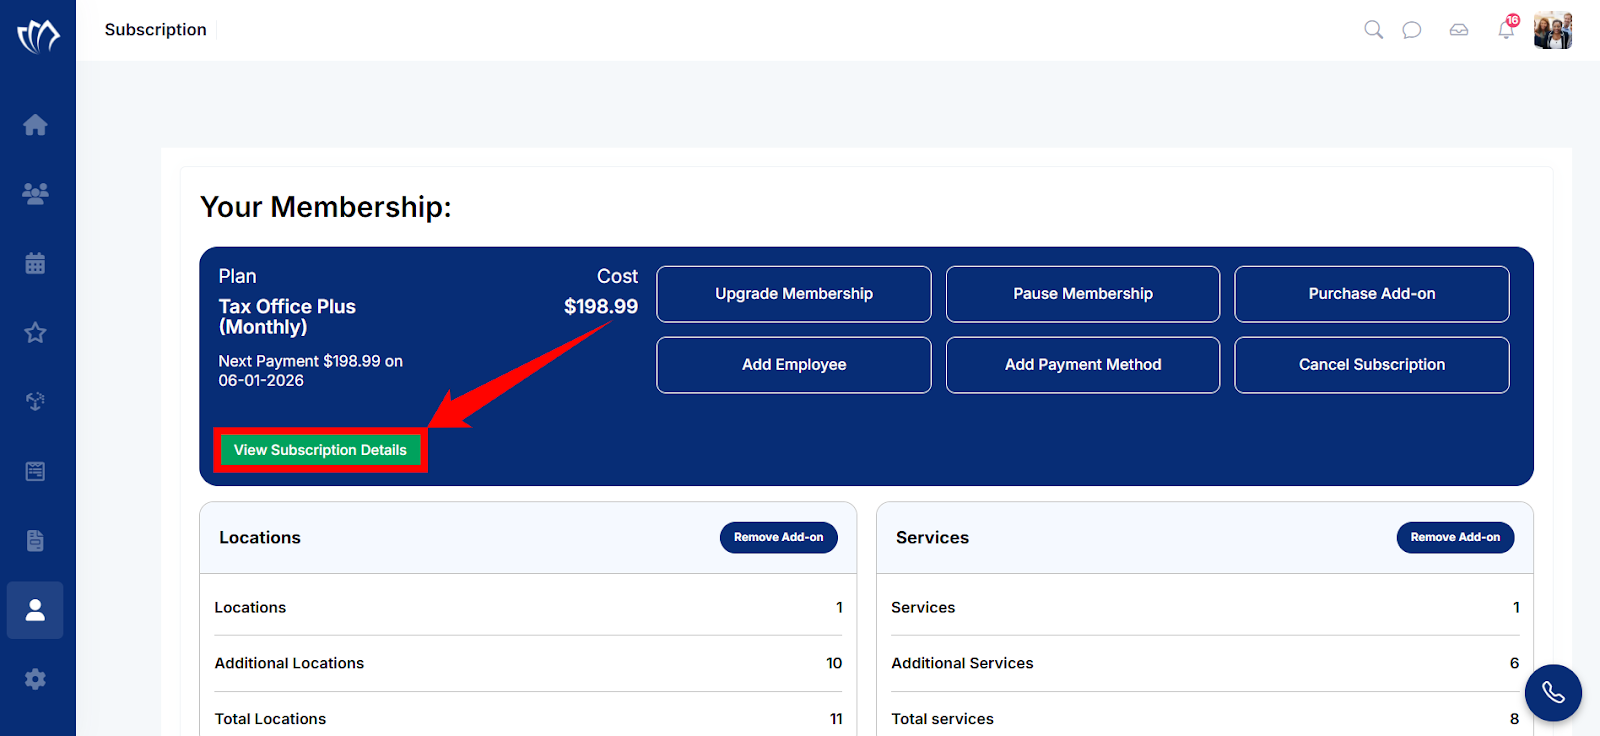
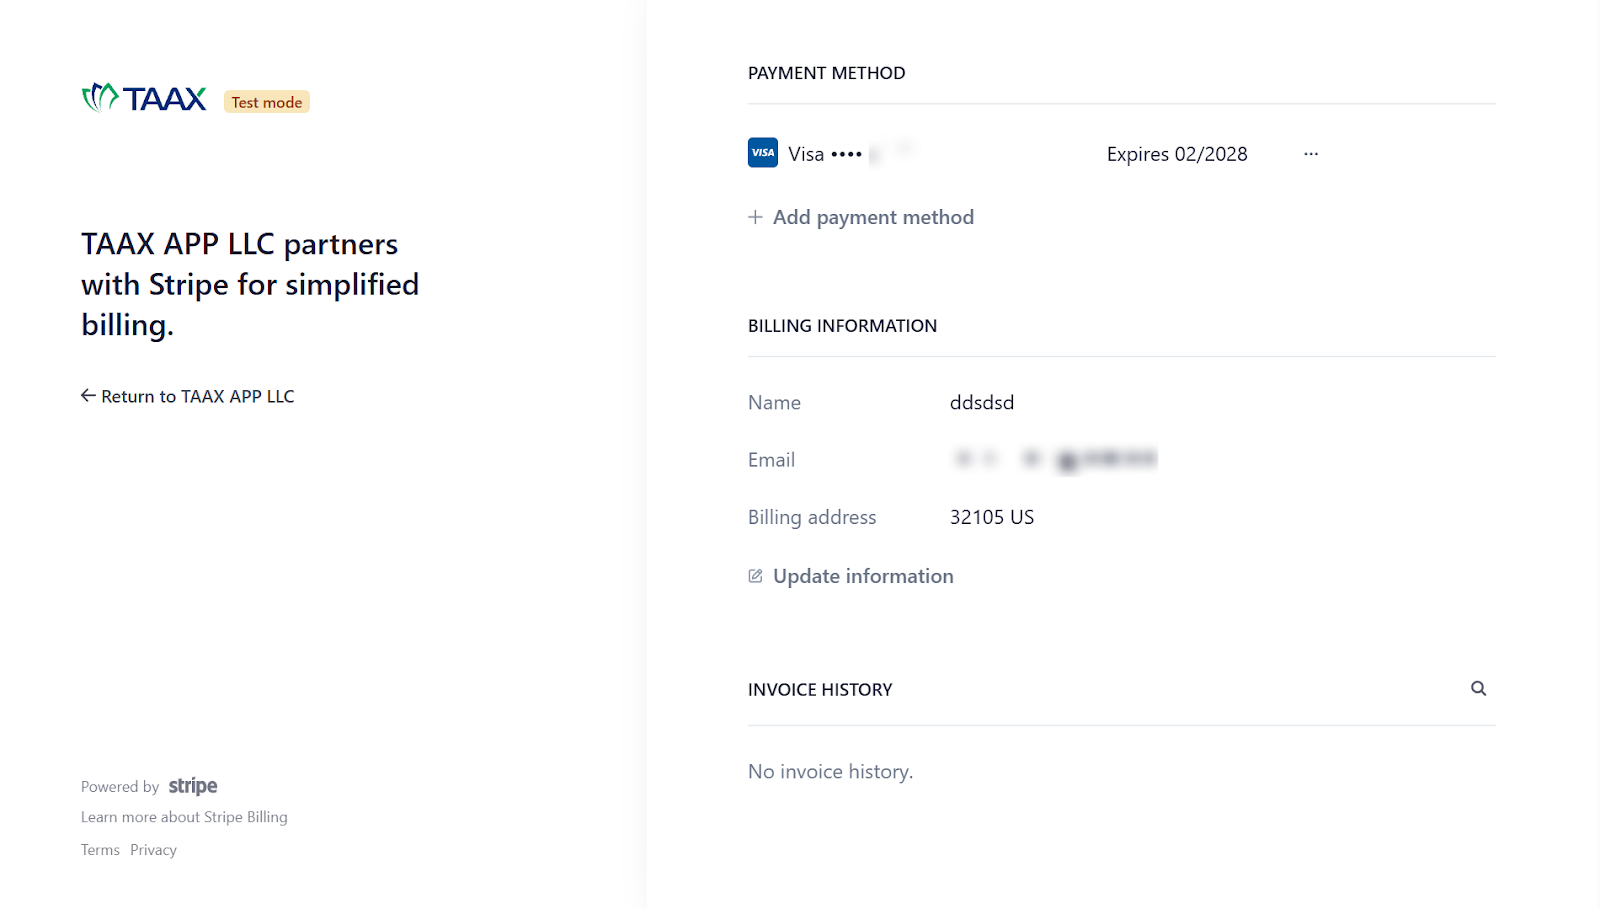
Step 2: A new screen will open with all the details of your subscriptions.
Remove an Add-On
Removing an add-on from your subscription is useful when a feature is no longer needed in your current workflow. It reduces extra costs and aligns your subscription with the tools you actively use. This focuses your setup and avoids paying for unused services.
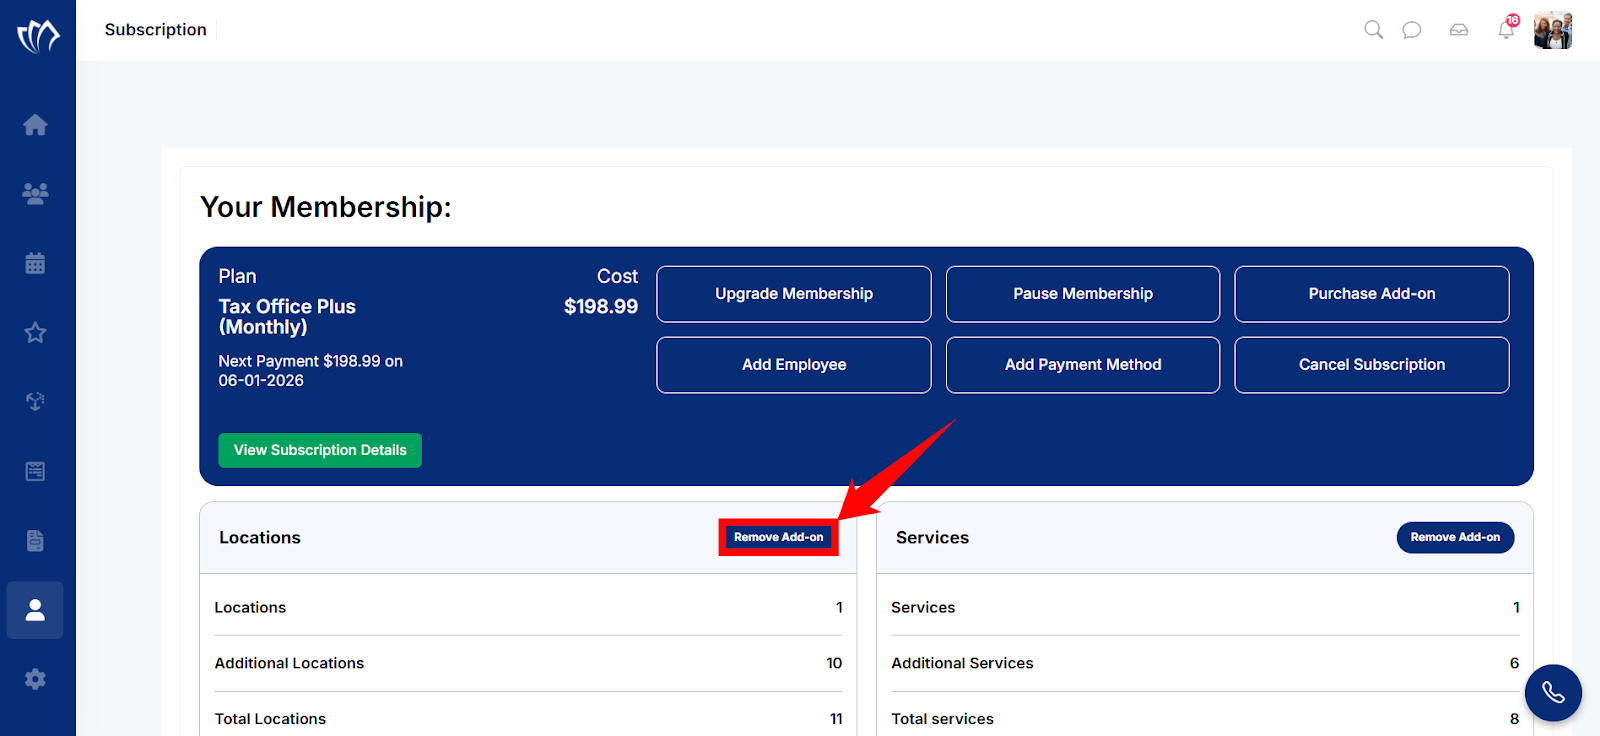
Step 1: Click on the “Remove an Add-On” button under the specific add-on card that you want to remove.
Step 2: A new screen will open with a confirmation modal asking whether you want to remove that particular add-on. Click on the cancel confirmation checkbox to confirm your cancellation, then click on the “Confirm” button.
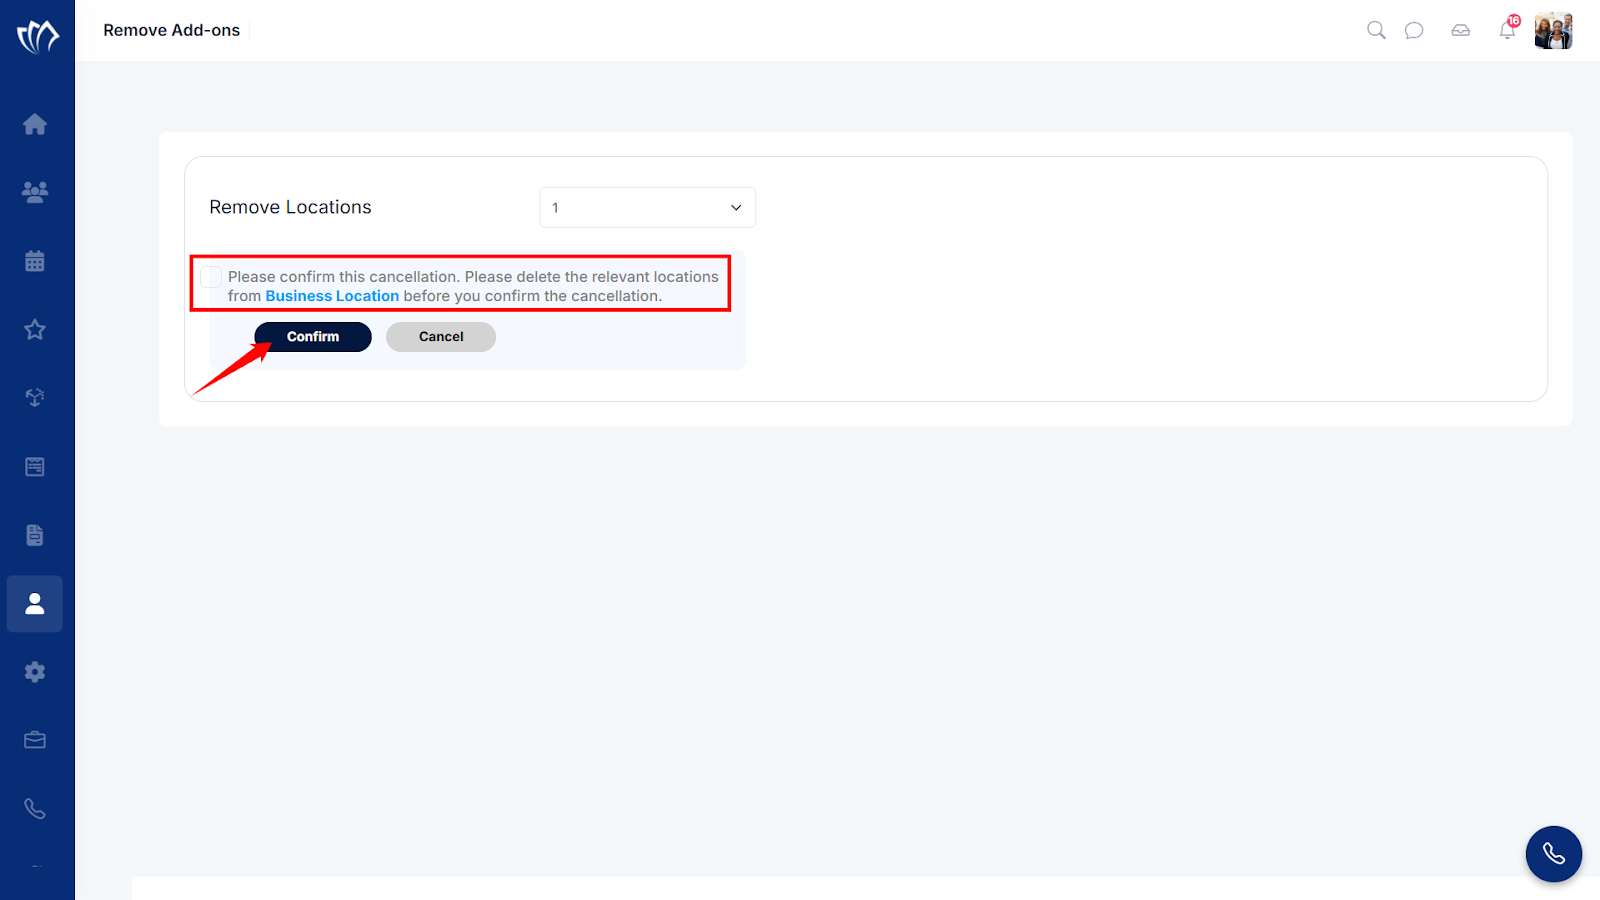
After clicking on the Confirm button, your add-on will be removed from membership.
Subscribe to an Add-On
Subscribing to an add-on in your subscription gives you access to extra tools that support specific tasks, such as advanced document handling. It adjusts the platform to fit your team’s needs without changing systems. This ensures your setup grows with your workflow whenever needed.
Step 1: Click on the “Subscribe to an Add-On” button under the specific add-on card that you want to subscribe to.
Step 2: A new screen will open where you can choose particular Add-ons, then click on the “Pay Now” button.